When your Nintendo Switch refuses to turn on, the culprit is usually something surprisingly simple: a completely flat battery or a minor software hiccup. The most effective first step is to charge it for at least 30-60 minutes using the official Nintendo AC adapter. After that, try a hard reset by holding the power button down for 15-20 seconds. Honestly, this one-two punch solves the problem for most people.
Your First Response Checklist
We’ve all felt that sinking feeling—you press the power button on your Switch, and… nothing. Before you start imagining a hefty repair bill, take a deep breath. Let's walk through the most common, and easily fixable, causes first. More often than not, the issue is with the power getting to the console, not a fatal flaw in it.
Think of these first steps as a bit of console triage. It's all about methodically checking the basics to rule out the simple stuff. By looking at everything from the wall socket to the console itself, you can often pinpoint the problem in just a few minutes.
Here’s a quick summary of what to check first before diving deeper.
Initial Diagnostic Checklist
| Check | What to Look For | Action to Take |
|---|---|---|
| Power Outlet | Is the socket actually live? | Plug in a lamp or phone charger to confirm it's working. |
| AC Adapter & Cable | Frayed wires, bent prongs, or visible damage. | Inspect the entire length of the cable and the power brick. |
| Charger Function | Can the charger power another device? | Use it to charge a compatible phone or tablet. |
| Dock Light | Does the green LED on the dock blink? | The green light should flash once when the dock receives power. |
These simple checks can save you a lot of time and frustration, helping you quickly identify whether the problem lies with your power setup or the console itself.
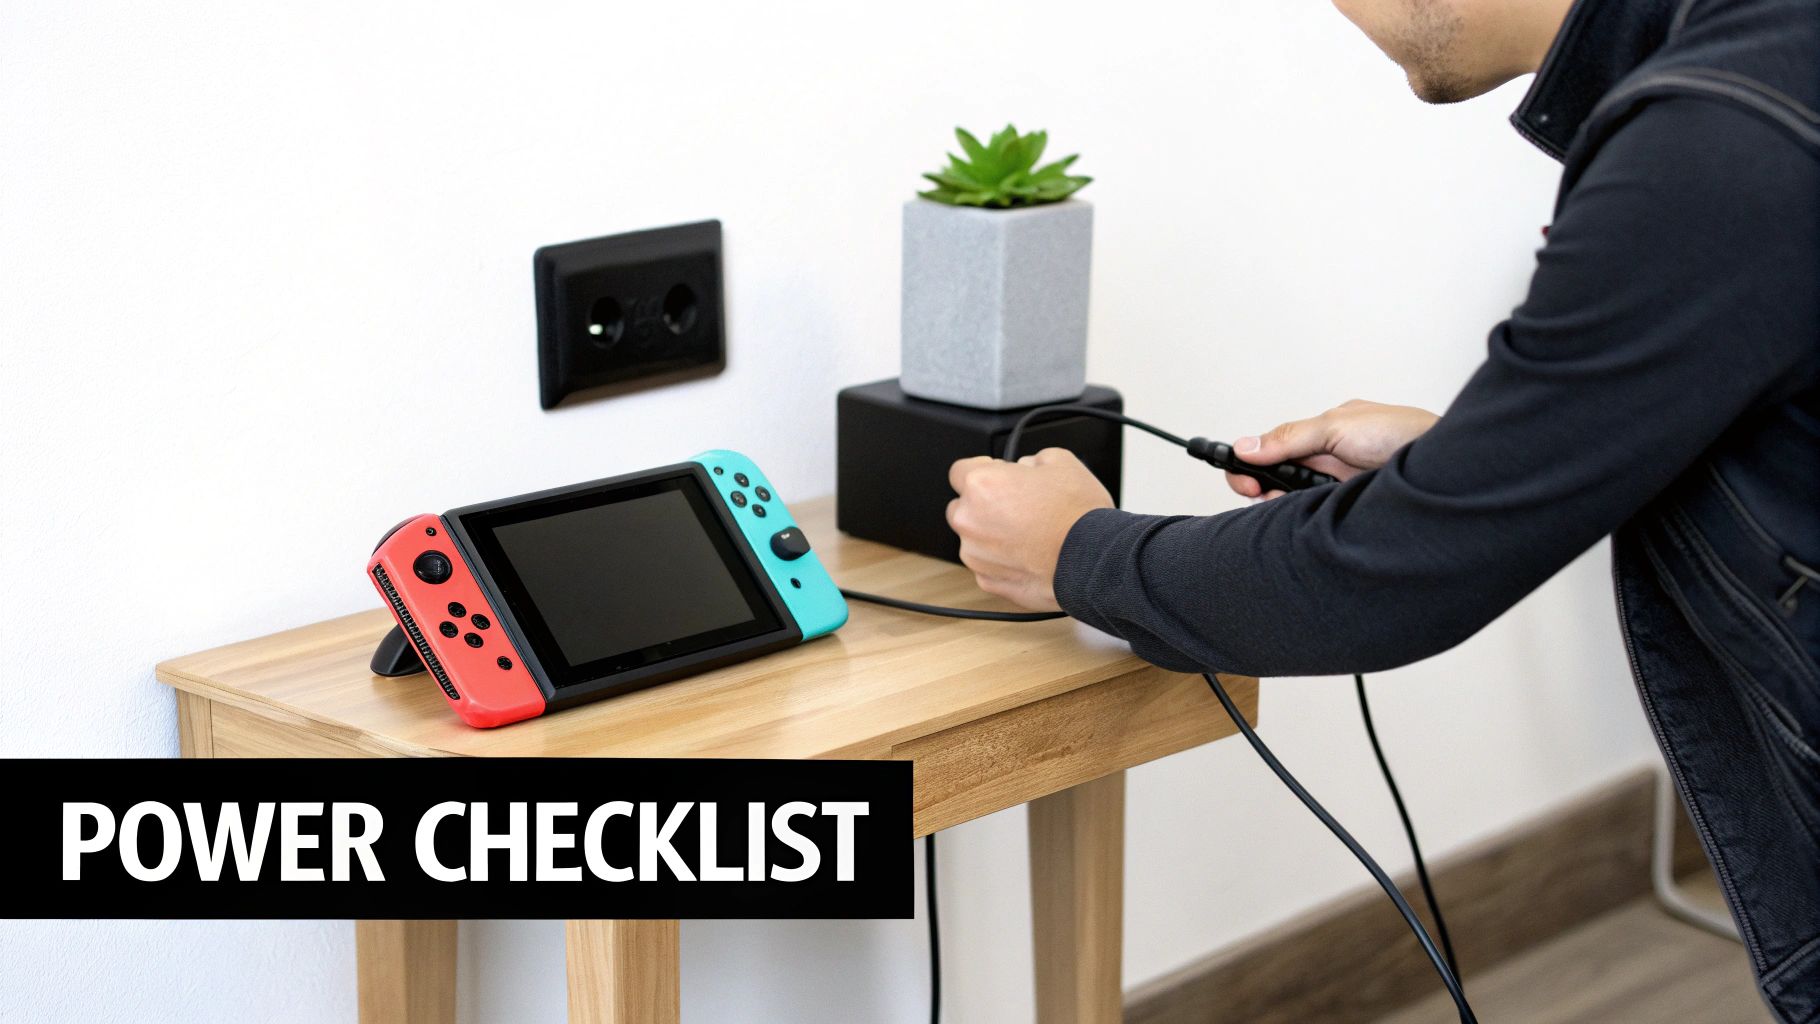
Confirming the Power Source
Alright, let's start at the very beginning: the wall socket. It sounds almost too basic, but you'd be surprised how often a tripped circuit breaker or a faulty power board is the real issue. Plug a lamp into the same outlet to make sure it's actually getting power.
Once that's confirmed, it's time to give your charging gear a close look.
- Inspect the AC Adapter: Look for any obvious signs of wear and tear on the official Nintendo power brick. We see a lot of frayed cables and bent USB-C connectors from being yanked out at an angle.
- Test with Another Device: If you have another USB-C device, like a modern smartphone, try charging it with your Switch adapter. If it works, you know the charger itself is fine.
- Stick to Official Gear: This is a big one. We've seen a lot of issues caused by third-party chargers and docks. Many of them just don't provide the specific power your Switch needs, leading to slow charging, no charging, or even damage to the console's internal charging chip.
Key Takeaway: Always use the official Nintendo-branded AC adapter that came with your console. It’s specifically designed to provide the correct voltage and amperage, ensuring the battery charges safely and efficiently.
This handy flowchart can help you visualise the first few steps, from checking the power supply to attempting that hard reset.
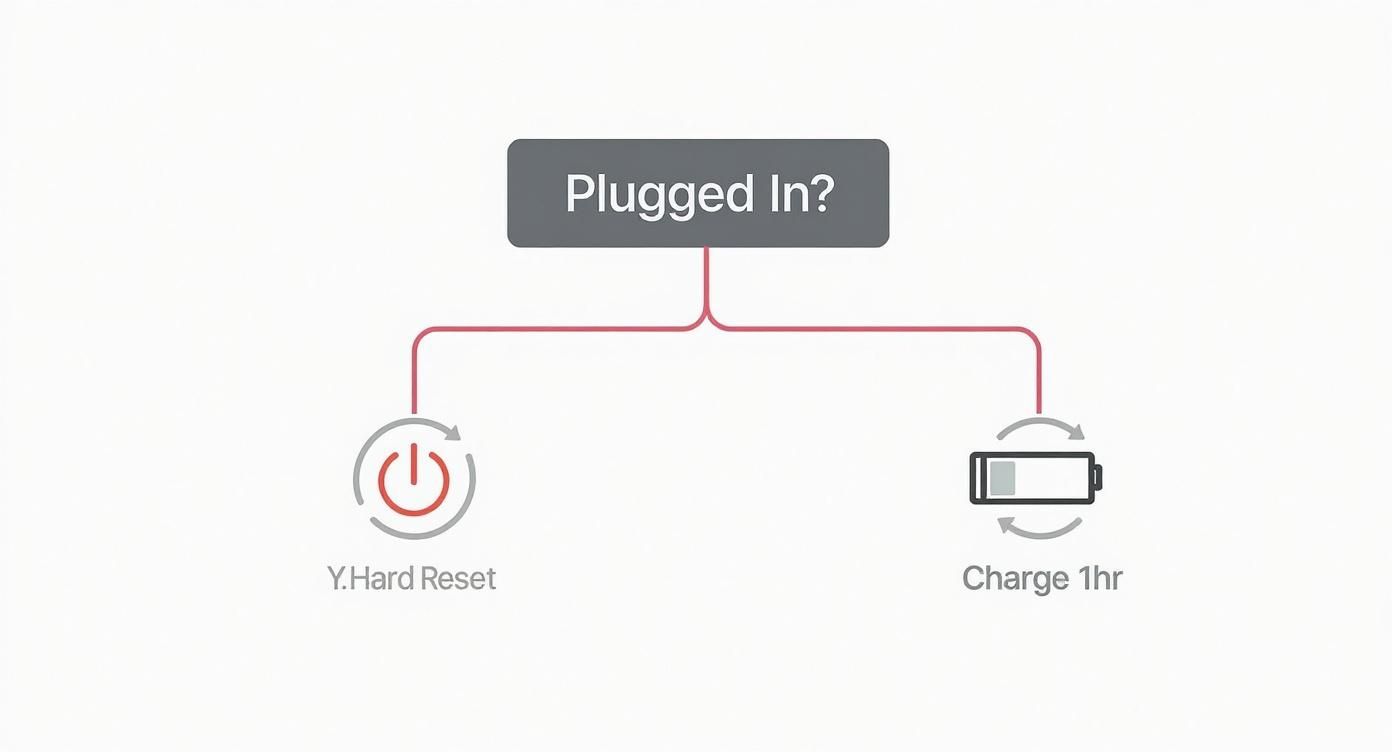
As you can see, the path is pretty straightforward. Your first move depends entirely on whether the console is getting power, which then leads you to either give it more charge time or force a restart.
Checking the Dock Connection
If you normally charge your Switch in its dock, make sure the connection is solid. When you first plug the dock's AC adapter in, its green LED should flash on for a second. That's your confirmation that the dock has power.
When you slide the Switch in, you should feel it connect firmly with the USB-C port at the bottom. If it's sitting crooked or something is blocking the port, it won't make a proper connection and won't charge, even if the dock's light is on.
My Switch Still Won't Turn On – What Next? Trying a Hard Reset
So, you’ve checked the power cable, the dock, and the wall outlet, but your Switch is still giving you the silent treatment with a black screen. Don't start panicking just yet. More often than not, this isn't a sign of catastrophic hardware failure. It's usually just a simple software glitch.
The Switch's operating system can sometimes freeze up so completely that it mimics a dead battery or a serious internal fault. I see this happen all the time, particularly with consoles that have clocked up some serious gaming hours. The best tool in our arsenal for this exact problem is a hard reset (or forced restart). It’s a quick and easy procedure that forces the console to power down completely, clearing out any temporary software bugs causing the freeze.
Best of all, this process is completely safe. It won't touch your precious save data or any of your downloaded games, making it the essential first step before you assume the worst.
The Forced Restart Process
Performing a hard reset is incredibly simple and doesn't require any tools – just a bit of patience.
Here’s exactly what you need to do:
- First, unplug the console from its AC adapter and take it out of the dock.
- Now, find the small, circular power button on the top-left edge of the Switch. Press it down and hold it firmly.
- Keep holding it for at least 15 to 20 seconds. Don't be alarmed that the screen stays black; that's exactly what's supposed to happen. This long press ensures the internal components are fully discharged, forcing a complete shutdown.
- After the 20 seconds are up, let go of the button. Give it a moment, then press the power button again, just like you normally would to wake it up.
If the software glitch was the culprit, you should be greeted by the familiar Nintendo logo within a few seconds as the console boots back to life. For many of the Switches we see, this is the magic fix.
Expert Tip: Didn't work the first time? Don't give up. Some software freezes are particularly stubborn. I always recommend trying the 20-second hold a second time before moving on. Sometimes, that’s all it takes.
When to Use Maintenance Mode
If the hard reset didn't do the trick, there's one more software-level fix you can try: booting into Maintenance Mode. Think of this as a hidden recovery menu for your Switch, perfect for dealing with more persistent issues, like when your nintendo switch won't turn on past the logo screen.
To get into this mode, make sure the console is fully powered off first. Next, press and hold both the Volume Up and Volume Down buttons at the same time. While you’re holding those down, press the power button once. Keep holding the volume buttons, and the Maintenance Mode menu should appear.
In this menu, you’ll see a powerful option: "Initialise Console Without Deleting Save Data." This is your last-ditch software fix. It essentially resets the Switch's core operating system back to its factory settings but – and this is the important part – it leaves all your game saves, screenshots, and user profiles untouched. It’s the final step to rule out software corruption before we have to start thinking about a hardware fault.
Investigating Common Hardware Failures
So, you've tried charging, you’ve done the hard reset a few times, and still nothing. If your Nintendo Switch won’t turn on after those initial steps, it’s time to start thinking about hardware. At this point, we can usually rule out a simple software glitch and focus on the physical components.
Don't worry, this doesn't necessarily mean you need to grab a screwdriver just yet. You can learn a lot just by playing detective—carefully observing your console's condition and how it responds (or doesn't) when you plug it in. This process will help you figure out if you're dealing with a simple fix or something that needs a deeper dive.
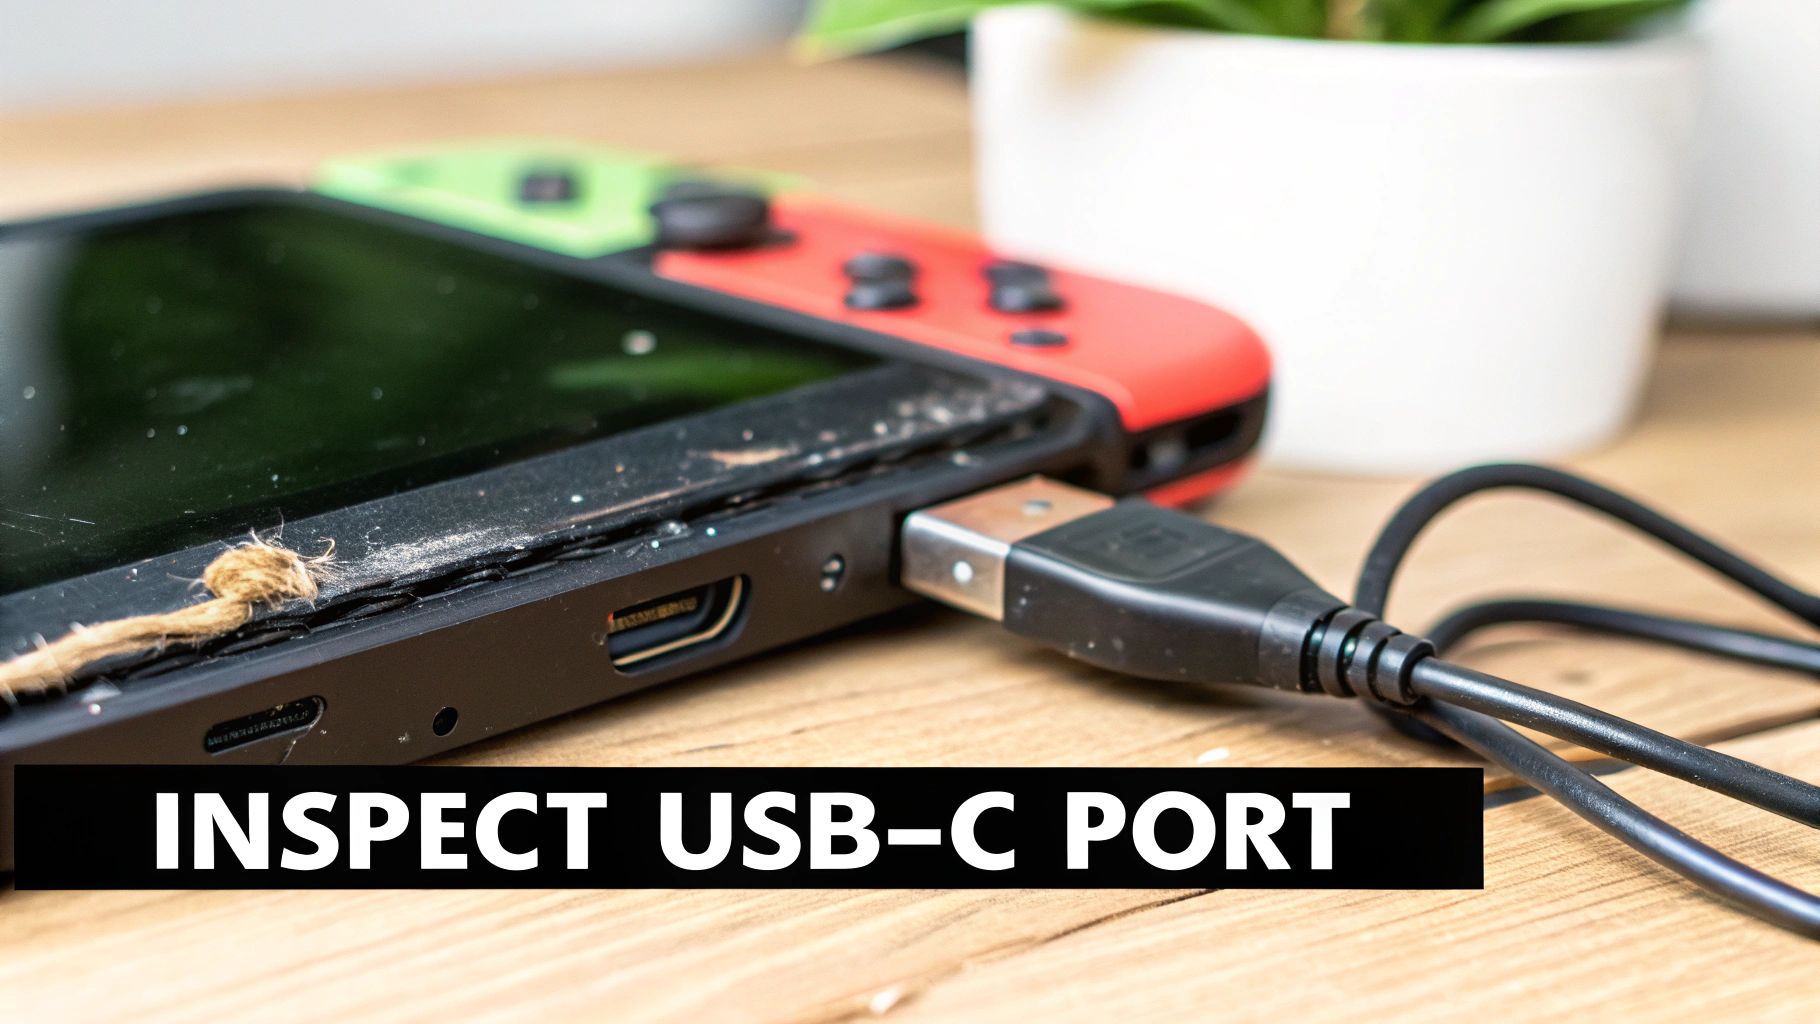
The Usual Suspect: The USB-C Charging Port
The USB-C port is the lifeline for your Switch. It's where all the power goes in, and because it sees constant use, it's one of the most common points of failure we see in our workshop. A bit of wear and tear is normal, but any real damage here can stop your console from charging altogether.
Start with a quick physical inspection.
- The Wiggle Test: Grab the official Nintendo charging cable and plug it in. Does it feel loose? A good, solid connection should have almost no wiggle room. If the plug feels sloppy inside the port, that’s a red flag.
- A Closer Look: Get a torch and shine it right into the port. You’re looking for any pins that look bent, crooked, or broken. This often happens if a cable is jammed in at the wrong angle.
- Check for Blockages: You’d be surprised how often the culprit is just a bit of pocket lint or dust packed tightly inside. This debris physically stops the charger from seating properly, preventing a connection.
If you can see gunk in there, try gently clearing it out with something non-metallic, like a wooden or plastic toothpick. Never use metal tweezers or a paperclip, as you could easily cause a short circuit and fry the electronics.
A Quick Word of Warning: We see a lot of Switches come in with severe power issues after being used with third-party docks. Many of these unofficial docks don't regulate power properly, which can destroy a crucial power management chip (the M92T36) on the motherboard. If your Switch died right after using a non-Nintendo dock, that’s a very likely cause.
Signs of a Failing Battery
Just like the battery in your phone, the Switch’s lithium-ion battery wears out over time. After a few years, it simply can't hold a charge like it used to, and eventually, it can fail completely. When it does, the symptoms can look just like any other power problem.
You might be dealing with a dead battery if you noticed any of these things before it died:
- The console would only work while it was docked, then shut off immediately when you lifted it out.
- In the weeks leading up to the failure, the battery life seemed to drop off a cliff.
- The Switch felt unusually hot while charging or wouldn't last more than a few minutes off the charger.
A battery at the end of its life just doesn't have the juice to boot the system, no matter how long it’s plugged in. This is an especially common problem for the original consoles that were bought back in 2017.
The Reality of DIY Switch Repair in Australia
When your Switch suddenly dies, the urge to jump online, watch a couple of videos, and try fixing it yourself is totally understandable. It looks easy enough on YouTube, right? But for us here in Australia, the reality can be a whole lot messier. Just finding the right tools and genuine parts can be your first big challenge.
And then you have to be honest with yourself about the repair. Sure, some fixes look simple, but the inside of a Switch is packed with tiny, fragile components. One wrong move with a pry tool or a misplaced screw can quickly turn a simple battery swap into a nightmare motherboard repair, costing you way more in the long run.
What Repairs Are Actually DIY-Friendly?
Knowing your limits is key. Some jobs are definitely manageable if you're careful, but others are a fast track to a bricked console without the proper gear and experience.
- Manageable for Beginners: Things like swapping a drifting joystick or even replacing the battery don't usually require any soldering. If you've got patience and a steady hand, these are decent starting points.
- Risky for Amateurs: Even the battery replacement can be tricky. They're often glued in tight, and trying to pry it out can easily lead to puncturing the battery (a fire hazard) or ripping a delicate ribbon cable you didn't see.
- Best Left to Professionals: Anything involving micro-soldering is a definite no-go for DIY. This includes jobs like replacing a faulty USB-C port or a power chip on the main board. One tiny mistake here can permanently kill your Switch.
Honestly, a common story we hear is someone trying a complex repair to save a bit of cash, only to cause way more damage. The cost to fix the original problem is almost always less than fixing a botched DIY job.
Sourcing Parts and The "Right to Repair" Drama
Things have gotten tougher for DIY repairs in Australia over the years. When the Switch first came out in 2017, it was seen as reasonably fixable. But Nintendo's approach, using heaps of glue and not providing official parts or manuals to the public, has made it harder. If you want a deep dive into this, the team at iFixit.com has some great insights.
Because you can't buy official parts, you're left scrolling through online marketplaces for third-party copies, and the quality is all over the place. You might snag a great component, or you might get one that dies in a few weeks. It's a real gamble.
As professionals, we don't take that risk. We have trusted suppliers for high-quality parts. While we handle all sorts of console issues, the skills needed often overlap with those in mobile phone repair, where specialist knowledge is absolutely crucial. Going with a pro means you get a reliable part backed by a warranty, giving you the confidence that your Switch will be back in action for a long time.
Finding Professional Repair Services in Australia
So, you’ve tried all the DIY tricks in the book, and your Switch is still stubbornly playing dead. At this point, it’s time to call in the professionals. When your console is on the fritz in Australia, you’ve basically got two choices: send it off to Nintendo Australia or find a good independent repair shop.
Each path has its own perks and pitfalls. The best one for you really depends on your budget, how quickly you want your console back, and what’s actually wrong with it.

Official Nintendo Repairs vs Third-Party Specialists
Going through Nintendo's official service centre is a no-brainer if your Switch is still under warranty—it’ll almost certainly be free. You're also guaranteed they'll use genuine, factory-spec parts for the job. But if your warranty has expired, be prepared for potentially steep costs and a long wait. Because they have a centralised system, the turnaround can take a while.
This is where independent repair shops really shine. They're often a lot faster, sometimes turning around common fixes in just a day or two. Price-wise, they're usually more competitive, especially for straightforward jobs like swapping out a dead battery or fixing a busted charging port.
Better yet, a skilled independent technician can often handle complex motherboard-level repairs, like replacing a tiny power chip. That’s a delicate soldering job that Nintendo might not even attempt; they’d probably just offer you a full (and expensive) replacement unit instead.
Understanding Common Repair Costs
When your Nintendo Switch won't turn on, the repair cost hinges entirely on what’s causing the problem. To give you a rough idea of what you might be looking at for an out-of-warranty fix, here are some typical price ranges.
- Battery Replacement: You're usually looking at somewhere between $90 and $150. This is a common fix for older consoles whose batteries just can't hold a charge anymore.
- USB-C Charging Port Repair: This one typically falls in the $120 to $180 range. It’s a delicate micro-soldering job needed when the port is wobbly, bent, or completely unresponsive.
- Motherboard Fault (e.g., Power IC Chip): This is the most complex of the bunch. Costs can start around $150 and climb past $250, depending on which chip has failed and the work involved.
These are just estimates, of course, but they give you a solid benchmark to help decide if a repair makes more sense than buying a new console.
A big challenge here in Australia is that getting quality replacement parts for a DIY fix can be a real headache. This often pushes people towards professional services. The official route can mean being without your console for weeks, a frustrating reality you'll find echoed in forums by Aussie gamers sharing their own repair sagas.
Choosing a professional you trust is what matters most. At CTF Mobile Phones & Computer Repairs, we believe in clear, upfront diagnostics and have the expertise to handle a huge range of console issues. If you’re in Perth and need a hand, our guide on finding gaming console repair near me will get you sorted with fast, reliable service.
Answering Your Nintendo Switch Power Questions
When your Switch suddenly refuses to turn on, it's easy to jump to the worst conclusion. Is it a goner? What went wrong? We get these questions all the time, so let's walk through some of the most common concerns we hear from Switch owners.
Frantically troubleshooting a dead console can feel a lot like trying to figure out why your phone is charging slowly. It’s frustrating, for sure, but the root cause is usually something logical we can track down.
Can Leaving My Switch Dead for Months Break It?
Unfortunately, yes, this can cause serious problems. The Switch, like most modern electronics, uses a lithium-ion battery. If you let that battery drain to zero and leave it that way for a long time, it can fall into what's known as a "deep discharge" state.
Basically, the voltage drops so low that the battery's built-in safety features kick in and prevent it from ever charging again. It's a permanent failure. The best way to avoid this is to store your Switch with at least a 50% charge and give it a top-up every few months, even if you're not playing it.
Why Does My Switch Only Work When Docked?
This is a dead giveaway that the battery is on its last legs. When your Switch is sitting in the dock, it's pulling power straight from the wall adapter, completely bypassing the battery. But the second you undock it, it needs that internal battery to take over—and if the battery can't hold a charge anymore, the console will instantly die.
Using it exclusively in the dock might feel like a clever workaround, but it's not a real solution. The only way to get your Switch back to being the portable console it was meant to be is with a battery replacement.
Can a Cheap Charger or Dock Damage My Switch?
One hundred percent. We see this happen far too often. Many third-party chargers and docks, especially the super cheap ones, don't adhere to the correct USB-C Power Delivery standards that the Switch requires.
Using the wrong one can send an improper voltage spike right into the console's sensitive internal components, frying the power management chip on the motherboard (we often see the M92T36 IC fail).
This is what people mean when they say they've "bricked" their console. To avoid a very expensive repair, our advice is simple: always use the official Nintendo charger and dock. Saving a few dollars on an accessory just isn't worth the risk.
Will a Repair Delete My Saved Game Data?
That all depends on what needs fixing. For most standard hardware swaps, your precious save data is completely safe.
- Data is Safe: If we're just replacing the battery, screen, or cooling fan, your data isn't touched. Those components are separate from the motherboard where your game saves live.
- Data is at Risk: The problem is when the fault is on the motherboard itself—like a fried power chip. If the whole board needs to be replaced, then unfortunately, any save data stored on the console will be lost.
This is exactly why having a Nintendo Switch Online membership with cloud saves is so important. Any good technician will talk you through the potential risks to your data before they even pick up a screwdriver.
When you need a fast, reliable, and expert diagnosis for your gaming console, CTF Mobile Phones & Computer Repairs in Perth is here to help. Visit our website for a free quote and get your Switch back in the game.