
Ever had that sinking feeling when your computer suddenly starts acting… weird? Maybe it's sluggish, programs crash for no reason, or you're seeing a flood of pop-up ads. These aren't just random glitches; they're often the first tell-tale signs of a virus or malware infection.
Learning how to remove a virus from your computer is crucial, but it all starts with recognising the problem in the first place.
Is Your Computer Infected? Spotting the Warning Signs

Before you can start cleaning up, you need to play detective. Viruses aren't always loud and obvious with a big, flashing warning on your screen. In fact, the most dangerous ones are designed to be stealthy, quietly working in the background.
I've seen countless cases where malware was secretly using a computer's power to mine cryptocurrency or siphoning off personal data without the owner having a clue. The only hints were subtle changes in the machine's day-to-day behaviour.
Common Symptoms of a Malware Infection
The best way to diagnose a potential infection is by listening to your computer. If it's acting out of character, it's probably trying to tell you something is wrong.
Keep an eye out for these classic red flags:
- Sudden Performance Drop: Your once-zippy machine now feels like it's wading through treacle. Applications take ages to open, and booting up is a chore. This often means malware is hogging your system resources.
- Frequent Crashes or Errors: Seeing the dreaded "Blue Screen of Death" on Windows? Or are apps on your Mac freezing and quitting unexpectedly? Viruses can destabilise your whole system.
- Unexplained Network Activity: If your internet is painfully slow but you're not downloading anything, malware could be using your connection to send data or spread itself to other devices on your network.
- Browser Redirects and Pop-ups: Has your browser homepage mysteriously changed? Are you getting bombarded with ads, even on sites that are usually clean? That’s a textbook sign of adware.
The threat is very real. Recent Australian reports tracked over 5,000 malware attacks in a single month—that's about 179 attacks every day. This constant barrage shows why it's so important to be vigilant. You can learn more about the latest security findings to understand the scale of the problem.
Key Takeaway: A computer virus won't always announce itself. Slow performance, bizarre browser behaviour, and constant crashes are your biggest clues that something is wrong and it’s time to act.
Common Virus Symptoms on Windows vs Mac
While many signs of infection are universal, some symptoms are more common on one operating system than the other. Knowing what to look for can help you narrow down the problem faster.
Here's a quick comparison of typical signs you might spot.
| Symptom | Common on Windows | Common on Mac |
|---|---|---|
| Blue Screen of Death (BSOD) | Very common with deep-level infections | Not applicable |
| Unwanted Browser Toolbars | Frequent with adware and PUPs | Less common, but still happens |
| System Settings Changing | Yes, registry edits are a classic sign | Possible, especially with Gatekeeper bypasses |
| Fake Antivirus Pop-ups | A very common scareware tactic | Increasingly common on macOS |
| Kernel Panics (Grey Screen) | Not applicable | Mac's equivalent of a major system crash |
This table is a general guide, of course. Cybercriminals are always adapting their methods, so you could see any of these symptoms on either platform. The key is to investigate anything that feels out of the ordinary for your specific machine.
Right, you think you’ve got a virus. Don't panic. What you do in the next few minutes can make a massive difference, stopping a small problem from turning into a complete disaster.
Think of it like digital first aid. The absolute first thing you need to do is pull the plug on the internet.
Seriously. Unplug that ethernet cable or switch off your Wi-Fi immediately. This is your single most powerful move. Many viruses rely on an internet connection to do their dirty work—phoning home to a command server, downloading even nastier malware, or trying to spread across your network to other devices. Cutting the connection traps it, leaving it stranded on your machine.
Isolate the Infection
By taking your computer offline, you've essentially put the malware into quarantine. It can't send your data out, and it can't infect your phone, your tablet, or your smart TV. This is more important than ever.
We've seen a huge spike in ransomware attacks here in Australia. These aren't just about locking your files anymore; criminals are now stealing your sensitive data first, then demanding a ransom to prevent it from being leaked. Taking your machine offline instantly stops that data theft in its tracks. You can read more about the rise of Australian data breaches on Cyble.com.
A Pro Tip From Experience: Don't just click the Wi-Fi icon and disconnect. I’ve seen malware that can re-enable it. Physically unplug the network cable from the back of your PC or power down your entire router. It's the only way to be 100% sure the connection is severed.
Protect Your Must-Have Files
Okay, with the immediate threat contained, let's think about your data. While the virus is on your system, all your personal files are at risk. The next job is to back up anything you can't bear to lose, but you have to be smart about it. The last thing you want is to copy the virus over to your backup.
Grab a brand new USB stick or an external hard drive you've just formatted. Plug it in, but be very careful—if any 'AutoPlay' window pops up, close it immediately. You want to manually copy only the essentials.
- Stick to your own stuff: Focus purely on documents, photos, videos, and project files that you created.
- Don't touch programs: Avoid backing up any applications, software installers, or system files from your Windows or Program Files folders. Malware loves to hide in these locations.
- Plan to scan it later: Before you even think about moving these files back onto a clean computer, you must scan this backup drive with a reliable antivirus program.
This selective backup is your safety net. If the cleanup process fails and you have to resort to wiping the entire system, at least you know your irreplaceable photos and important work are safe. Now, you’re ready to move on to the next phase: actively hunting down and getting rid of the malware.
Using Safe Mode for Effective Virus Removal
Alright, you’ve pulled the plug on the internet and your precious files are safely backed up. Good. Now it’s time to deal with the infection head-on. The trick to effectively removing a virus is to corner it when it’s most vulnerable, and that means rebooting your computer into Safe Mode.
Think of Safe Mode as a diagnostic state for your computer. It starts up with only the bare essentials—the absolute minimum drivers and files needed to function. This is a huge advantage for us because most malware is designed to launch automatically when your system boots up normally. In Safe Mode, it never gets the chance to load, leaving it exposed and unable to fight back.
This visual guide breaks down the critical first moves you should always make when you suspect an infection.
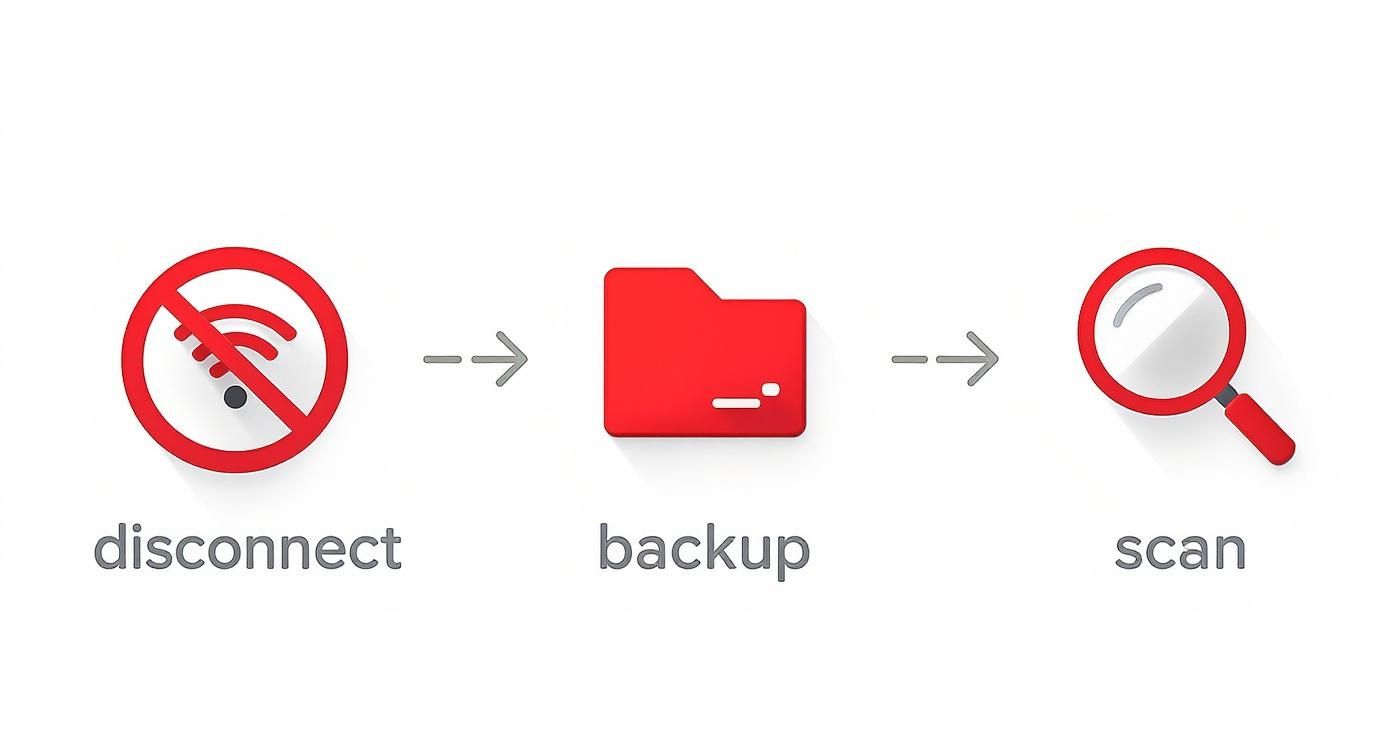
Following this sequence—disconnect, backup, then boot into a secure environment—is the cornerstone of any successful malware cleanup. It ensures the threat is contained and your data is out of harm's way before you start the removal process.
How To Get Your Computer Into Safe Mode
Jumping into Safe Mode is slightly different depending on your operating system, but the core idea is the same across the board. Don't be alarmed if your screen looks a bit strange; a lower resolution and basic icons are perfectly normal in this mode.
-
For Windows 10 & 11: The quickest method is to hold down the Shift key while you click 'Restart' from the Power menu. This brings up the 'Choose an option' screen. From there, you'll need to navigate to Troubleshoot > Advanced options > Startup Settings > Restart. After your PC reboots, you’ll see a list of options. Press F5 to select 'Enable Safe Mode with Networking'.
-
For macOS: The steps depend on whether you have an Apple or Intel chip.
- On an Apple silicon Mac, shut it down completely. Then, press and hold the power button until the startup options appear. Select your startup disk, hold the Shift key, and click 'Continue in Safe Mode'.
- On an Intel-based Mac, restart it and immediately press and hold the Shift key. Keep holding it until the login window appears.
Once you're operating from this secure environment, you're ready to bring out the heavy artillery: a powerful anti-malware scanner.
Running a Deep System Scan
With the malware effectively deactivated, it's time to hunt it down. A quick scan from your everyday antivirus software probably won't cut it here. For a proper deep clean, you need a dedicated, on-demand scanner designed to root out the nasty stuff.
I've seen countless cases where a good on-demand scanner found threats that a user's primary antivirus had completely missed. These tools are specifically built to find and destroy things like spyware, adware, and other potentially unwanted programs (PUPs) that can slip through the cracks.
To give you a better idea of what you’ll be working with, here are some of the tools I often recommend to people in this situation.
Recommended Virus Removal Tools
This table summarises some of the most effective tools I've used over the years. They each have their strengths, but all are excellent for performing a thorough system cleanup.
| Tool Name | Primary Use | Key Feature | Best For |
|---|---|---|---|
| Malwarebytes | On-demand malware removal | Aggressive detection of PUPs and zero-day threats | A first-line, deep-cleaning scan when you suspect an active infection. |
| Bitdefender Free | Real-time & on-demand scanning | Lightweight performance with top-tier detection rates | Users needing a reliable, no-frills scanner that gets the job done. |
| AdwCleaner | Adware & hijacker removal | Targets and removes annoying browser toolbars, adware, and hijackers | Cleaning up a browser that has been taken over by unwanted extensions. |
| HitmanPro | Second-opinion scanner | Uses multiple antivirus engines in the cloud for maximum detection | Finding deeply embedded threats that other single-engine scanners might miss. |
No matter which tool you choose, the goal is the same: find and eliminate every last trace of the infection.
You might need to download your chosen tool on a clean computer and transfer it over with a USB stick. Once it’s installed, open it up and look for the most comprehensive scan option available—this is usually labelled 'Full Scan', 'System Scan', or 'Deep Scan'.
My Two Cents: Kicking off a scan and walking away is tempting, but stay patient. A thorough scan digs into every nook and cranny of your system and can easily take over an hour. It's absolutely critical to let it run to completion without any interruptions to ensure it catches everything.
When the scan is finished, you’ll see a list of all the threats it found. Don't overthink it—just follow the program’s advice to quarantine and delete everything it flags. Quarantining safely isolates the malicious files so they're no longer a threat, and deleting them gets them off your system for good.
After you've cleared the list, give your computer a normal restart and see how it behaves. With any luck, those annoying symptoms will be a thing of the past.
Tackling Stubborn and Deeply Embedded Malware
Sometimes, no matter what you do, a standard scan in Safe Mode just doesn't cut it. You restart your computer, hoping for the best, only to be greeted by the same sluggish performance or those infuriating pop-ups. It’s a classic sign you're dealing with something far more sinister than your average bit of malware—most likely a rootkit or another deeply embedded threat.
These nasty infections are masters of disguise. They burrow right into the core of your operating system, tucking themselves away where normal antivirus scans simply can't reach while Windows or macOS is up and running. To beat them, you have to fight them on neutral ground, before they even get a chance to load.
This is exactly where a bootable rescue scanner comes into play. It’s one of the most powerful tools in your arsenal for a truly deep clean.
What Is a Bootable Rescue Scanner
Think of a bootable rescue scanner as a self-contained operating system on a USB stick, packed with its own set of powerful antivirus tools. Instead of booting your computer from its infected hard drive, you start it directly from this USB.
It’s a clever approach because it means your computer's main operating system—and the virus hiding inside—remains completely dormant. The malware is essentially trapped, unable to run, hide, or defend itself while the scanner meticulously picks it apart.
A bootable rescue scanner is like performing surgery on your system from the outside. It's the most effective way to remove stubborn threats like rootkits because it inspects your files without any interference from the infected OS.
Creating one is surprisingly straightforward. All you need is a clean, uninfected computer and a spare USB drive (usually at least 2GB). Most major antivirus companies, like Bitdefender or Kaspersky, offer free rescue disk tools you can download.
Creating and Using Your Rescue Drive
The process involves downloading a special ISO file from the antivirus provider and then using a simple utility like Rufus to make the USB drive bootable. Once that’s done, you're ready to start the cleanup on the infected machine.
Here’s the general game plan:
- Change the Boot Order: First, plug the rescue USB into the infected computer and restart it. You’ll need to immediately press a key (often F2, F12, or DEL) to enter the BIOS or UEFI settings menu.
- Select the USB Drive: Inside the BIOS menu, navigate to the 'Boot' or 'Boot Order' section. From there, set the USB drive as the first boot device. Don't forget to save your changes before you exit.
- Launch the Scanner: Your computer will now bypass its hard drive and start up from the USB, loading the rescue tool's minimal operating system. It might look a bit basic, but it has everything it needs for the job.
- Update and Scan: The very first thing you should do is connect to the internet (if you can) to update the virus definitions to the latest version. After that, launch a full, deep scan of your computer's internal hard drive.
This scan will be incredibly thorough, so be patient—it can take a significant amount of time. Because it's operating outside of your normal system, it can safely spot and eliminate threats that were previously untouchable.
Once the scan finishes and removes any malware it found, you can remove the USB, reset your BIOS boot order back to the hard drive, and restart your computer into what should now be a clean, healthy environment. This advanced technique is often the final word on how to remove a virus from a computer when all else has failed.
Securing Your System After the Cleanup
Getting rid of a virus is a huge relief, but don’t relax just yet. Your work isn't quite finished. Think of it like dealing with a burglar; just because you’ve kicked them out doesn’t mean they haven't left a window unlocked or made a copy of your keys. This final stage is all about changing the locks and making sure your digital home is more secure than ever.
The first, most critical thing to do is change every single one of your important passwords. You have to assume that any password you typed while the malware was active is now in someone else's hands. This means email, online banking, social media—any account holding sensitive personal or financial information. A keylogger, a sneaky and common type of malware, could have recorded every keystroke.
Fortifying Your Digital Defences
With new passwords in place, it's time to deal with the software the malware probably exploited to get in. Web browsers are a prime target, so my advice is to completely uninstall and then reinstall them. This is the best way to get rid of any malicious code or dodgy settings the virus might have left behind.
After reinstalling your browsers, go through your extensions one by one. If you don't recognise something or haven't used it in ages, get rid of it. Rogue extensions are a classic backdoor for adware and spyware.
Expert Insight: Malware often leaves behind small, seemingly harmless files or registry entries. These remnants can act as a beacon, inviting reinfection down the track. A full software refresh—especially for your browsers—is the surest way to wipe the slate clean and close off any hidden entry points.
Next up is a system-wide health check. Run your operating system's update tool and install every available security patch for Windows or macOS. Outdated software is one of the most common vulnerabilities exploited by viruses, so keeping everything up-to-date is a non-negotiable step for future protection.
Creating a Resilient Recovery Plan
Building a strong defence is more important than ever, especially when you look at the numbers. The Australian Signals Directorate (ASD) now responds to over 1,200 cybersecurity incidents a year. With cybercrime reports also climbing, knowing how to remove a virus and properly recover is an essential skill. You can learn more about how the ASD is tackling persistent threats across Australia.
This is also the perfect time to get a reliable backup routine going. If you lost files or had them corrupted during the infection, you already know how painful that can be. Having a clean, recent copy is your ultimate safety net. If you find yourself in a situation where critical files are gone, it's worth it to secure your files with data recovery Kingsley expertise and see what professional options are available. Regular backups are the best defence against data loss from any future attacks.
Common Questions About Computer Virus Removal
Even after you think you've cleaned up your system, a few nagging questions can stick around. It’s totally normal to feel a bit unsure after dealing with a virus, so let’s tackle some of the most common uncertainties people face.
Getting your head around these points is a big part of feeling confident in the cleanup. It's not just about hitting 'scan'; it's about understanding what comes next.
Can I Remove a Virus Without Antivirus Software?
Look, for some really basic adware, you might get lucky by manually uninstalling a dodgy browser extension or a program you don't recognise. But for pretty much everything else? It's a terrible idea. Think of it like trying to perform surgery on yourself with a kitchen knife.
Modern malware is sneaky. It's built to bury itself deep in your system, creating hidden files and registry entries to ensure it comes back. If you go in there deleting things without being a seasoned expert, you're far more likely to delete a critical system file and stop your computer from booting altogether.
The Safest Bet: Always use a reputable antivirus or anti-malware program. These tools are designed specifically to hunt down and safely remove all the nasty bits and pieces of an infection without wrecking your operating system.
Does a Factory Reset Remove All Viruses?
A full factory reset—where you wipe the hard drive clean and reinstall the operating system—is a powerful weapon. It will absolutely get rid of the vast majority of viruses and malware. For a system that’s heavily infected and acting erratically, this is often the best, albeit most drastic, solution.
However, it's not a 100% silver bullet. A very small number of highly advanced threats, like firmware rootkits, can actually survive a system wipe. These are incredibly rare and usually reserved for high-level, targeted attacks, so it's not something the average person typically encounters. For most of us, a factory reset is the ultimate final resort.
Just remember to back up your important files to a clean, separate drive before you do anything. If you've already lost files and need to get them back, it's worth looking into reliable data recovery in Mirrabooka before you wipe the slate clean for good.
How Do I Know the Virus Is Truly Gone?
This is the big one. You need that peace of mind. The most telling sign is simple: the original symptoms are gone. The annoying pop-ups have stopped, the sluggish performance is fixed, and your computer just feels right again.
To be extra sure, here’s what I always recommend:
- Get a Second Opinion: After your main antivirus has done its job, install a different, well-regarded anti-malware tool (like Malwarebytes) and run another full scan. Two clean scans from two different programs is a very good sign.
- Keep an Eye on Things: Use your computer as you normally would for the next few days. Watch for any weird behaviour or any of the old symptoms trying to creep back in.
- Check Your Accounts: It’s a smart move to monitor your email, banking, and social media accounts for any strange activity, just in case your login details were snatched before you cleaned the infection.
If your computer is running smoothly and a couple of scans come back clean, you can breathe a sigh of relief. The virus is gone.
If you’re still wrestling with a stubborn infection or just feel out of your depth, there’s no shame in calling in a pro. At CTF Mobile Phones & Computer Repairs, we deal with this stuff every day. We offer thorough virus and malware removal to get your computer back to being safe, secure, and running how it should. Check us out online at https://www.ctf.com.au to learn more or book a service.