
A screen protector is simply a thin, clear layer that you stick onto your iPhone's display. Its job is to be the first line of defence against scratches, smudges, and even cracks. Think of it as a sacrificial shield, taking the hits from keys, coins, or an accidental drop so your actual, very expensive screen doesn't have to.
Why Your iPhone Screen Protector Is a Smart Investment
It’s easy to see a screen protector as just another accessory, but it’s more like essential insurance for your iPhone. We see the consequences of going without one every day at our Perth repair shop. For a small, one-off cost, you get a huge amount of peace of mind, knowing your screen is safe from the daily grind.
The Cost of an Accident
Picture this: your phone slips out of your hand while you’re walking through Karrinyup, or it slides off the table at a pub down at Cottesloe Beach. One clumsy moment can leave you staring at a spiderweb of cracks. Suddenly, you're facing a repair bill that can easily stretch into hundreds of dollars.
This is exactly why a screen protector is such a wise move. When you look at the potential UK Broken Phone Screen Repair Cost, it really drives home how much money you can save just by being prepared.
A high-quality tempered glass protector costs a tiny fraction of a screen replacement. It’s easily the most cost-effective way to protect your iPhone from those all-too-common accidents.
A Growing Trend for a Reason
This isn’t just our opinion; the numbers back it up. The Australian market for screen protectors reached a massive USD 467.78 million in 2024 and is expected to climb to USD 890.2 million by 2033.
Considering iPhones have a whopping 56.13% market share in Australia, it's clear that people are wising up to the need to protect their devices. It's a truth we see constantly here in Balga: prevention is always better—and a whole lot cheaper—than the cure.
Now that we've established why protection is so vital, let's get into the 'how' of choosing and fitting the perfect screen protector for your iPhone.
Tempered Glass vs. Film: Choosing the Right Shield for Your iPhone
When you start shopping for an iPhone screen protector, you'll quickly find yourself facing two main options: tempered glass or plastic film. They both promise to protect your screen, but how they do it—and how well they do it—is a world apart. The best choice for you really depends on your daily life right here in Perth.
Think about a tradie on a job site in Balcatta. Their phone gets thrown in a toolbox, covered in dust, and is always at risk of being dropped. That kind of environment screams for the heavy-duty impact protection you only get from tempered glass. On the flip side, a student might just want something slim and cheap to prevent minor scratches, making a simple film protector a perfectly good fit.
The Strong Case for Tempered Glass
For the vast majority of iPhone users, our advice is straightforward: go with tempered glass. It’s a multi-layered shield, usually only 0.3mm to 0.5mm thick, that feels just as smooth and responsive as the phone's original screen.
Its biggest selling point is its hardness. Most are rated 9H on the Mohs scale, which is just a fancy way of saying it’s incredibly tough to scratch. Keys, coins, and whatever else is rattling around in your bag won’t leave a mark.
But here’s the most important part: tempered glass is brilliant at absorbing impact. If you accidentally drop your phone, the protector will often crack or shatter, taking the hit so your actual screen doesn't have to. It's a small, replaceable sacrifice to avoid a very expensive screen repair.
What About Plastic Film Protectors?
Plastic film protectors, typically made from PET or the more flexible TPU, are much thinner. They do a decent job of preventing everyday scratches and scuffs, but that’s about where their protection ends. They offer next to no defence against a serious drop.
While they’re certainly cheaper, film protectors often have a slightly rubbery feel that can make swiping and typing feel a bit off. They provide a basic level of defence, but they just can't match the all-around security of glass. If you're curious about more advanced film options, you can learn all about hydrogel screen protectors in our detailed guide.
Here's a simple way to look at it: A film protector is like a guard against surface-level threats, like scuffs. A tempered glass protector is a bodyguard against a real disaster, like a shattered screen from a drop.
Tempered Glass vs Film Protector a Quick Comparison
Still on the fence? This table breaks down the key differences to help you decide which protector suits your lifestyle best.
| Feature | Tempered Glass | Film (PET/TPU) |
|---|---|---|
| Impact Protection | Excellent. Designed to absorb shock and shatter to protect the main screen. | Poor to minimal. Offers very little protection against drops. |
| Scratch Resistance | High (9H hardness). Resists scratches from keys, coins, and daily wear. | Fair. Protects against minor scuffs but can be scratched by harder objects. |
| Feel & Sensitivity | Feels identical to the original glass screen with excellent touch response. | Can feel slightly rubbery or "plasticky," sometimes affecting sensitivity. |
| Clarity | High-definition clarity, virtually invisible. | Good, but can sometimes reduce screen brightness or sharpness slightly. |
| Cost | More expensive upfront, but cheaper than a screen replacement. | Very affordable and budget-friendly. |
| Best For | Anyone wanting maximum protection against drops and deep scratches. | Users who are careful with their phone and primarily want scratch prevention. |
Ultimately, tempered glass provides peace of mind that a film protector just can't offer. For a small extra investment, you get significantly more robust protection.
Key Features to Look For in Any Protector
No matter which material you lean towards, a few key features separate a great screen protector from a dud.
- Oleophobic Coating: This is an absolute must-have, especially during a humid Perth summer. It’s a special oil-repellent layer that resists fingerprints and smudges, keeping your screen looking clean and clear.
- Clarity: A good protector shouldn't look like you have anything on your screen at all. Look for options with high transparency ratings to make sure your photos and videos look as crisp and vibrant as they’re meant to.
- Touch Sensitivity: The last thing you want is a protector that makes your phone feel sluggish. A quality product will preserve the original touch response perfectly, which is vital for everything from sending a quick text to gaming.
How to Achieve a Perfect Bubble-Free Installation
Feeling a bit apprehensive about putting on your new iPhone screen protector? You're not alone. It can feel like a high-stakes, one-shot deal, but with the right technique, you can nail a flawless, bubble-free finish on your first attempt.
The secret to success actually starts before you even think about peeling off the backing. It's all about the environment. Find a clean, well-lit room—a bathroom right after a hot shower is a classic pro-tip. The steam in the air weighs down dust particles, which are the absolute number one enemy of a perfect installation.
Before you start, give your hands a good wash to get rid of any natural oils. Then, lay out everything from the box: the screen protector, the alcohol wipe, the microfibre cloth, and any dust-removal stickers. Having it all organised and ready to go makes the whole process feel less frantic.
Preparing Your iPhone Screen
This is, without a doubt, the most important part of the job. A perfectly clean screen is non-negotiable if you want to avoid those dreaded bubbles.
First thing's first: turn your iPhone off. A black, powered-down screen makes spotting every tiny speck of dust and lint a hundred times easier.
Now, grab the alcohol wipe and give the screen a thorough clean. I find it’s best to work in straight, overlapping lines from top to bottom. Avoid scrubbing in circles, as that can just push the grime around instead of lifting it off.
Immediately follow that up with the dry microfibre cloth, using the same top-to-bottom motion. This buffs away any alcohol residue, leaving the screen bone dry. Now, the crucial inspection: hold your phone under a bright light and tilt it at an angle to see if anything is left.
The most common cause of bubbles isn't trapped air; it's a microscopic piece of dust. Using that little dust-removal sticker is the single best thing you can do to guarantee a perfect finish.
Even if you think the screen looks spotless, use the dust-removal sticker. Lightly dab it across the entire surface. It's designed to pick up those tiny particles you simply can't see. Don't rush this step—patience here will save you a world of frustration later.
Mastering the Hinge Method for Perfect Alignment
The "hinge method" is a fantastic trick we use in the shop all the time. It makes misaligning your screen protector practically impossible.
Before you take off the protective film from the sticky side, lay the protector on your iPhone's screen. Take a moment to line it up perfectly with the earpiece, camera, and the edges of the display. Once you’re happy with the position, grab two pieces of regular sticky tape and use them to secure one of the long edges of the protector to the side of your phone. You've just created a hinge.
This handy flowchart gives a quick visual reminder of what kind of protector you might be working with, highlighting the key differences between glass and film.
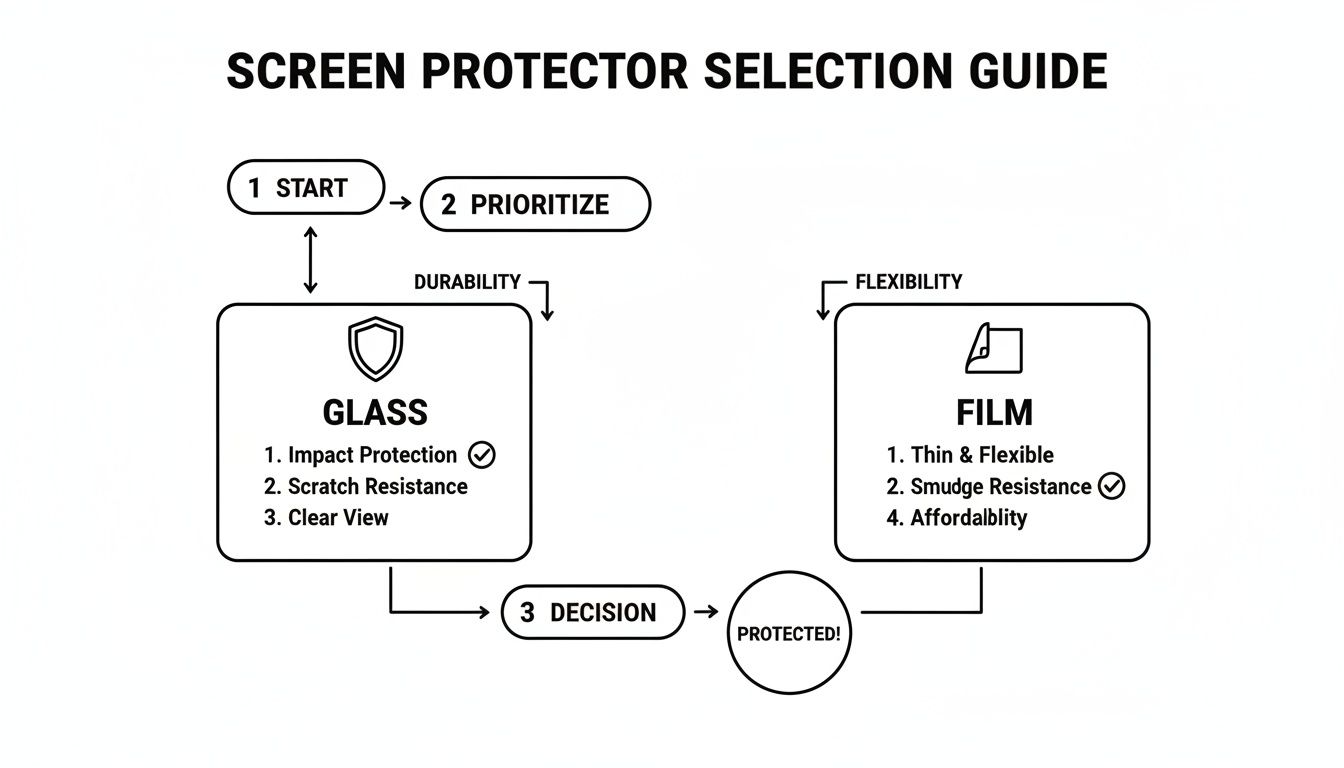
It’s a good visual cue for the choice you made: tough impact protection from glass or the basic scratch resistance from a film protector.
Now, you can flip the screen protector over using your tape hinge, just like opening a book. This gives you one last chance to inspect the screen for any stray dust. When you're ready, carefully peel the backing off the adhesive side, making sure your fingers don't touch it.
Gently lay the protector back down onto the screen. Because you pre-aligned it with the hinge, it will fall into the exact right spot.
Press one finger down in the centre of the screen. You'll get to watch as the adhesive magically spreads outwards towards the edges. Let it do its thing. Once it has mostly adhered, use the microfibre cloth or a squeegee to gently push any small, remaining air pockets out towards the nearest edge.
If you follow these steps, you should be looking at a perfectly applied screen protector. But hey, sometimes things don't go to plan. Don't panic! Our next section will walk you through fixing any common issues. And remember, if you're around Girrawheen and would rather skip the stress entirely, our team at CTF Mobile Phones & Computer Repairs is always here to do a professional installation for you.
Troubleshooting Common Installation Mishaps
Even when you’re being extra careful, things can go wrong during a screen protector installation. We’ve all been there. But don’t panic and rip it off – a small mistake doesn’t mean you have to start over with a new protector. Most of the common issues, like a pesky air bubble or a stray speck of dust, are surprisingly easy to fix.
The trick is to be quick but gentle. Yanking the protector off in frustration is the fastest way to ruin the adhesive and make things worse. All you really need is a little patience and a couple of simple tools to turn a botched application into a perfect one.
Dealing with Annoying Air Bubbles
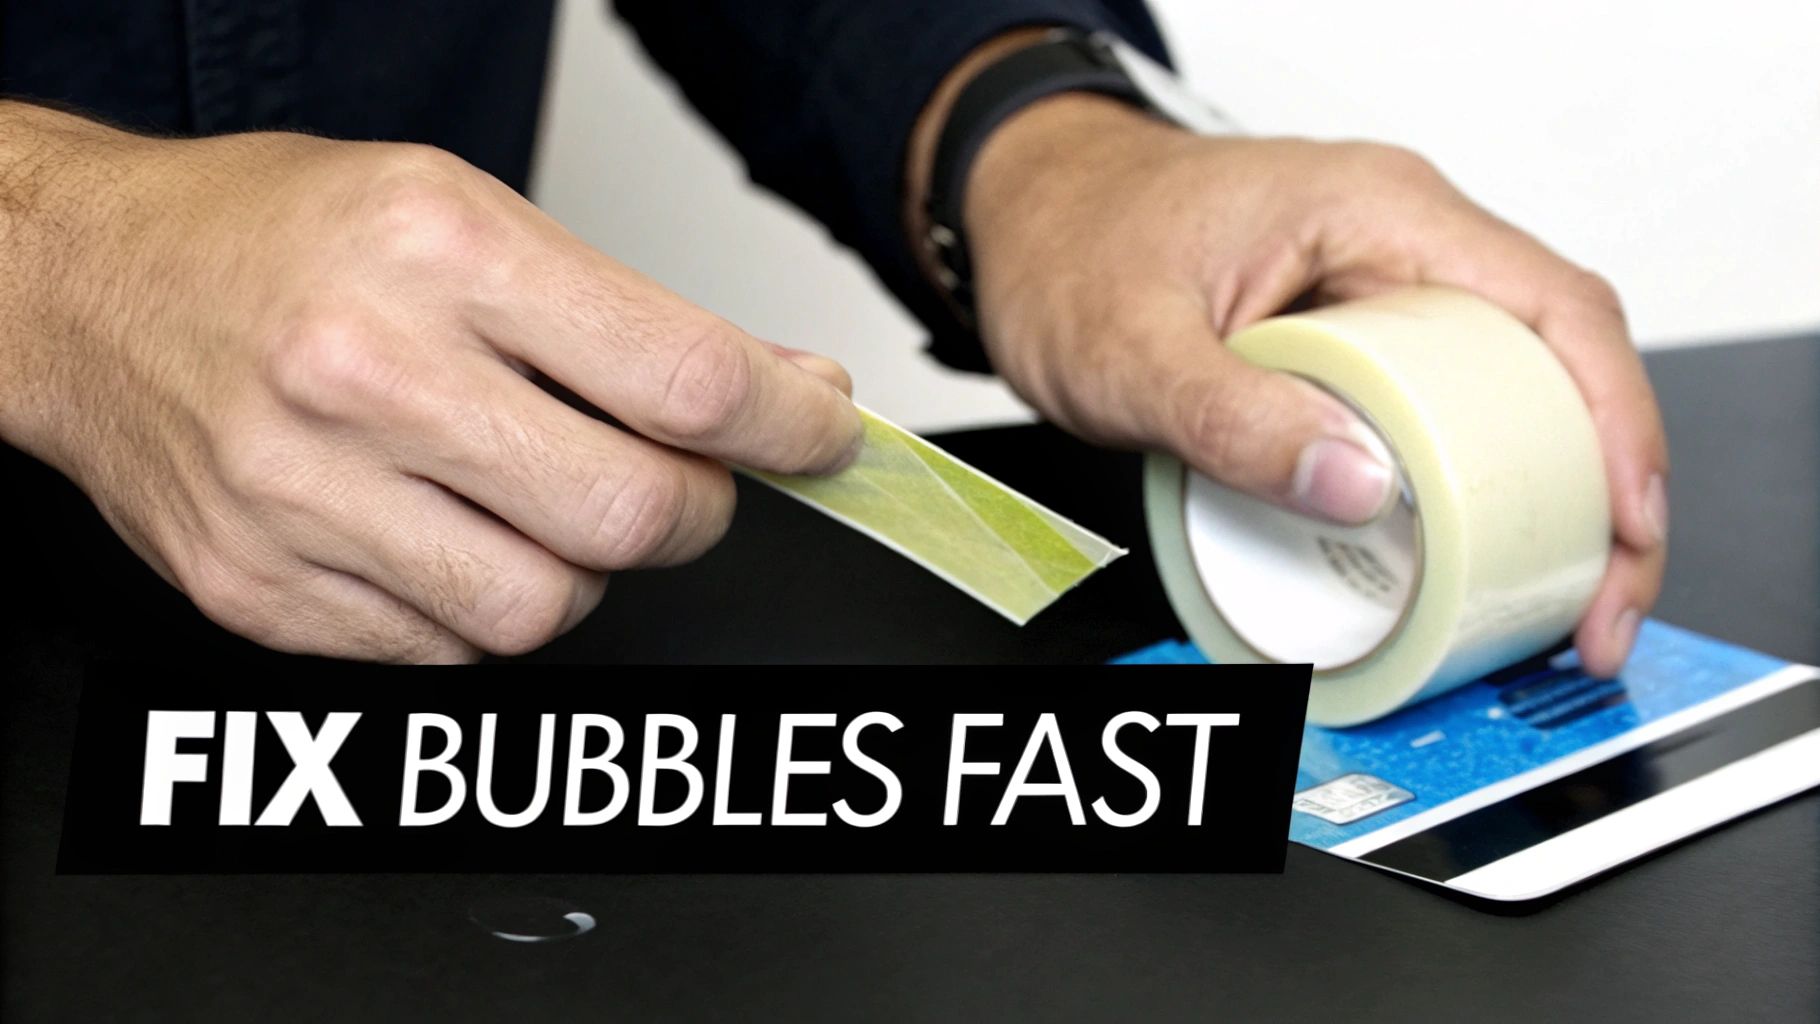
The most frequent frustration is spotting little air bubbles trapped under the glass. If they're close to an edge, you're in luck – you can usually push them out.
Grab a credit card or the squeegee that came with your kit and wrap it in the microfibre cloth. This stops you from accidentally scratching the new protector. Start from the middle of the bubble and apply firm, steady pressure, pushing it toward the closest edge. It's not about brute force; think of it as a smooth gliding motion that gently persuades the air to escape.
What if a bubble in the centre of the screen just won't budge? That’s almost always a sign that a tiny piece of dust is trapped underneath, which calls for a slightly different tactic.
Removing Trapped Dust and Debris
It’s amazing how a single, tiny speck of dust can create such a large and stubborn bubble. To get rid of it, you’ll need a bit of sticky tape (regular Scotch tape works fine) or one of the dust-removal stickers from your kit.
- Carefully lift a corner: Use your fingernail to gently pry up the corner of the screen protector nearest to the dust. Only lift it just enough to get underneath – avoid peeling the whole thing off.
- Use the tape to dab: Take your piece of tape and use the sticky side to dab at the dust speck. It should lift the particle right off either your phone's screen or the protector's adhesive.
- Gently reapply: Once the dust is gone, slowly lower the protector back into place. The adhesive will reseal itself, and this time, it should be perfectly bubble-free.
Remember, the goal is minimal intervention. The less you handle the adhesive side of the protector, the better the final result will be. This technique is a go-to for professional installers.
Sometimes, despite your best efforts, the protector might get cracked or damaged while you're making these adjustments. If you find yourself in a situation that feels like more than a simple fix, it's good to know the risks. Forcing a badly damaged protector can sometimes cause problems for the phone's actual screen. You can find some helpful info on what to do if you suspect you have a cracked phone screen in our detailed article. It's always better to replace a cheap, damaged protector than to risk the expensive display underneath.
Keeping Your Screen Protector in Top Shape for the Long Haul
Your iPhone screen protector is on the front line every day, taking the hits so your display doesn't have to. But to keep it doing its job and your view pristine, a little regular TLC goes a long way. This isn't about some complicated routine; it's mostly just smart cleaning and knowing when to call it a day.
When it comes to cleaning, think gentle. Harsh chemicals, especially anything alcohol-based, are a no-go. They can strip away that slick, fingerprint-resistant oleophobic coating over time. Most of the time, all you need is a quick wipe with a slightly damp microfibre cloth to clear away smudges and dust.
If you're dealing with something a bit more stubborn, grab a cleaning spray made specifically for electronic screens. This way, you clean off the grime without damaging the coatings that keep your protector feeling smooth. You can find some good general advice on how to clean laptop screen safely that often applies here too.
When Is It Time for a New Protector?
Even the toughest screen protector won't last forever. The trick is to spot the signs of wear and tear before it's too late, so your iPhone’s actual screen never has to face the danger. A damaged protector has done its duty, but it can't offer the same reliable defence a second time.
Keep an eye out for these tell-tale signs that it’s time for a replacement:
- Deep Scratches: We’re not talking about tiny surface scuffs. If you can feel a scratch with your fingernail or it catches the light, the protector's structural integrity is compromised.
- Spiderweb Cracks: A network of cracks spreading from an impact point means the protector sacrificed itself for your screen. It’s lost its ability to absorb another shock.
- Lifting Edges: When the sides start peeling up, they create a perfect entry point for dust and grit. This is not only annoying but can lead to scratches on the actual display underneath.
A cracked screen protector isn't a failure; it’s proof it worked. It took a hit that could have otherwise shattered your expensive iPhone screen. Swapping it out is a small price to pay to get that full protection back.
Don't put off replacing a compromised protector. A cracked one is a weak spot, and the next drop could send the force straight through to your screen. Plus, the adhesive is likely weakened, meaning it’s not providing the solid defence you think it is.
If you're around Perth, from Westminster to Marangaroo, and you've noticed any of these issues, getting a replacement is a quick and easy fix. Pop into CTF Mobile Phones & Computer Repairs, and we can remove the old one and apply a fresh, perfectly aligned iPhone screen protector in minutes. Your phone will be back to being fully prepared for whatever life throws at it.
When to Skip the DIY and See a Professional
While this guide should give you the confidence to get a fantastic result at home, there are definitely times when calling in an expert is the smarter play. Let's be honest, trying to install an iPhone screen protector yourself isn't always the straightforward task it seems.
For instance, if your iPhone's screen is already showing some light scratches, a DIY application can easily trap air around these imperfections. This doesn't just look bad; it can actually make those little scuffs and marks stand out even more. A professional technician has techniques to apply a protector that can cleverly mask the appearance of existing wear.
Scenarios That Warrant Expert Help
Sometimes, it really just comes down to peace of mind. Maybe you have shaky hands, or a physical limitation makes that kind of precise, steady work a real challenge. For others, it’s about protecting a new investment – you've just spent a lot on a premium iPhone and you want a guaranteed flawless finish without the risk of messing up and wasting a good protector.
Letting an expert handle the installation is a smart move if you want to avoid the hassle and be certain of a perfect fit. Think of it as a small extra cost for a guaranteed outcome.
Here at our Balga repair shop, we work in a controlled, dust-free environment and use top-tier screen protectors every day. That controlled setting, combined with years of practice, is our secret to getting perfect alignment and a bubble-free finish every single time.
It’s a quick, stress-free service that saves you time and frustration. More importantly, it’s a tiny price to pay when you consider the potential cost of repairing an iPhone screen if the worst should happen.
So, if you're feeling a bit hesitant, consider this your permission slip to skip the stress and let us handle it for you.
Your Top Screen Protector Questions Answered
We get a lot of questions about screen protectors from Perth locals dropping by the shop. It's totally understandable—you want to be sure you're making the right call for your iPhone. Let's clear up a couple of the most common ones.
Will a Screen Protector Mess with Face ID or My Touchscreen?
This is a big one, but you can relax. A good quality tempered glass protector is designed to be completely invisible to your iPhone. They’re incredibly thin, usually less than 0.4mm, so they won't block the Face ID sensors or make your touchscreen feel laggy.
If you ever do notice a delay or a lack of responsiveness after applying a protector, it’s a red flag. That’s almost always a sign of a cheap, poorly made, or overly thick product that isn't up to scratch.
Is It My Protector or My Actual Screen That's Cracked?
That heart-stopping moment when you see a crack—we’ve all been there. Thankfully, there’s an easy way to figure out what’s actually damaged.
Just tilt your phone under a light and have a really close look at the crack itself.
- If it's the protector: You'll see a fine line sitting on top of the glass. The display underneath will look perfectly fine, with no weird colours or dead pixels. You might even be able to feel the edge of the crack with your fingernail.
- If it's the screen: This is a bit more serious. You'll likely see strange colours, black blotches, or lines running through the display underneath the glass surface. The crack itself might seem deeper.
Seeing a cracked protector is actually a good thing! It means it sacrificed itself to save your screen, which is exactly what you want. But don't get complacent—its job is done. Get it replaced straight away so you’re protected for the next inevitable bump or drop.
For a professional installation or expert advice on the best protector for your device, visit us at CTF Mobile Phones & Computer Repairs.