
When your Xbox 360S suddenly refuses to power on, the first place to look is usually the Xbox 360S power supply. That little brick is your console's lifeline, and its indicator light is the key to figuring out what’s gone wrong. A solid orange glow? That’s just standby mode. But if you see a flashing red light, or no light at all, you've likely found the source of your problem.
Before you jump online to order a replacement, it’s worth running through a few quick checks. It could save you a bit of cash and get you back in the game faster.
Is Your Xbox 360S Power Supply Really the Problem?
It’s tempting to blame the power brick straight away, but I’ve seen countless cases where the real issue was much simpler. A loose cable or a power board that’s been accidentally switched off is more common than you'd think. Taking a moment to diagnose the issue properly is always the best first step.
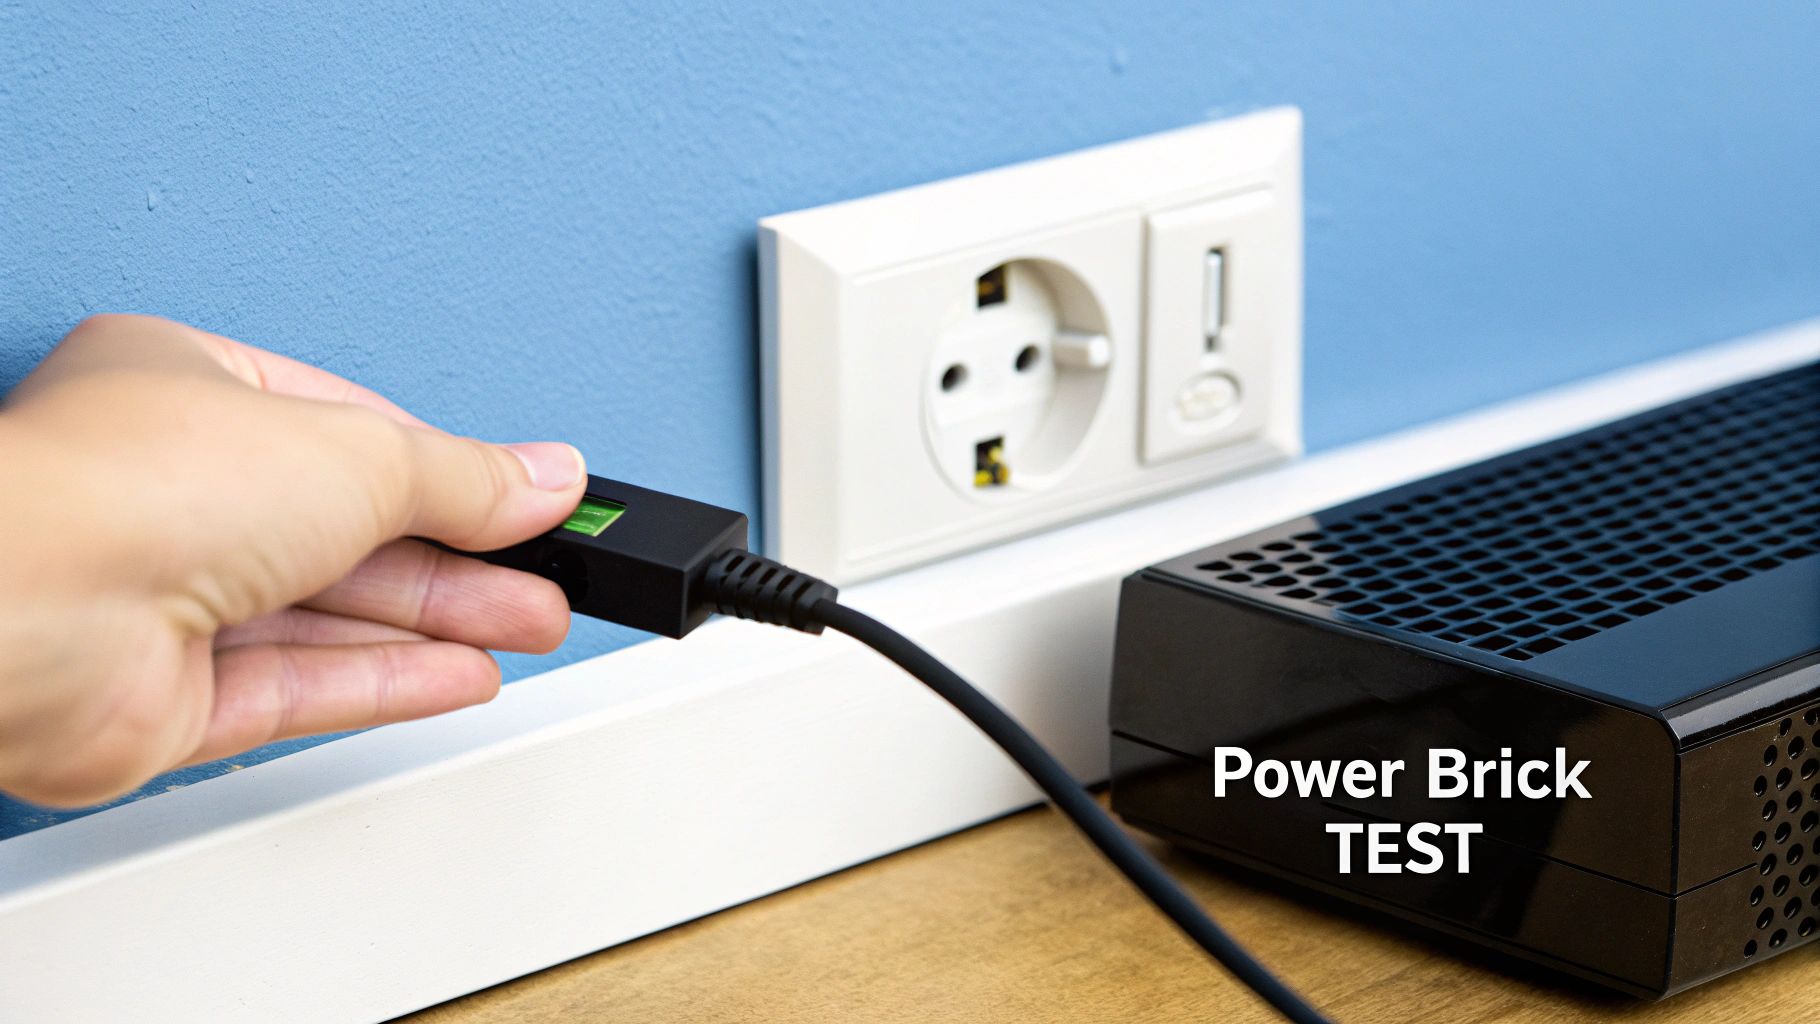
The little LED on the power brick itself is your best friend here. It’s designed to give you a quick, at-a-glance status report on the power supply's health and its connection to your console.
What the Light on Your Power Brick Is Telling You
That tiny light is a surprisingly clever diagnostic tool. Each colour and pattern tells a different story about what's happening between the wall socket and your Xbox.
The light on your power brick is your first clue. Here’s a quick reference table to help you decipher its signals.
Understanding Your Xbox 360S Power Supply Light
| Light Status | What It Means | What to Do Next |
|---|---|---|
| Solid Green | All good! The console is on and receiving stable power. | If the console still isn't working, the problem lies elsewhere. |
| Solid Orange | The power supply is in standby mode. It's getting power and is ready to go when you turn the console on. This is normal. | If the console won't turn on from orange, check the console's power button and connections. |
| Flashing Orange/Red | This points to an internal fault. The power supply might be overheating or a component has failed. | The power brick likely needs replacing. |
| No Light | This could mean a completely dead power brick, but it could also be a problem with the wall outlet, the cable, or a tripped circuit. | Start by checking your wall socket and all cable connections. |
Basically, if you’re seeing green or orange, your power supply is probably doing its job. A red or absent light is where you need to start investigating further.
This quick decision tree can help you visualise the process.
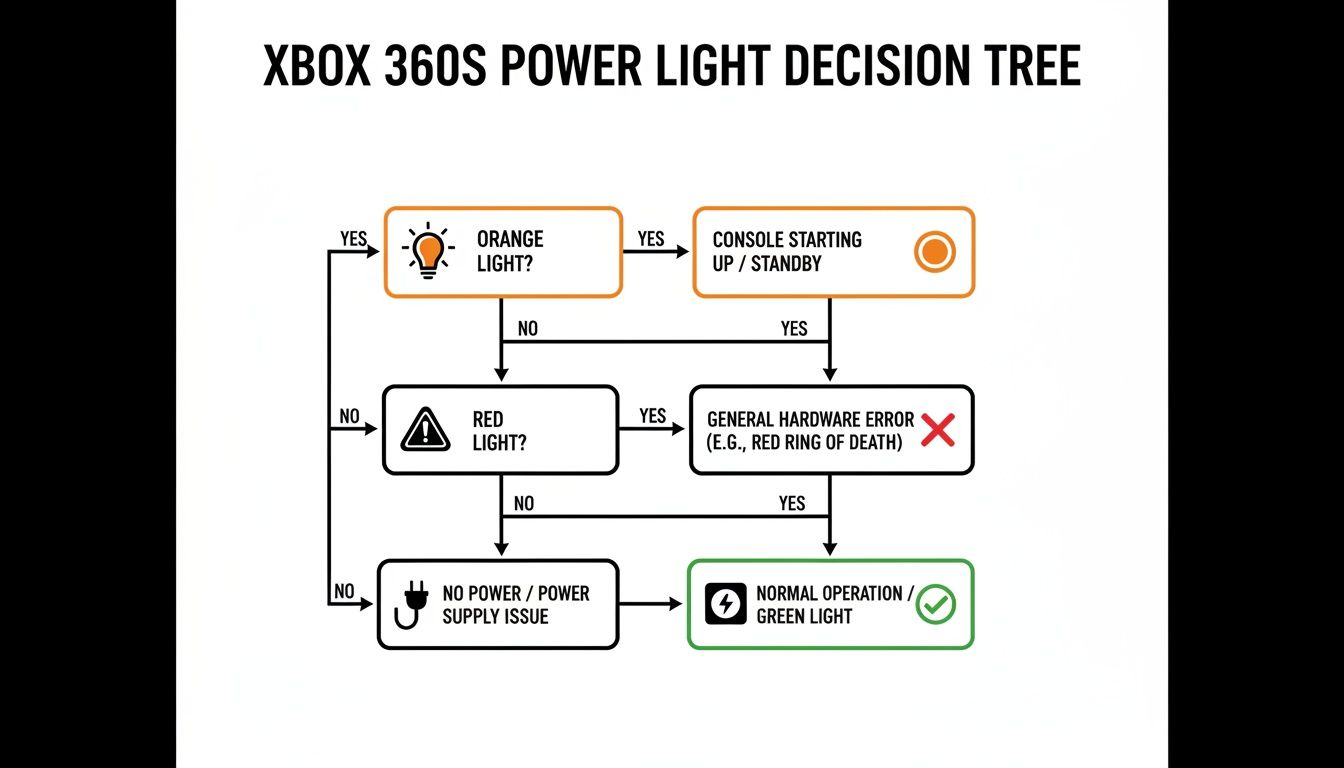
As you can see, a green or orange light usually means you can look for other causes, while red or no light keeps the focus squarely on the power supply itself.
The Old "Turn It Off and On Again" Trick
Before you declare the power brick dead, try a full power cycle. This often clears up temporary glitches.
- Unplug the power cable from the wall outlet.
- Disconnect the cable from the power brick.
- Unplug the connector from the back of the Xbox 360S.
Now, just let everything sit for at least 60 seconds. This gives any residual power inside the components time to fully discharge. Once the minute is up, plug everything back in, making sure every connection is firm and sits snugly in its port. You might be surprised how often this simple reset brings a console back to life.
This is particularly relevant for us here in Australia. Early in the console's life, there were issues with mismatched power standards, which meant our 230–240 V mains required very specific power supplies to operate safely. You can read a bit more about the console's regional hardware differences on its Wikipedia hardware page.
Choosing the Correct Replacement Power Supply
So, you've figured out your Xbox 360 S power supply is on the fritz. The next step is grabbing a replacement, but hold on a minute—this is where a lot of people make a classic, frustrating mistake. It’s easy to assume any power brick labelled "Xbox 360" will do the trick, but that’s not the case. The different models in the 360 family have their own unique connectors and power needs.
Picking up the wrong one isn't just a waste of money; it can be a genuine safety hazard for your console. You absolutely have to match the new power supply to your specific Xbox 360 S.
Identifying the Correct Connector
The most obvious giveaway is the physical plug that goes into the back of your console. The Xbox 360 S has a distinct, smaller, dual-barrel connector. It's completely different from the big, chunky rectangular plug used on the original "phat" Xbox 360s.
Before you even think about hitting "buy", always visually inspect the product photos and compare the connector to the port on your console. Honestly, this one simple check will save you from the most common compatibility headache.
Matching Power Ratings Is Non-Negotiable
Looks aren't everything. Beyond the connector shape, you've got to match the electrical specs. Flip over your old power brick and look for the sticker. You're searching for the Output DC rating.
For a standard Xbox 360 S, you're looking for these specific numbers:
- 12V—10.83A
- 5Vsb—1A
These numbers are not just suggestions. Pumping the wrong voltage or amperage into your console is a surefire way to fry its internal components for good. If you want to get into the nitty-gritty of it, understanding charger wattage and compatibility is a great way to wrap your head around the technical side of things.
Official Microsoft vs Third-Party Options
You’ve really got two paths here: hunt down a second-hand official Microsoft unit or buy a brand-new third-party power supply. Each route has its own trade-offs.
An official power supply gives you peace of mind. You know it has the correct specifications and safety certifications. The catch? The console is long discontinued, so you’re buying a used part with an unknown history and potentially limited life left in it.
On the other hand, a new third-party brick is usually cheaper and easier to find. The main risk here is the mixed bag of quality. Stick to reputable brands with plenty of positive reviews and, most importantly, make sure the unit has an Australian RCM (Regulatory Compliance Mark). This little symbol means it meets our local safety standards. A cheap, uncertified brick from a random online marketplace is a serious fire risk.
The Xbox 360 was a massive hit here in Australia, selling over 30,000 units in its first weekend alone. That incredible popularity means there’s still a healthy market for accessories and parts, so you'll find plenty of both genuine and aftermarket options if you know what you’re looking for.
How to Safely Install Your New Power Brick
Alright, you’ve got the correct replacement in hand, and your Xbox 360 S is just moments away from getting back in the game. Installing the new Xbox 360 S power supply isn't just a matter of plugging it in; a few simple but crucial steps will guarantee a safe connection and help your new hardware last for years.

Pre-Installation Safety Steps
Before you even tear open the packaging on the new power brick, let's deal with the old one properly. First things first: make sure your Xbox 360 S is completely powered down—not just asleep in standby mode.
Unplug the old power brick from the wall socket first, then disconnect it from the back of the console. This is the important bit: you absolutely must wait at least 60 seconds before connecting the new unit. This gives any leftover electrical charge inside the console's components time to fully dissipate, which is a key step in preventing an accidental short circuit.
Making the Connection
Once a minute has passed, you're clear to hook everything up. It’s a straightforward process, but taking the time to make sure each connection is secure will save you headaches down the road.
- Connect to the Console First: Grab the connector from your new power supply and plug it firmly into the back of your Xbox 360 S. You should feel a satisfying click as it seats correctly. A loose connection here is a common cause of intermittent power problems and can even damage the port over time.
- Connect the Mains Cable: Next, attach the figure-8 power cable to the power brick itself. Give it a good push to make sure it’s seated all the way in.
- Plug Into the Wall: Finally, plug the other end of the cable into a wall socket. I can’t stress this enough: for an extra layer of protection, always use a quality surge protector. It's a small investment that can save your console from a sudden power surge.
With everything connected, take a look at the indicator light on the new power brick. It should be glowing solid orange. This tells you it's in standby mode and ready to go.
Pro Tip: Do your power brick a favour and keep it off the carpet. Don’t stuff it inside a cramped, poorly ventilated entertainment unit, either. That brick has a little fan inside and needs good airflow to stay cool. Overheating is one of the top reasons these things fail prematurely.
Now for the moment of truth. When you power on your console for the first time with its new supply, that light should switch from orange to a solid green. A green light means you have a successful installation and a healthy flow of power. If it stays orange or, worse, turns red, it’s time to double-check all your connections from start to finish.
When to Call in a Professional
Swapping out a faulty **Xbox 360 S power supply** is one of the easier DIY repairs out there. If you’ve run through the diagnostics and a new power brick gets your console humming again, fantastic—job done. But sometimes, the power brick isn’t the real problem; it’s just the first thing to fail. It’s important to know when to put the tools down and let a pro take over.
Knowing when you're out of your depth can save you from accidentally frying your console's motherboard or wasting money on parts you don't actually need. There are a few tell-tale signs that the problem lies inside the Xbox 360 S itself, pointing to a much more technical fix.
Red Flags It's a Console Problem
The clearest sign of all? You’ve plugged in a brand-new, perfectly working power supply, and your Xbox still plays dead. If a new brick doesn't solve it, the fault is almost certainly internal. At this point, your troubleshooting journey has moved beyond a simple swap.
Another major red flag is any physical damage to the console's power port. Take a close look at where the power cable plugs into the back of the Xbox. Is it wobbly, cracked, or are any of the pins bent out of shape? If so, no power supply in the world is going to make a clean connection. Trying to jam it in could cause a short and kill the motherboard for good.
A burning smell is a serious warning that you absolutely cannot ignore. If you notice a sharp, chemical or plastic odour coming from the console (not the power brick), unplug it from the wall immediately. This is a classic symptom of failing internal components like capacitors, which are a fire hazard and not something you can fix at home.
What to Expect From a Repair Shop
If you're seeing any of these signs, taking your console to a professional is the smart play. A good repair shop like CTF has the proper diagnostic tools to trace faults on the motherboard—something you just can't do without specialised gear.
When you drop off your console, being prepared helps everyone.
- Describe the symptoms: What exactly is the console doing? Is the power light red, orange, or just off? Any weird noises?
- Explain your own troubleshooting: Let the technician know you've already tried another power supply. This saves them time and immediately points them in the right direction.
- Share recent history: Was the console dropped? Did you have a power surge or a blackout recently? Context matters.
Usually, you’ll pay a small diagnostic fee for the technician to open up the console and find the root cause. From there, they'll give you a firm quote for the repair. If the issue with your Xbox 360S power supply feels like it's part of a bigger problem, checking out an expert guide to gaming console repair can give you a better idea of what might be involved. This will help you make an informed choice, whether it's a simple fix or a complex hardware failure.
Simple Habits to Make Your Power Supply Last Longer
You've just invested in a new power supply to get your Xbox 360 S back in the game, so it's smart to treat it with a bit of care. Honestly, just a few small habit changes can dramatically extend its lifespan and save you from going through this all over again. The biggest enemy of any electronic component? Heat.
The Xbox 360 S power supply isn't just a simple cord; it's a self-contained unit with its own internal parts, including a little fan dedicated to keeping everything from cooking itself. For that fan to work properly, it needs a steady flow of cool, fresh air.
Give Your Power Brick Room to Breathe
Proper ventilation is the most critical factor for longevity. I can’t tell you how many times I've seen a perfectly good power supply fail simply because it couldn't get enough air. It's an almost guaranteed recipe for overheating and an early death for the component.
Let’s look at a few common placement mistakes that will absolutely kill your power brick:
- On the carpet: This is a big one. Carpet fibres are notorious for blocking the air vents, and the fabric itself acts like a blanket, trapping heat right where you don't want it. Always put the brick on a hard, flat surface like a wooden shelf or tiled floor.
- Inside a closed cabinet: I get it, you want your entertainment setup to look neat. But tucking the power brick away inside a cabinet creates a hotbox, forcing the poor little fan to circulate the same hot air over and over.
- Pushed up against a wall: Make sure you leave at least a few centimetres of clear space around the entire power brick. Air needs to flow in and out.
I’ve seen countless power supplies fail just because they were suffocated. My best advice is to think of it like a mini-computer—because it is. It needs to breathe. Keeping it cool is the single most effective thing you can do to make it last.
A Bit of Housekeeping Goes a Long Way
Beyond just finding a good spot for it, a little proactive maintenance and some smart power habits can really make a difference. These simple actions protect your hardware from both internal grime and external electrical gremlins.
Dust is the silent killer of cooling fans. Over time, it clogs up the vents and coats the fan blades, making them struggle to spin and causing the whole unit to run hotter. Every couple of months, just grab a can of compressed air and give the vents a quick blast to clear out any gunk.
Finally, think about what's coming out of your wall socket. Power surges, even tiny ones you don't notice, can slowly degrade and damage sensitive electronics.
- Always use a surge protector: Plugging your console and its power supply straight into the wall is playing with fire. A good quality surge protector is a cheap and incredibly effective shield against unexpected power spikes from the grid.
- Unplug when you're away: If you're heading off on holiday or just know you won't be gaming for a while, unplug the power brick from the wall socket. It’s the only surefire way to protect it from surges and it also reduces a tiny bit of wear and tear.
Common Questions About the Xbox 360 S Power Supply

Even with a solid guide, there are always a few tricky questions that come up when you're wrestling with an Xbox 360 S power supply. I’ve seen these pop up time and again in forums and from customers, so let's get those last lingering doubts sorted out with some straight answers.
Can I Use an Original Xbox 360 Power Supply on an S Model?
In short, absolutely not. The power supplies for the original "phat" Xbox 360 and the later, slimmer S model are worlds apart and definitely not interchangeable.
Microsoft actually designed them with completely different physical connectors to stop people from mixing them up. The 360 S uses a distinct, smaller round plug, while the original console has a big, chunky rectangular one. You physically can't plug one into the other without breaking something, so make sure the brick you're using was specifically made for the Xbox 360 S.
Is It Safe to Buy a Third-Party Power Supply?
It can be, but you have to tread very carefully. There are some excellent third-party brands out there that make perfectly good, affordable replacements. The catch is that the market is also awash with cheap, uncertified knock-offs that are, frankly, a hazard.
To stay safe and avoid damaging your console, here’s what you need to look for:
- Safety Certifications: Here in Australia, the golden ticket is the RCM (Regulatory Compliance Mark). If you see that symbol, it means the product has been tested and meets our local safety standards.
- Real-World Reviews: Don't just look at the star rating. Dig into recent customer reviews and keep an eye out for complaints about the brick getting dangerously hot, making strange noises, or dying after just a few weeks.
- A Proper Warranty: A seller who believes in their product will offer a decent warranty. If there's no guarantee or a very short one, that’s a massive red flag.
Look, I get it, saving a few bucks is tempting. But a cheap, uncertified power brick isn't a bargain—it's a gamble. It's not worth risking your console, or worse, an electrical fault in your home. Spending a little extra on a certified unit is really an investment in peace of mind.
Why Is My New Power Supply Making a Loud Noise?
A low, steady hum from the power brick is perfectly normal. There’s a small fan inside that kicks in to keep things cool, especially when your Xbox is working hard during a gaming session. It’s just the cooling system doing its job.
What you don't want to hear are loud, erratic noises like grinding, buzzing, or sharp clicking. Those are tell-tale signs of trouble, usually pointing to a failing fan or a more serious electrical issue inside.
Before you panic, check that the brick has room to breathe and isn't sitting on a soft surface like a rug, which can block its vents. If you've given it plenty of airflow and the racket continues, stop using it immediately. It's almost certainly faulty and needs to be returned to the seller under warranty. Don't risk it—a noisy power supply is often a precursor to a complete and potentially damaging failure.
If you've gone through these checks and your console still isn't powering on, the problem might be deeper than just the power supply. For those trickier issues, or if you'd just feel better with a professional eye on it, CTF Mobile Phones & Computer Repairs is ready to help. Our technicians have the experience to diagnose the real fault and get you back in the game. You can learn more about our console repair services at https://www.ctf.com.au.