
More often than not, fixing an iPhone charging port comes down to one surprisingly simple thing: a good, thorough clean. Before you jump to conclusions and assume the worst (and a costly repair bill), take a moment to check for pocket lint and other gunk. It’s the number one reason your phone suddenly decides it won’t charge.
How to Tell if Your iPhone Charging Port Is Actually Broken
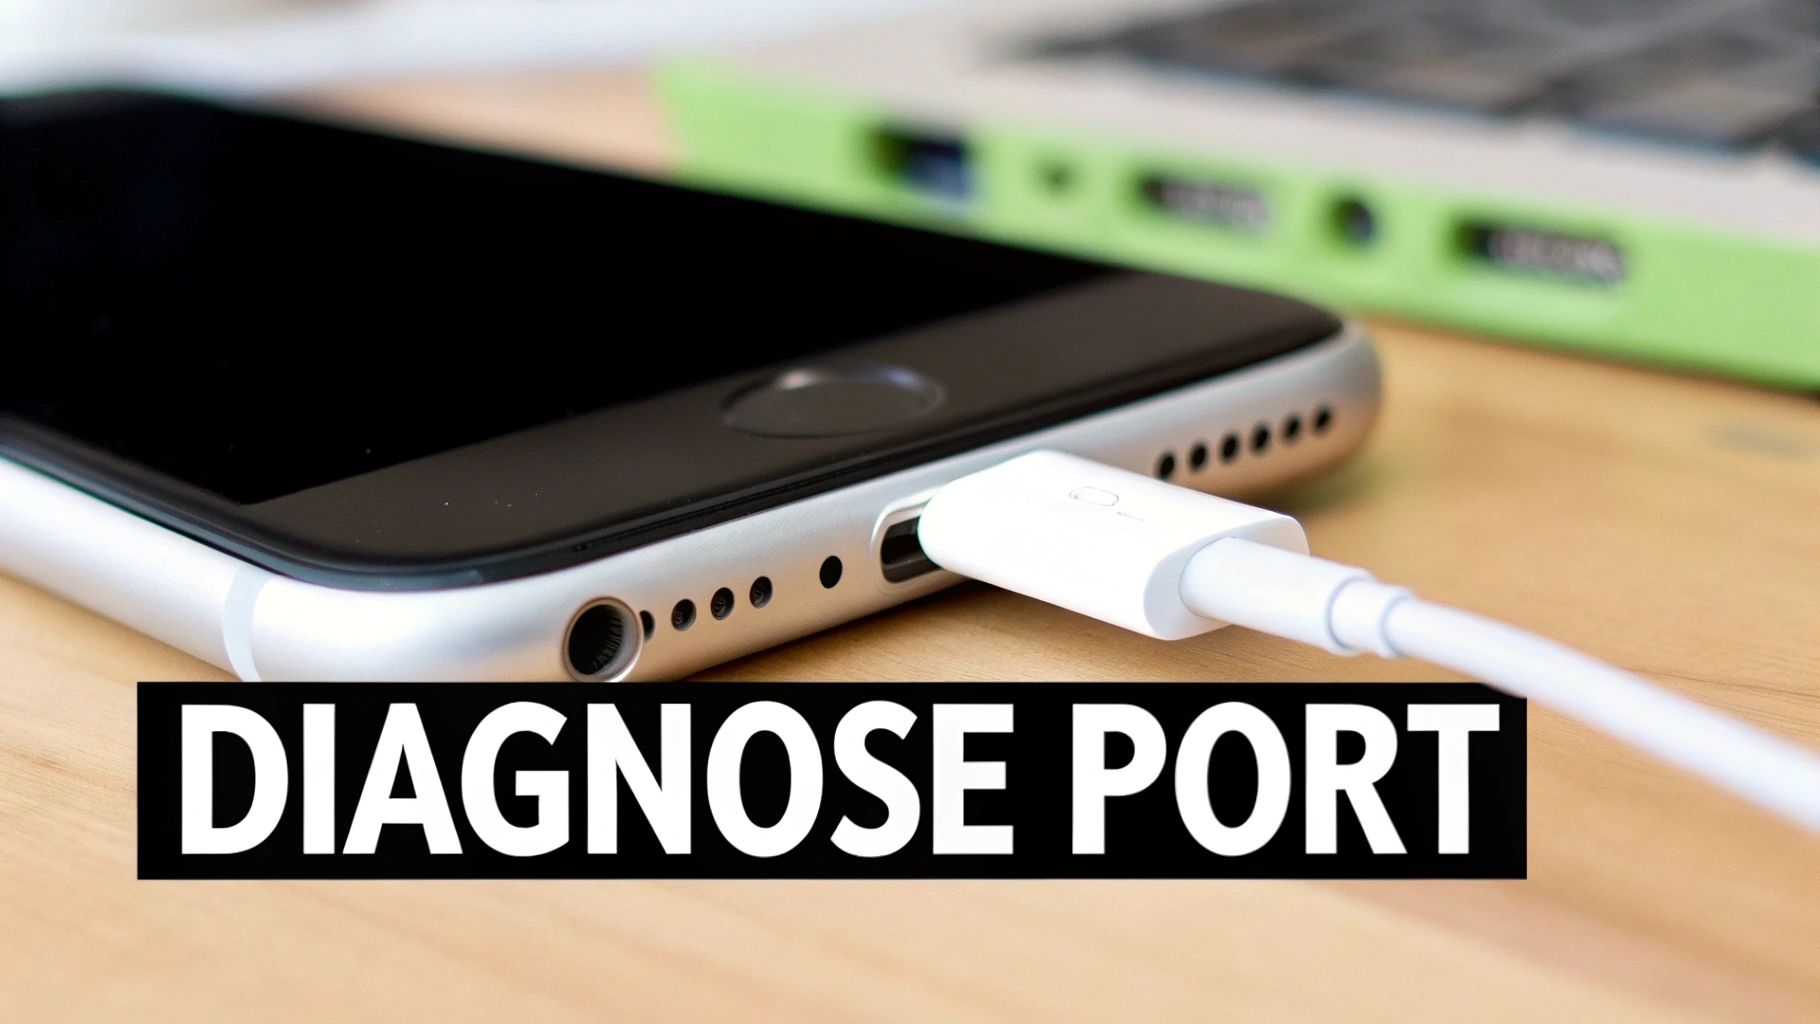
Before you start pricing out new parts or booking a repair, it’s vital to play detective. A dodgy charging port can easily masquerade as other problems, and rushing into a fix without a proper diagnosis is a surefire way to waste time and money. The first real step is making sure the port is actually the culprit.
Let's start by ruling out the easy stuff. Find a charging cable and wall adapter that you know for a fact are working—maybe borrow a friend's or use the one for your iPad. If your iPhone springs to life and charges normally, you’ve found your problem. It's the accessories, not the phone itself.
You can also try plugging your original cable into another Apple device. If it fails to charge that too, the cable is your weak link.
Common Symptoms of a Faulty Port
If a different cable and charger didn't solve it, it's time to look a little closer at your iPhone's behaviour. A failing port usually gives off some pretty clear warning signs.
- Loose Connection: When you plug the cable in, does it feel mushy or wobbly? A healthy connection should have a satisfying, solid "click". A loose fit is a classic sign that the port is either full of debris or the internal pins have seen better days.
- Intermittent Charging: You'll see the charging symbol flicker on and off, or maybe the phone only charges if you hold the cable just right. This points to an unstable connection inside the port.
- No Charging at All: This is the most obvious one. You’ve tried multiple known-good cables and power sources, and your phone gives you absolutely no sign of life.
Don't forget the humble restart. A simple software glitch can occasionally mess with the charging process. Before you assume it's a hardware fault, a quick reboot is the easiest troubleshooting step in the book.
Differentiating Debris from Damage
Here’s the good news: most of the time, the issue isn't permanent damage. Charging port problems are one of the most common faults we see in Australian repair shops, but the fix is often ridiculously simple.
Technicians report that a professional clean clears up the vast majority of cases. In fact, many shops estimate that only about 5–10% of charging port complaints actually need a full hardware replacement because of genuine damage like corrosion or bent pins. For a better idea of what local repairs might cost, you can check out resources like fonefix.com.au.
Safely Cleaning Your iPhone's Charging Port
So, your iPhone has decided to stop charging. Before you start thinking about expensive repairs, take a breath. More often than not, the problem isn't a faulty battery or a broken port—it's just a bit of stubborn pocket fluff.
Think about it: your phone goes in and out of your pocket or bag all day long. Over time, that Lightning port collects an amazing amount of lint, dust, and general grime. Every time you plug in your cable, you're compacting that debris down, until one day, the cable just can't make a solid connection anymore.
It's easily the most common reason for charging failures I see. The good news? You can usually sort this out yourself in about five minutes with zero cost. You just need to be careful, because those little charging pins inside the port are delicate and easy to damage.
The Right Tools for the Job
First things first, grab a torch and have a proper look inside the port. It's often shocking to see just how much stuff is jammed in there. When it comes to cleaning, the golden rule is to use tools that are non-metallic and non-conductive.
- A wooden or plastic toothpick: This is the perfect tool for the job. It's soft enough that it won't scratch the sensitive contacts, but it's got enough backbone to pry out compacted lint.
- A soft-bristled brush: A clean, old toothbrush or a small anti-static brush is brilliant for getting rid of any loose dust once the bigger bits are out.
- Compressed air (with caution): This can be a great finishing touch, but you have to use it the right way.
Critical Safety Tip: Whatever you do, do not use metal objects. Steer clear of paper clips, SIM-ejector tools, or needles. They can easily scratch the charging pins and, even worse, cause an electrical short that fries the port for good.
The Correct Cleaning Technique
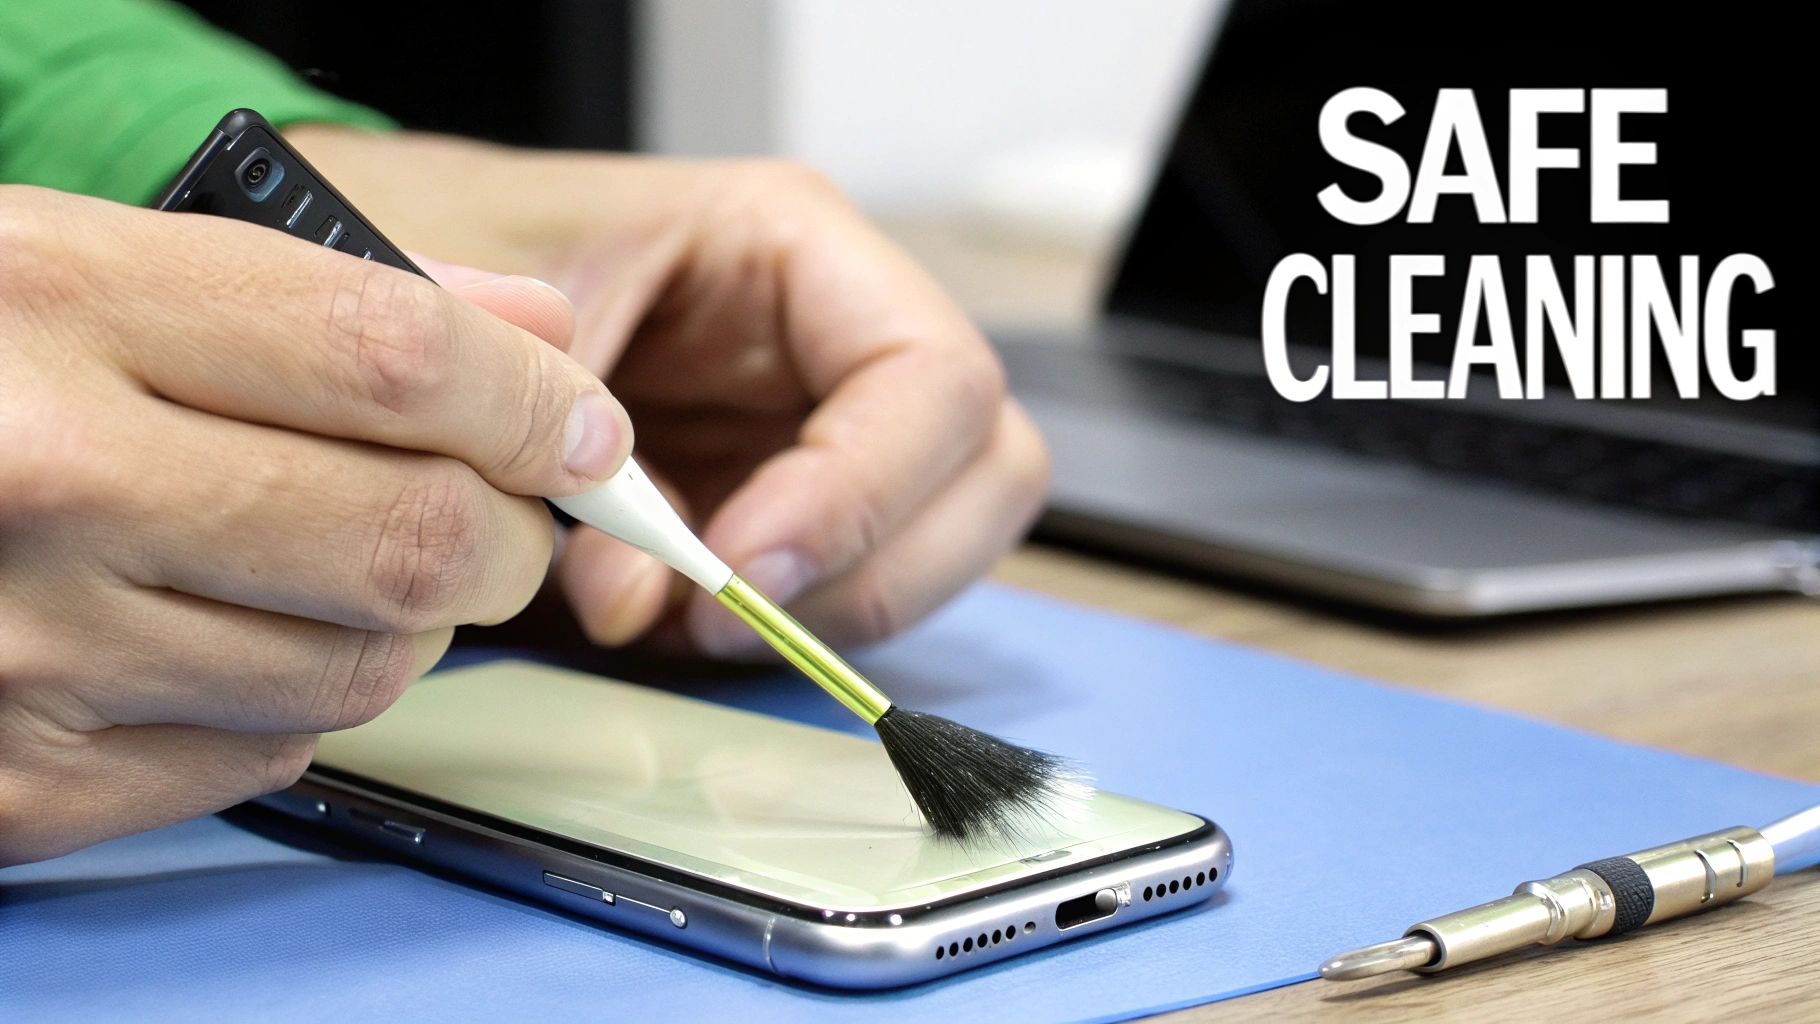
Before you even think about putting anything inside the port, turn your iPhone off completely. It's a simple step that removes any risk of causing an electrical short.
Now, take your wooden or plastic toothpick and very gently scrape around the inside walls of the charging port. The key is to be gentle and patient. You're trying to hook the debris and pull it out, not dig it out. Be especially careful to avoid putting any real pressure on the small row of gold pins.
Once you’ve removed the big clumps, you can use a can of compressed air to puff out the remaining dust. Make sure to keep the can upright and use very short bursts from a distance. If you tilt the can, the liquid propellant can spray out, which introduces moisture. And if you ever think liquid has gotten into your phone, knowing how to fix a water-damaged phone is essential.
After a thorough but gentle clean, turn your phone back on and plug it in. Nine times out of ten, this simple clear-out is all it takes to get things working perfectly again.
Assembling Your DIY iPhone Repair Toolkit
So, a good clean didn't do the trick. If you're feeling adventurous, replacing the charging port yourself might be the next logical step. But before you even think about popping open your iPhone, let's be clear: diving into its guts without the right gear is a surefire way to turn a small problem into an expensive paperweight.
Getting your tools and parts lined up first isn't just a suggestion; it's the most critical part of the whole process. You wouldn't try to bake a cake by guessing the ingredients, and you definitely shouldn't try to open an iPhone with a butter knife. Specialised tools are an absolute must.
Essential Tools For The Job
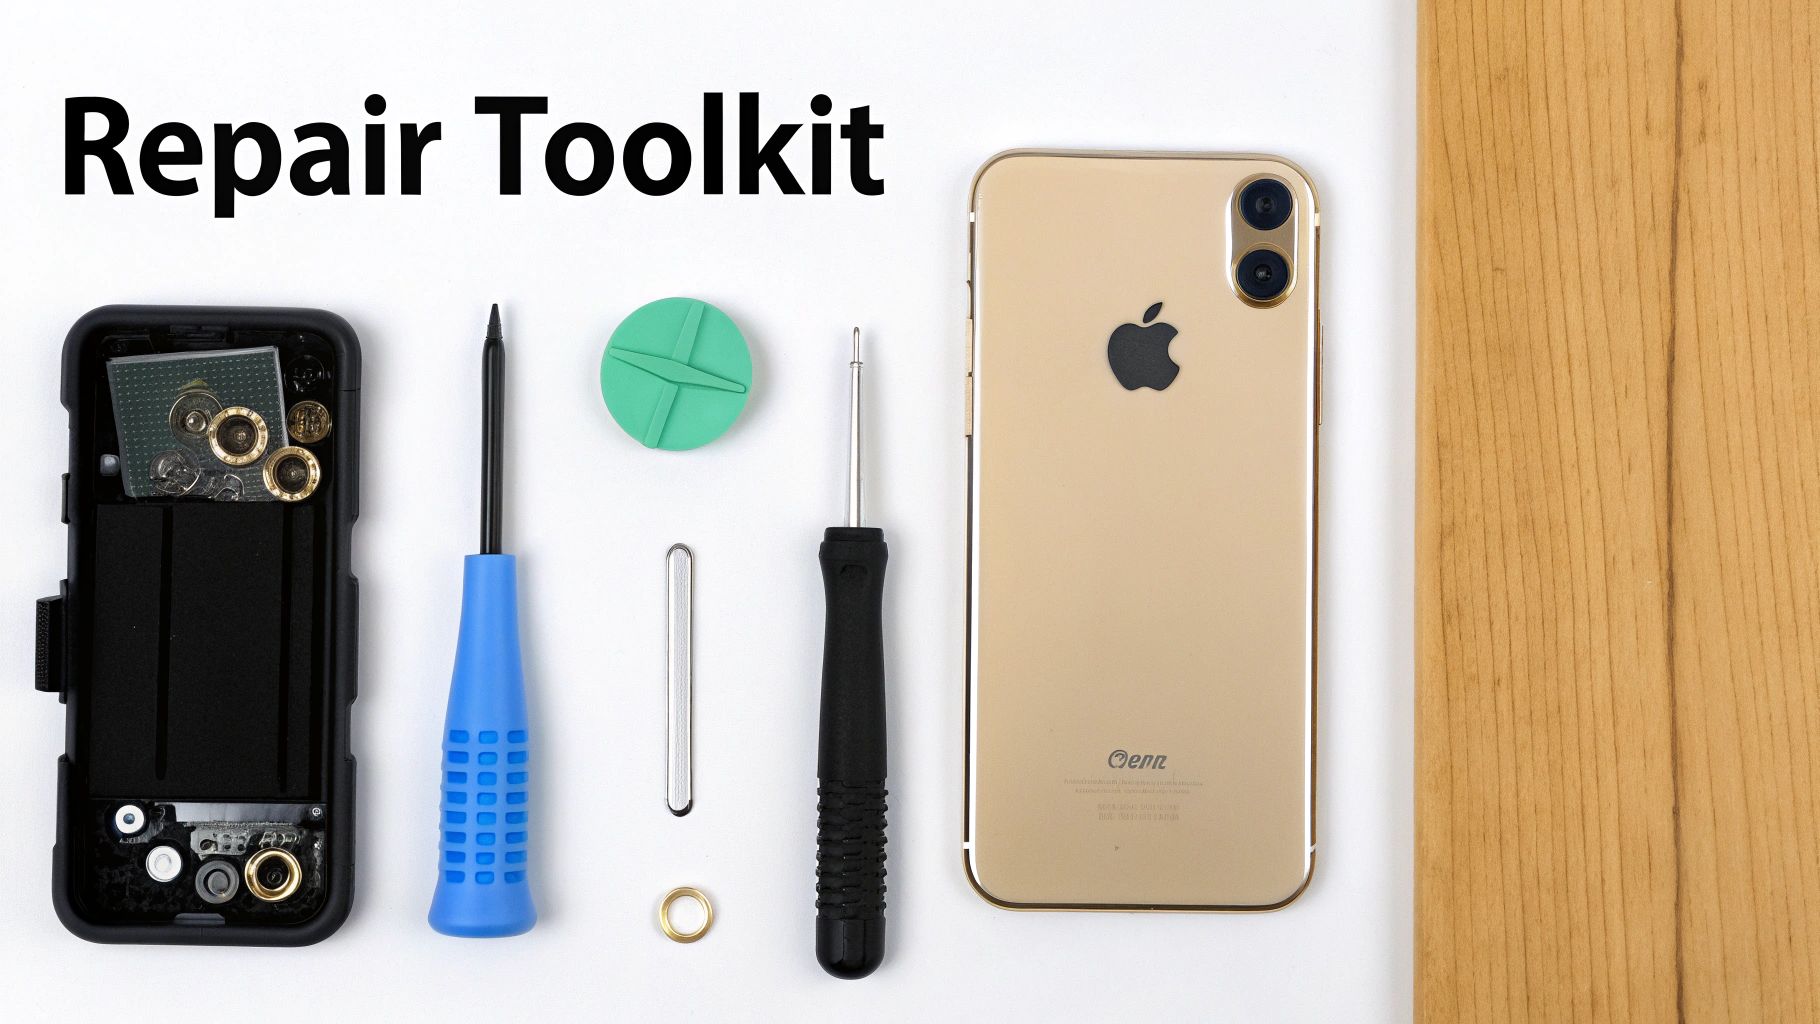
You don't need a professional-grade workshop, but a few key items are non-negotiable for this kind of delicate work. Thankfully, you can find most of what you need in affordable all-in-one repair kits online.
- Pentalobe Screwdriver (P2): Your ticket inside. This is specifically for those two tiny screws flanking the charging port. Nothing else will fit.
- Tri-Point Screwdriver (Y000): For models from the iPhone 7 onwards, you'll find these unique three-pronged screws inside, holding down important cable connectors.
- Plastic Spudger & Opening Picks: These are your best mates for safely prying the screen away from the frame and gently disconnecting those paper-thin ribbon cables without causing damage.
- Suction Cup: Essential for getting a firm, even grip on the screen to lift it just enough to get your opening pick started.
A well-lit, organised workspace is just as crucial as any tool. I can't stress this enough. Use a magnetic mat or even just some small containers to keep track of every single tiny screw. Losing one isn't just annoying; putting the wrong screw back in the wrong hole can permanently damage the logic board.
Sourcing a Quality Replacement Part
The success of your entire repair really comes down to the quality of the new charging port you install. The market is flooded with options, so it pays to know what you're looking for.
- OEM (Original Equipment Manufacturer): These are parts made by the same companies that supply Apple directly. They're top-tier in quality and reliability but can be trickier to find and will cost you more.
- High-Quality Aftermarket: This is the sweet spot for most DIYers. Reputable third-party suppliers make parts that are just as good as the originals, offering a great balance between performance and price.
- Cheap Knock-offs: Be very wary of those "too good to be true" prices on massive online marketplaces. These parts often use flimsy materials and poorly-made connectors, which can lead to the same charging problems—or worse—just a few weeks after you've done all the hard work.
Sourcing reliable gear is a universal principle, whether you're looking for suppliers for construction tools or tiny electronic components. Always check seller reviews and make sure there's a warranty. Spending a few extra dollars on a decent part now will save you the headache of having to do the entire repair all over again.
DIY iPhone Repair Toolkit Essentials
To make things easier, here’s a quick checklist of everything you'll need to tackle a charging port replacement. Think of this as your shopping list for a successful repair.
| Tool/Component | Primary Use | Estimated Cost (AUD) |
|---|---|---|
| Complete Repair Kit | Includes all necessary screwdrivers, spudgers, picks, and suction cup | $25 – $45 |
| Replacement Charging Port | The new part, specific to your iPhone model | $20 – $50 |
| Heat Gun / Hairdryer | To soften the adhesive holding the screen in place | $0 – $30 |
| Magnetic Screw Mat | Keeps tiny screws organised and prevents them from getting lost | $10 – $20 |
| Isopropyl Alcohol (99%) | For cleaning any leftover adhesive or residue | $5 – $10 |
Having these items on hand before you begin will make the entire process smoother and significantly increase your chances of a successful, stress-free repair.
A Look at the Charging Port Replacement Process
Thinking about replacing the charging port yourself? It’s a whole different ball game compared to just cleaning it out. While it’s definitely doable for someone with a bit of patience and a steady hand, you need to know what you’re getting into before you even touch a screwdriver. This isn't like changing a tyre; it's more like delicate surgery where one wrong move can have big consequences.
The exact process for replacing an iPhone charging port changes a fair bit from one model to the next. Older phones are often more forgiving, while newer ones can be a real headache. Still, the basic roadmap is pretty much the same across the board. Let's walk through the general stages so you know what to expect.
The Core Steps of the Repair
No matter if you're working on an old iPhone 7 or a newer iPhone 12, the fundamental journey from a broken port to a working one follows the same key milestones.
-
Getting the Screen Off: This is often the most stressful part. You’ll start by removing the two tiny screws at the bottom of the phone. Then, you'll need to gently heat the edges of the screen to soften the adhesive that keeps it waterproof. From there, it's a careful process of using a suction cup and thin plastic prying tools to lift the display without cracking the glass or damaging the screen itself.
-
Cutting the Power: This is a non-negotiable step. Before you do anything else, the battery must be disconnected. Forgetting this can lead to an accidental short circuit that could permanently damage the phone's main logic board, turning a simple repair into a complete disaster.
-
Removing the Faulty Port Assembly: The charging port isn't just one single piece. It's actually part of a complex ribbon cable that usually includes other important bits, like the main microphone. You'll need to meticulously undo several tiny screws and pop off a few delicate connectors to get the old assembly out.
-
Fitting the New Part: This is basically the removal process in reverse, but it demands even more care. The new charging port assembly has to sit perfectly in place. You need to make sure every connector clicks home securely and every single screw goes back exactly where it came from.
Here’s a piece of advice I can't stress enough: stay organised. A magnetic screw mat is your best friend for a job like this. Mixing up screws is a classic mistake, and putting a longer screw into a hole meant for a short one can punch right through to the logic board, causing irreversible damage.
How the Model Changes the Game
The difficulty of this repair really depends on how old your iPhone is. A job that's relatively simple on an iPhone 8 can be a nightmare on a newer model.
On older devices, like the iPhone 8, the charging port is a more self-contained part. It's still a fiddly job that requires attention to detail, but it's one of the more straightforward major repairs you can do.
Now, compare that to an iPhone 13 or anything more recent. The charging port is much more tightly integrated with other systems. Everything is packed in tighter, the ribbon cables are thinner and easier to tear, and there are more tiny brackets and shields to keep track of. One slip of a tool can easily rip a crucial cable, creating a much bigger problem. On these newer phones, patience isn't just a virtue—it's the most important tool you have.
When to Call a Professional for Your iPhone Repair
Trying a DIY fix on your iPhone can be a great feeling, but there's a fine line between a satisfying repair and a costly disaster. It’s absolutely critical to know when to put down the tools and call in someone with experience.
While giving the charging port a careful clean is one thing, a full replacement is a different beast altogether. You're suddenly navigating a minefield of fragile ribbon cables, tiny components, and microscopic screws. Pushing on without the right gear or a steady hand can quickly turn a simple fix into a much bigger, more expensive problem.
Honestly, knowing your own limits is probably the most important tool you have. If you open up your phone and immediately feel that sense of dread or uncertainty, that’s your cue to stop. The risk of stripping a screw, tearing a delicate cable, or shorting the logic board just isn't worth the few dollars you might save.
Understanding the Costs of Professional Repair
Let’s be real, the main reason most of us even consider DIY is the cost. So, what are you looking at for a professional charging port repair in Australia? It’s not a single, straightforward price. The final bill really depends on your iPhone model, how bad the damage is, and whether you head to an Apple Store or a trusted local repair shop.
In Australia, the cost for an out-of-warranty charging port fix can range from AUD $49 to AUD $329. Based on what specialists around the country publish, older models like an iPhone 8 tend to sit at the lower end of that scale, maybe around $49 to $99. But for the latest models with more complex, integrated parts, you could be looking at the high end, somewhere between $199 and $329.
This diagram gives you a simplified look at the steps a technician takes, from getting inside the device to swapping out the faulty part.
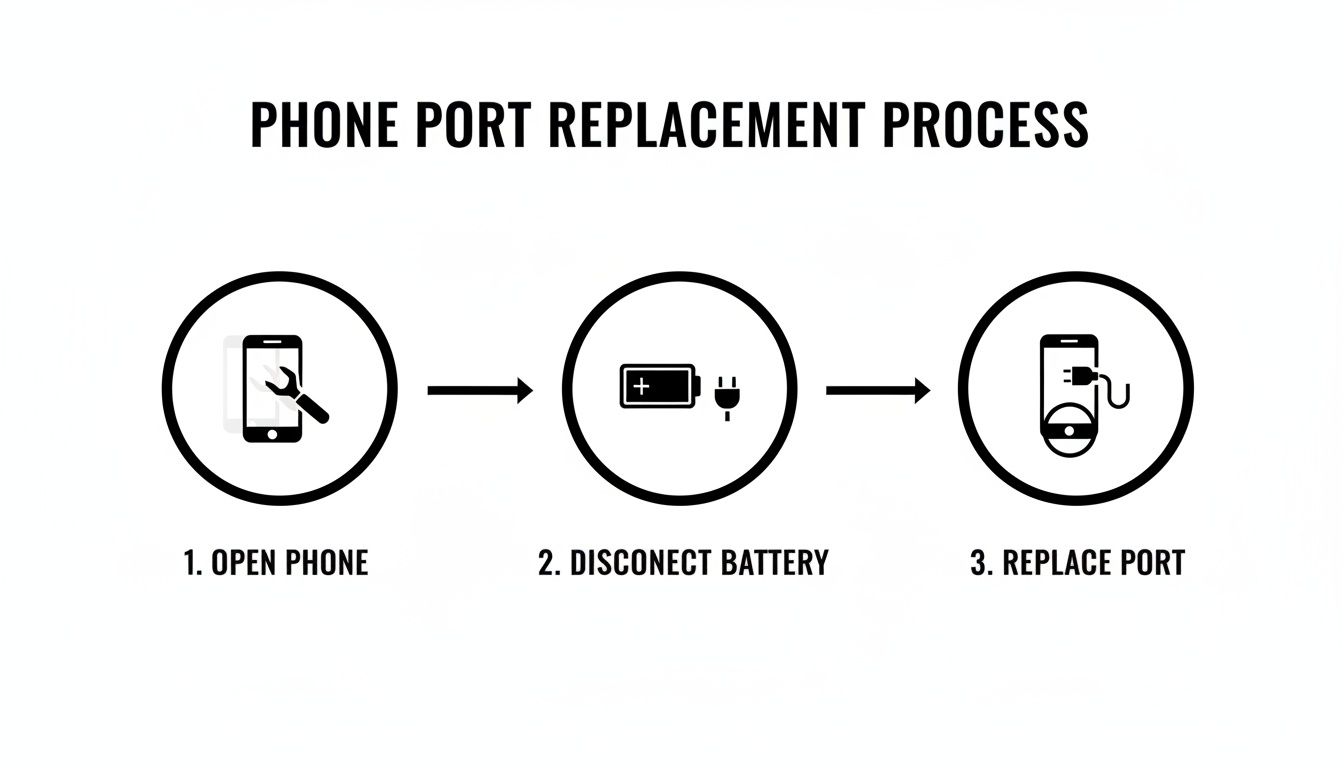
It really highlights why specialised tools and a bit of know-how are so important, especially for critical steps like safely disconnecting the battery before touching anything else.
Clear Signs It Is Time for an Expert
Sometimes, the phone makes the decision for you. Certain symptoms or situations are just too risky for a first-timer and need a professional eye to prevent making things worse.
- You Lack the Right Tools: If you don't have the proper pentalobe screwdrivers, plastic spudgers, and a gentle heat source, don't even think about improvising. Using a paperclip or a kitchen knife is a surefire way to cause permanent damage.
- A DIY Attempt Has Failed: Already gave it a shot and now the phone won't turn on, or new issues have cropped up? It's time to stop and let a pro diagnose the damage.
- There Are Signs of Water Damage: See any green or white crusty residue inside the port? That's corrosion, and it means the problem could go much deeper than just the port. You might be looking at logic board issues, which definitely require an expert. For that, you’d need someone who offers https://ctf.com.au/discover-reliable-electronic-board-repairs-in-balcatta-today/.
- You Simply Don't Feel Confident: Trust your gut. If the idea of prying open your expensive phone fills you with anxiety, the peace of mind that comes with paying a professional is worth every cent.
Ultimately, it comes down to balancing cost against risk. A professional repair not only gets the job done correctly with high-quality parts but also usually comes with a warranty. That’s a guarantee you just can’t give yourself.
And if it turns out your iPhone is beyond repair or you decide it’s time for an upgrade, make sure you handle the old device responsibly. Look into secure iPhone disposal and recycling services to ensure your data is wiped and the components are handled properly.
Common Questions About Fixing an iPhone Charging Port
After you've tried a few basic troubleshooting steps, it's completely normal to still have a few questions rattling around before you decide what to do next. Tackling an iPhone charging port repair can seem simple on the surface, but a few common worries often pop up when people are deciding between a DIY job and calling in a professional. Let's clear up some of the most frequent ones.
A big one we hear all the time is, "Are you sure it's not the battery?" The symptoms can definitely look similar, which is confusing. The main giveaway is this: a failing battery will usually still let the phone show that it's charging, even if it dies quickly or shuts down at 20%. On the other hand, a dodgy port often means you get an intermittent connection, or the phone doesn't even realise a cable is plugged in at all.
Another valid concern is what happens if a home repair goes pear-shaped. It's a smart question to ask. The biggest risk is accidentally wrecking something else inside the phone. You could easily tear a delicate ribbon cable, or even worse, damage the logic board by putting the wrong screw in the wrong hole. This can quickly turn a small, fixable issue into a very expensive, and sometimes unfixable, disaster.
Preventing Future Charging Dramas
Once your charging issue is sorted, you'll want to make sure you don't have to go through it all again. Luckily, preventing most charging port problems just comes down to forming a few good habits. These small tweaks can make a massive difference to the lifespan of your port.
- Ditch the cheap, uncertified cables: Always look for MFi (Made for iPhone) certified cables. They're built to Apple's standards, so they deliver a stable voltage and fit perfectly, which means less wear and tear on your port.
- Don't charge in steamy rooms: Charging your phone in the bathroom while you shower is a bad idea. All that moisture in the air can get into the port and cause corrosion over time.
- Watch out for pocket fluff: If your phone lives in your pocket, lint and dust are its mortal enemies. Think about getting a case with a port cover, or just give the port a quick glance every now and then to keep it clear.
Here's the key takeaway: a little bit of prevention is worth a pound of cure. The vast majority of charging port failures aren't due to some internal electronic fault; they're caused by physical gunk getting jammed in there or just rough handling. Treating your port with a bit of care is the best fix there is.
If a DIY repair attempt does unfortunately lead to bigger problems, like your data becoming inaccessible, it's time to call for professional help. In these situations, your best bet is to stop immediately to avoid causing more damage and look into options for reliable data recovery in Mirrabooka from technicians who know how to safely get your important files back.
At the end of the day, understanding these common issues helps you make a much smarter decision, whether that's doing a careful clean, attempting the repair yourself, or knowing when it's time to hand your phone over to the experts.
Whether you need a simple port cleaning, a full replacement, or help with a repair that didn't go as planned, the expert team at CTF Mobile Phones & Computer Repairs is here to help. We offer fast, reliable service with transparent pricing to get your iPhone working perfectly again. Visit us online at https://www.ctf.com.au to learn more or to book your repair.