
Before you even think about picking up a screwdriver, it's worth checking if the problem is software-based. It's the quickest and easiest thing to rule out. A simple graphics driver update, a quick look at your display settings, or even just rebooting the laptop can sometimes work wonders. If that doesn't clear things up, then you're likely looking at a hardware issue.
First Steps to Diagnose Your Laptop Screen Problem
Alright, let's play detective. A laptop screen can go wrong in a bunch of ways—it might flicker, get weird vertical lines, develop dead pixels, or just refuse to turn on at all. Nailing down the actual cause is crucial because it tells you whether you're in for a five-minute fix or a full-blown screen replacement.
I've seen it countless times: people jump to conclusions and end up wasting time and money. A screen that's completely black feels like a disaster, but it could easily be a software hiccup that a hard reset will solve in seconds.
Is It a Software or Hardware Fault?
Always start by ruling out the easy stuff. Software gremlins are way less hassle to deal with than physical repairs, so they should be the first things you check. You might be surprised how often one of these simple tricks gets the display working again without you ever having to open the laptop.
-
Update Your Graphics Driver: This is a big one. Outdated or corrupted graphics drivers are a common culprit for flickering, strange colours, and all sorts of visual glitches. Head straight to your manufacturer’s website—be it NVIDIA, AMD, or Intel—and grab the latest driver for your model.
-
Check Display Settings: Ever accidentally hit a key combo and had your screen go blank? It happens. You might have switched your projection mode to "Second screen only." Check your Windows display settings or use the function keys on your keyboard (often F4, F5, or F8) to cycle back to "PC screen only" or "Duplicate."
-
Perform a Hard Reset: This is the classic "turn it off and on again," but with a little more oomph. Shut down the laptop, unplug it from the wall, and take the battery out if you can. Now, press and hold the power button for about 30 seconds. This drains any leftover charge from the system. Pop the battery back in, plug it in, and see if it boots up normally.
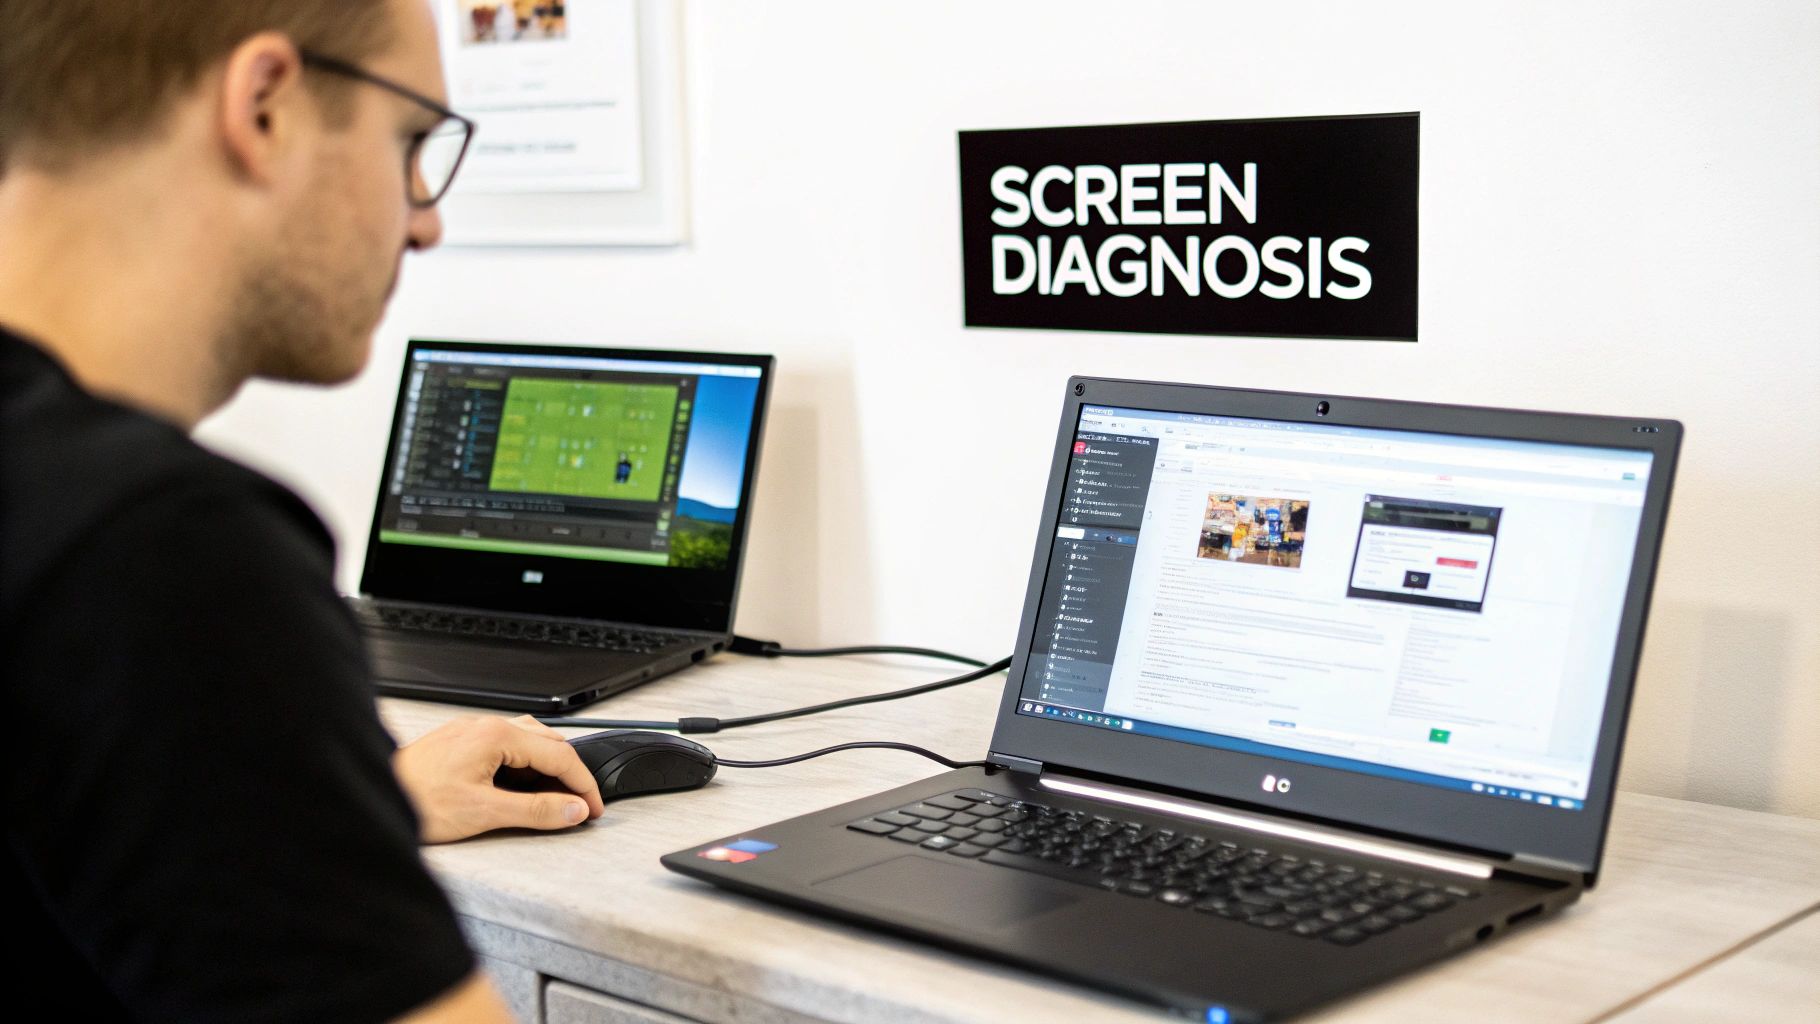
The Essential External Monitor Test
This next step is your single most powerful diagnostic tool: hooking up an external monitor. Grab a TV or another computer screen and connect it to your laptop with an HDMI, DisplayPort, or USB-C cable. This test will tell you exactly where the problem lies.
If the picture on the external monitor looks perfect, then you've successfully isolated the issue. The fault is almost certainly with your laptop's own LCD panel or the thin cable that connects it to the motherboard.
On the other hand, if the external screen shows the same distortion, lines, or flickering, then the problem is deeper—it's pointing to your laptop's graphics card or motherboard. For a more detailed breakdown, Mindmesh Academy has a solid guide on troubleshooting video projectors and displays.
A faulty graphics card usually means the whole motherboard needs replacing, which is a seriously complex and often expensive repair. If you find yourself in that boat, looking into professional electronic board repairs in Balcatta is a much smarter move than attempting a DIY fix that could do more harm than good.
Getting Your Toolkit Ready
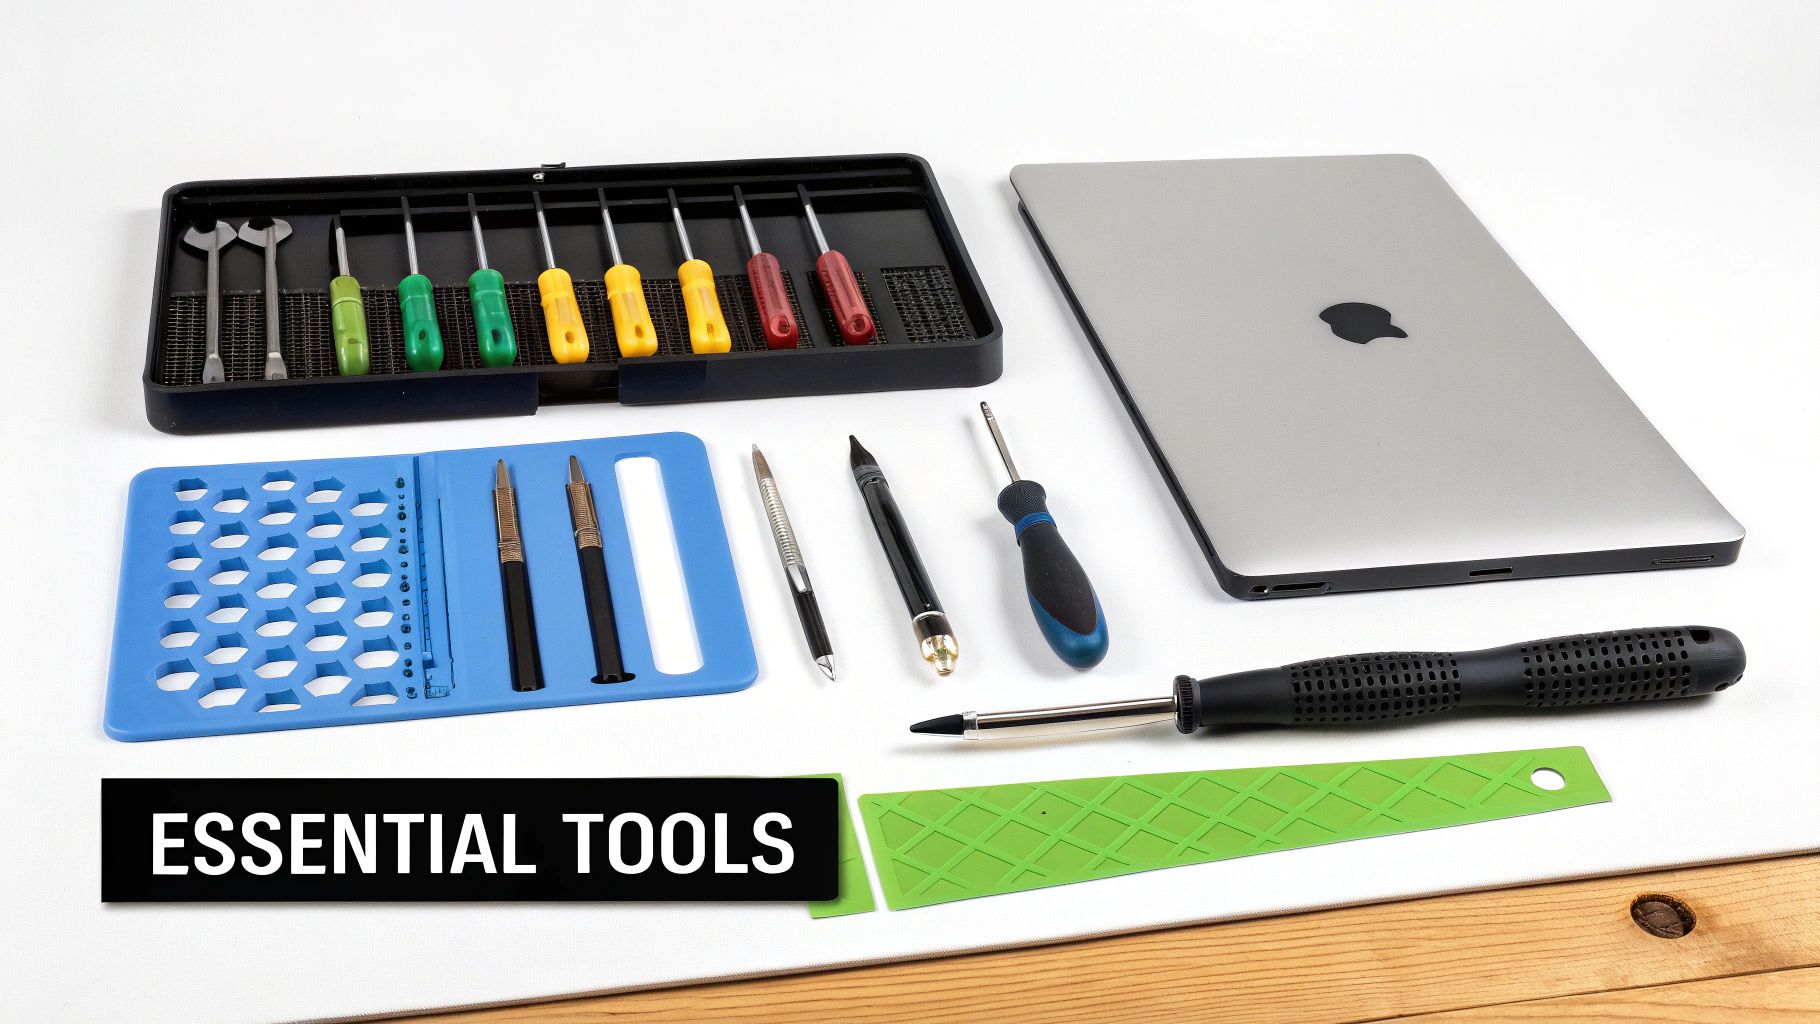
Before you even think about starting, let’s talk tools. Trying to fix a laptop screen with the chunky screwdriver from your kitchen drawer is a recipe for disaster. Trust me, I’ve seen the aftermath. A successful repair isn't about having the most expensive gear; it’s about having the right gear to do the job cleanly and safely.
The absolute essentials are a set of precision screwdrivers—laptop manufacturers are obsessed with tiny Phillips head screws. Just as crucial are some plastic pry tools, often called spudgers. These will be your best mates when it comes to separating the screen bezel from the lid without leaving a trail of scratches and broken plastic clips.
Your Core Repair Essentials
Working on any modern electronics, especially a delicate laptop screen, means you have to be mindful of electrostatic discharge (ESD). A tiny zap you can't even feel is more than enough to fry sensitive components. It’s worth looking into proper ESD Workspace and Storage Solutions to create a safe repair environment.
Here’s a practical list of what you should have on hand:
- Precision Screwdriver Set: You'll want a kit with a good variety of small bits. A Phillips #00 or #000 will likely be your go-to, but you never know what you might find.
- Plastic Spudgers & Pry Tools: These are non-negotiable for popping open the bezel. Using anything metal is a guarantee you’ll scratch the plastic.
- Fine-Tipped Tweezers: Incredibly useful for grabbing and guiding tiny ribbon cable connectors or picking up a screw you’ve dropped into a tight corner.
- Magnetic Project Mat: This is an absolute lifesaver. It gives you a place to map out exactly where each tiny screw came from, so you’re not left with mysterious extras at the end.
A Few Helpful Extras
These aren’t strictly necessary, but they can make life a lot easier. A small suction cup can be a huge help for gently lifting the old glass panel out, especially on models without much of a lip to grab onto.
Also, a heat gun on its lowest setting (or even a hairdryer) can be great for softening any stubborn adhesive holding the bezel in place. A little bit of warmth can make it come away much more easily.
The real goal here is to leave no trace. Using the right tools means your laptop will look just as good as it did before the repair, but with a perfectly working screen. After you’ve put in all that work, it’s a smart move to protect it. Check out options like a modern hydrogel screen protector to keep the new panel safe from future knocks and scratches.
Finding the Right Replacement Screen for Your Laptop
Ordering the wrong part is one of the most frustrating, time-wasting mistakes you can make in a DIY laptop repair. You end up with a useless component, your laptop is still in pieces, and you're back to square one. Let's make sure that doesn't happen by zeroing in on the one piece of information that guarantees a perfect match.
Your laptop's make and model—say, a Dell XPS 13 or an HP Spectre x360—is a good place to start, but it’s not enough to order the right screen. It’s a common trap people fall into. Manufacturers often use several different panel suppliers for the exact same laptop model. This means the connectors, mounting brackets, and even the panel's thickness can vary wildly. Relying solely on the laptop model is a gamble you don’t want to take.
The only foolproof way to get it right is to find the specific part number on the back of your original LCD panel. Yes, this means you need to have the broken screen out of the laptop lid first, but it's the only way to be absolutely certain. This number is the unique identifier for that specific panel.
What to Look For on the Label
Once you have that part number, you can start searching online. You’ll quickly notice a bunch of other technical details tied to it. It’s worth understanding what these mean because they affect both compatibility and how the screen will look and perform.
- Size and Resolution: This one’s a no-brainer—it has to be an exact match. A 15.6-inch panel simply won't physically fit in a 14-inch chassis. Likewise, a laptop designed for a 1080p (1920×1080) screen won't properly drive a 4K panel.
- Video Connector: This is probably the most critical technical detail. The vast majority of modern laptops use either a 30-pin or 40-pin eDP connector. If you order a screen with the wrong pin count, you won't be able to plug it in. It’s as simple as that.
- Finish: This often comes down to personal preference. Glossy screens tend to have more vibrant, punchy colours, but they can be a nightmare with reflections in bright rooms. A matte screen is fantastic at cutting down glare, making it a better choice if you often work near windows or outdoors.
A quick tip from experience: Once you have the screen out, snap a clear photo of the entire label on the back with your phone. This little step prevents typos and ensures you have all the details—like the manufacturer (e.g., LG, AU Optronics, BOE) and the full part number—handy when it's time to place your order.
Before you start shopping, it helps to have a clear checklist of what you're looking for. These are the non-negotiable specs you need to match.
Key Screen Specifications to Match
| Specification | Why It Matters | Where to Find It |
|---|---|---|
| Model/Part Number | This is the unique identifier for the panel, guaranteeing an exact match for all other specs. | Printed directly on the label on the back of the original screen. |
| Size (in inches) | The replacement must be the same physical size to fit inside the laptop's lid and bezel. | Often part of the model number, or listed separately on the label. |
| Resolution (pixels) | The new screen must have the same native resolution (e.g., 1920×1080) as the original. | Usually listed on the label or found by searching the model number online. |
| Video Connector Type | The connector (e.g., 30-pin eDP) must match your laptop's cable, or it won't connect. | Visually inspect the connector on the back of the panel or look up the model number. |
Matching these details precisely is the secret to a successful, stress-free repair. Getting any one of them wrong will almost certainly lead to incompatibility.
Where to Buy Your New Screen
With the correct part number in hand, you're ready to find a reliable supplier. My advice is to look for specialised laptop parts retailers rather than just jumping on a big marketplace like Amazon or eBay. Specialist shops usually have better quality control, more knowledgeable support staff, and a better handle on their inventory.
Always take a minute to read reviews for the seller. Look for specific comments on shipping (was it well-packaged?), quality, and whether other buyers received an exact match or a "compatible" model.
A trustworthy seller will be upfront about whether they are shipping the identical part number or a compatible equivalent. While compatible screens often work perfectly fine, sticking to the exact original part number eliminates any risk and is always the safest bet. That attention to detail is what separates a smooth fix from a frustrating ordeal.
A Visual Guide to Replacing Your Laptop Screen
Alright, you've got your tools laid out and the new screen is on its way. Now for the hands-on part. This is where people often get a bit nervous, but trust me, taking it slow and being methodical is the key to a smooth repair. I'll walk you through everything, from the crucial first safety steps to the final power-up, so you'll feel confident the whole way through.
The absolute golden rule before you even think about touching a screw is to kill the power. Trying to work on live electronics is the fastest way to cause a short circuit, which can fry your motherboard or other delicate components in an instant.
Essential Safety Preparations
First things first, unplug the laptop from its charger and disconnect any USB devices, external monitors, or anything else plugged into it. The next step is non-negotiable: you must disable the internal battery.
Most modern laptops have internal batteries you can't just pop out. You'll need to open the bottom case to get to it. For older models with a removable battery, it's as simple as unlatching it and setting it aside. If it's internal, you'll need to open up the main body of the laptop and carefully unplug the battery's connector from the motherboard. Don't skip this—it protects you and your device.
Pro Tip: After you’ve disconnected the battery, press and hold the power button for about 15-20 seconds. This is a great little trick that drains any leftover electricity hiding in the system's capacitors, making it even safer to work on.
Removing the Old, Damaged Screen
With all power safely cut, you can finally turn your attention to the screen assembly. The first thing you'll need to deal with is the thin plastic frame that runs around the edge of the screen—this is called the bezel.
To make sure you get the right replacement, you need to know three key things about your old screen. This little guide breaks it down.

This just hammers home the point: checking the laptop model, the physical size of the screen, and the exact type of connector is the only way to be certain you’ve ordered the right part.
Popping Off the Bezel
Most bezels are held on by a bunch of hidden plastic clips, though some also have tiny screws tucked away under little rubber pads. Grab a plastic pry tool (a spudger is perfect) and start gently working your way around the edge. I usually start at a top corner.
You'll hear a series of little "pops" as the clips let go. Go slow here. Trying to rush it is the number one way to snap a clip, which is a real pain.
Once the bezel is free, you'll see the LCD panel itself. It's usually held in a metal frame by four or more small screws, typically two on each side. Carefully take these out and keep them organised—this is where a magnetic mat really comes in handy. With the screws gone, the panel will be loose, and you can gently lay it face down onto the keyboard.
Be really, really careful at this point. The screen is still attached to the motherboard by a very delicate, flat ribbon cable. We call this the video cable or eDP cable, and it's the most fragile thing you'll handle during this entire job.
Disconnecting the Video Cable
The connector for the video cable is almost always secured with a small piece of tape and has a tiny latch or clip holding it in place. Use tweezers or the tip of your spudger to gently lift the tape, then flip up the little locking bar on the connector itself.
Once that latch is up, the cable should slide out with practically zero effort. Whatever you do, don't pull or yank on this cable. You can easily damage the tiny pins inside or even tear the cable, turning a simple screen swap into a much bigger headache.
With the old screen fully disconnected, set it aside. This is the perfect time to grab your new panel and do a side-by-side comparison. Double-check that the mounting brackets, the screw holes, and especially the video connector are all an exact match. This one last check can save you a world of frustration.
Installing the New Screen and Testing
Putting the new screen in is basically just doing everything in reverse. Gently slide the video cable back into the connector on the new panel until it feels fully seated. Then, press the locking latch back down to clamp it in place. You can use the original piece of tape to secure it further.
Now, before you snap everything back together, it's a very good idea to do a quick test. Carefully reconnect the battery (just the connector, you don't need to screw the bottom case on yet), plug in the power adapter, and hit the power button. The new screen should light up and show the boot logo. This quick check confirms the new panel is working and you’ve connected it correctly.
If it all looks good, disconnect the power and battery one last time. Now you can carefully place the new panel back into its metal frame and put the mounting screws back in. Snap the plastic bezel back on, working your way around the edges until all the clips click into place. Finally, reconnect the battery for good, screw the bottom case back on, and you’re done
DIY vs. Professional: Making the Right Call for Your Screen Repair
So, you’ve pinpointed the problem and found the right replacement screen. That’s a huge step, but now you’re at a fork in the road. Do you roll up your sleeves and tackle the repair yourself, or is it time to call in the professionals? Just because you can doesn't always mean you should, and this decision really comes down to weighing up the cost, the risk, and your time.
The biggest pull towards a DIY fix is, without a doubt, the cost. When you do it yourself, your only major expense is the new screen and maybe a few tools. This can easily save you a hundred dollars or more on what a shop would charge for labour, which is pretty tempting. To get a better handle on the numbers, our guide on laptop screen repair cost breaks it all down.
But that saving isn’t free. You need to factor in your own time and, more importantly, the very real risk of making things worse. One clumsy move with a screwdriver or yanking a fragile video cable the wrong way can turn a simple screen swap into a nightmare involving a new motherboard.
When to Leave It to the Pros
Some repairs are just not worth the headache for a first-timer. If your laptop is a high-end ultrabook, has a fiddly touchscreen, or features a screen that's literally glued into the frame, the difficulty level skyrockets. These jobs demand specific tools and a steady hand that only comes with experience.
It’s probably best to find a professional if you're facing one of these scenarios:
- Touchscreen or Digitiser Models: These screens have extra layers and connectors that are incredibly easy to break if you don't know exactly what you're doing.
- High-End or Brand-New Laptops: When your device is still under warranty or has a high price tag, the financial fallout from a mistake is just too great.
- Glued-In Panels: Many modern thin-and-light laptops use strong adhesive instead of screws. Getting these panels out requires heat guns and patience to avoid cracking the new screen or the bezel.
Deciding between a DIY approach and hiring an expert involves several trade-offs. This table breaks down the key considerations to help you make an informed choice.
DIY vs Professional Repair Comparison
| Factor | DIY Repair | Professional Service |
|---|---|---|
| Cost | Lower, as you only pay for parts and tools. | Higher, includes parts, labour, and overhead. |
| Time | Can be time-consuming, especially for first-timers. | Quick turnaround, often same-day or next-day service. |
| Risk | High. Potential to cause further damage to cables or the motherboard. | Low. The repair shop assumes liability for any damage during the repair. |
| Warranty | Only the part might have a warranty; no guarantee on the workmanship. | Typically includes a warranty on both the part and the labour, giving you peace of mind. |
| Tools | May require purchasing specialised tools you might only use once. | No need to buy any tools; the shop has everything required. |
| Complexity | Best suited for older, non-touchscreen models with screw-in panels. | Necessary for complex jobs like touchscreens, glued-in panels, and high-end models. |
| Skill Level | Requires patience, attention to detail, and comfort with electronics. | No technical skill required on your part. |
| Satisfaction | High personal satisfaction from a successful repair. | Convenience and the assurance of a job well done. |
Ultimately, this comparison highlights that the 'best' option depends entirely on your specific situation, your device, and your personal comfort level with technical tasks.
Understanding the Repair World
When you pay a professional, you're not just paying for their time; you're buying peace of mind. A good repair shop will offer a warranty covering both the new screen and their work. If that screen develops a fault a month down the line, it's on them to fix it, not you. That guarantee is a huge part of what you’re paying for.
The electronics repair industry is pretty interesting. Globally, authorised service centres have traditionally dominated, holding an estimated 68.1% of the market's revenue in 2023. But independent shops are catching up, with a projected annual growth rate of around 5.4%. We see this in Australia too, where local independent shops are often the go-to for common jobs like screen replacements because they can do it quickly and at a great price. You can dive deeper into these consumer electronics repair and maintenance market trends if you're curious.
In the end, it’s a personal calculation. If you’ve got a straightforward, older laptop and you genuinely enjoy a technical challenge, doing it yourself can be a really satisfying project. But if the stakes are high or the repair looks complicated, paying a professional is a smart investment for a guaranteed, quality result.
Answering Your Laptop Screen Repair Questions
Even when a repair goes smoothly, you're bound to have a few questions rattling around. Let's dig into some of the most common things people ask after fixing a laptop screen, so you know exactly what to expect.
A flickering screen is a classic sign of trouble, but it doesn't always mean the panel itself is a goner. More often than you'd think, the culprit is just a loose video cable. Before you even think about ordering a new screen, it’s worth taking the time to open up the laptop and reseat the cable connector. Check it on both the motherboard and the back of the panel itself – a firm connection can sometimes fix the flicker instantly.
Can I Upgrade My Screen During a Repair?
This is a great question, and one I get asked a lot. The answer is a definite "maybe." While you've got the laptop open, it’s tempting to think about swapping that standard HD screen for a shiny Full HD (1080p) one, or maybe ditching the glossy finish for a matte panel. Good news – it's often doable, but only if you meet a few critical conditions.
The new screen has to be a perfect match in a few key areas: the physical dimensions, the mounting points, and the video connector type (like a 30-pin eDP, for example) must be identical to the original. You’ll have a much better chance of success upgrading the resolution than you will changing the underlying screen technology. For instance, trying to go from a standard screen to a touchscreen is almost always a non-starter because the laptop just doesn't have the internal hardware to support it.
A very common and successful upgrade I've seen is swapping a basic 1366×768 panel for a 1920×1080 one within the same laptop model family. But my advice is to always jump on some forums and research your specific laptop model first. See if other people have managed the same upgrade before you spend any money on parts.
Is Repairing an Old Laptop Worth It?
This is the big one. Deciding whether to fix an older laptop or just bite the bullet and buy a new one can be a tough call. I always tell people to use the 50 percent rule as a guide. If the total repair cost—that’s parts plus what your time is worth, or a professional's fee—creeps over half the price of a similar new laptop, it’s probably time to invest in a new machine.
You also have to look at the laptop's overall health. If it's already struggling with other problems like a dying battery, a painfully slow hard drive, or it can't keep up with modern software, sinking money into a new screen is likely just putting off the inevitable.
But if you've got a well-looked-after machine and the broken screen is its only problem? A repair can easily breathe a few more years of life into it, making it a brilliant and cost-effective choice.
If any repair feels a bit beyond your comfort zone, or if you just want a guaranteed, professional result, the team at CTF Mobile Phones & Computer Repairs is here to help. We offer expert screen replacements and computer services all across Perth. Learn more and book your repair at ctf.com.au.