
More than just a quick wipe of the screen, properly cleaning dust from your computer means shutting it down, opening it up, and carefully using compressed air in short bursts to clear out fans and heatsinks. This simple bit of maintenance is crucial for preventing overheating, which is the number one cause of sluggish performance and hardware failure.
Why Dust Is Your Computer's Silent Killer
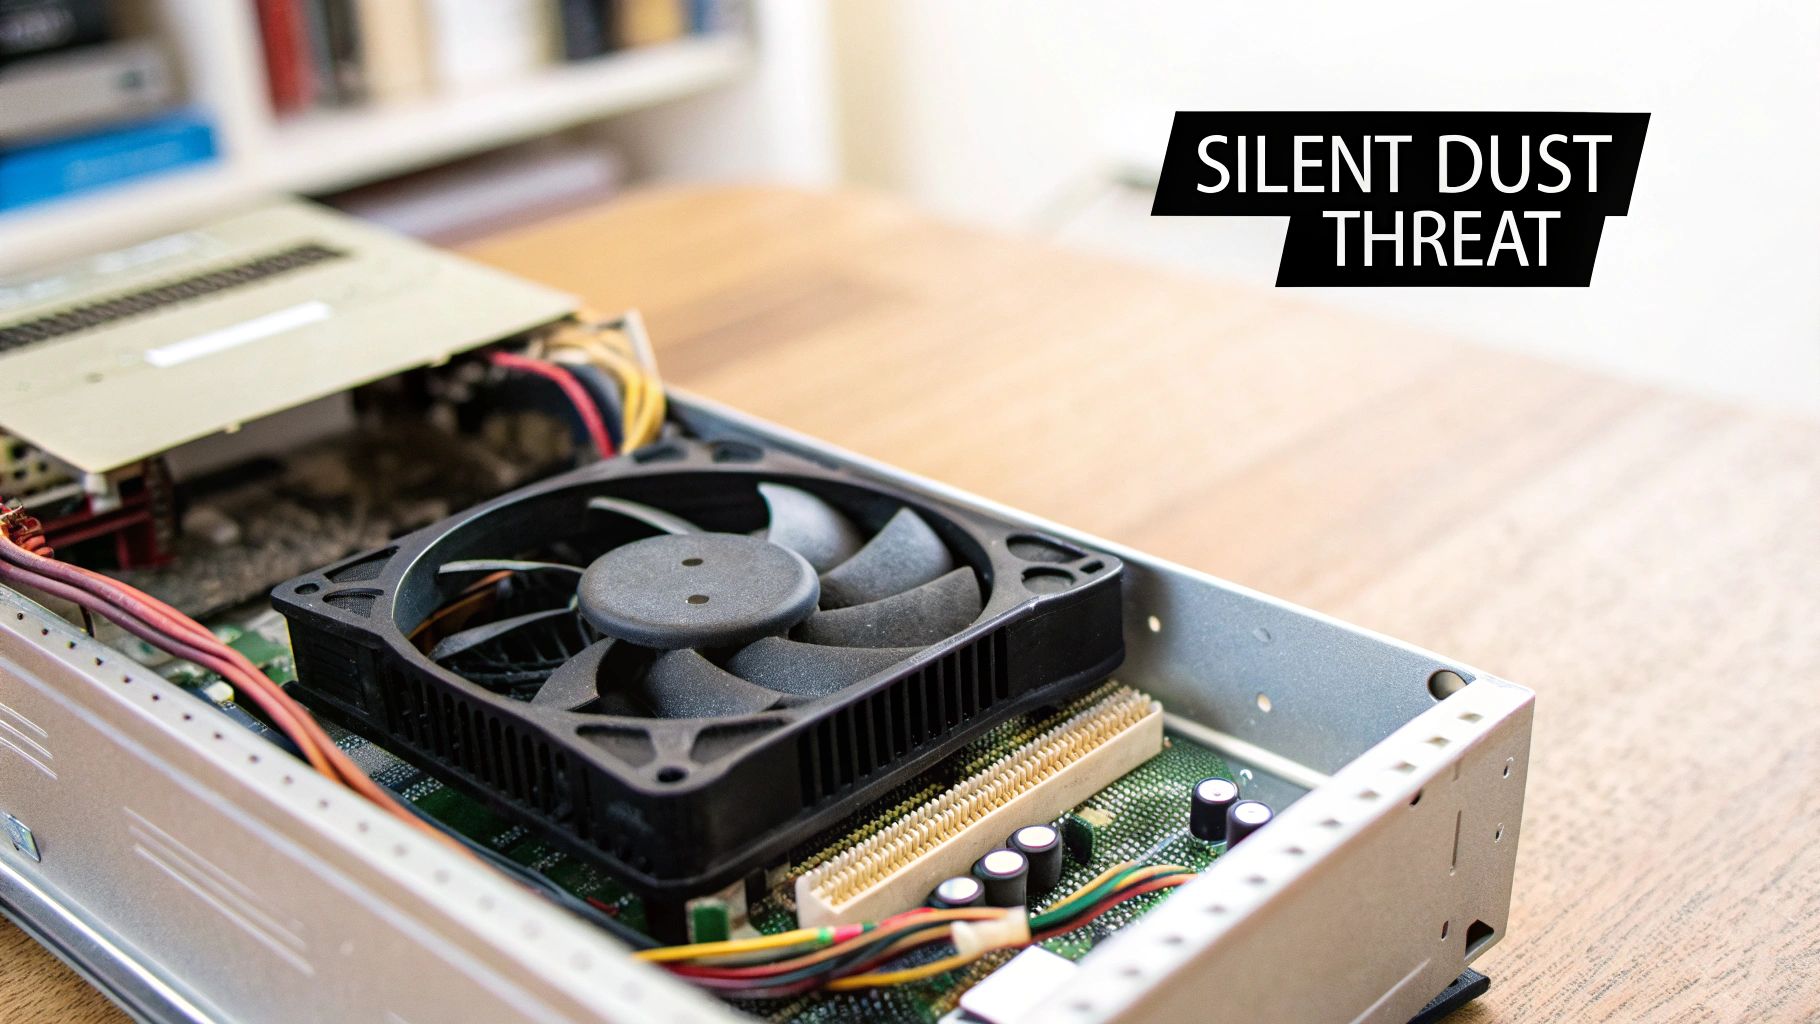
Before you reach for the air can, it helps to understand why a bit of fluff can cause such major headaches. Think of dust as a thick, insulating blanket wrapped around your computer's most critical parts. Your PC is built to cycle air—pushing hot air out and pulling cool air in—but that blanket of dust traps heat, forcing every component to work harder and run hotter.
This isn't just a small annoyance; it's a direct threat to your computer's health. When parts like the processor (CPU) and graphics card (GPU) get too hot, they automatically slow themselves down to prevent permanent damage. This process is called thermal throttling, and it’s the reason a dusty computer often feels sluggish, crashes mid-game, or struggles with everyday tasks.
The Real-World Impact of Dust Buildup
The consequences of letting dust build up aren't just theoretical. I've seen it firsthand with clients in Perth's northern suburbs like Balga and Kingsley, where the dry climate and fine particles create a perfect storm for PC problems. In these areas, it's not uncommon for a desktop to start overheating within 12 months if left uncleaned. In fact, some estimates suggest this impacts 70-80% of uncleaned desktops in similar environments. You can read more on how dust impacts office tech in Australia.
The warning signs that your machine is suffocating are often subtle at first, but they quickly become hard to ignore. Keep an eye out for these red flags:
- Loud Fan Noise: Do your computer fans sound like a jet engine taking off, even when you're just browsing the web? That's them working overtime to fight the heat.
- Performance Drops: Are your game's frame rates suddenly plummeting? Do your programs become unresponsive for no reason? This is a classic symptom of thermal throttling.
- Unexpected Shutdowns: If your PC shuts down without warning, it's often a last-ditch safety measure to prevent catastrophic heat damage.
A clean computer isn't about looks; it's about performance and reliability. Regular cleaning is the single most effective bit of preventative maintenance you can do to protect your investment and keep it running as well as the day you bought it.
Ultimately, that fuzzy buildup you see caked onto fan blades and heatsinks directly shortens the lifespan of your hardware. By learning how to clean the dust out of your computer, you aren't just doing a chore—you're actively extending the life of your machine.
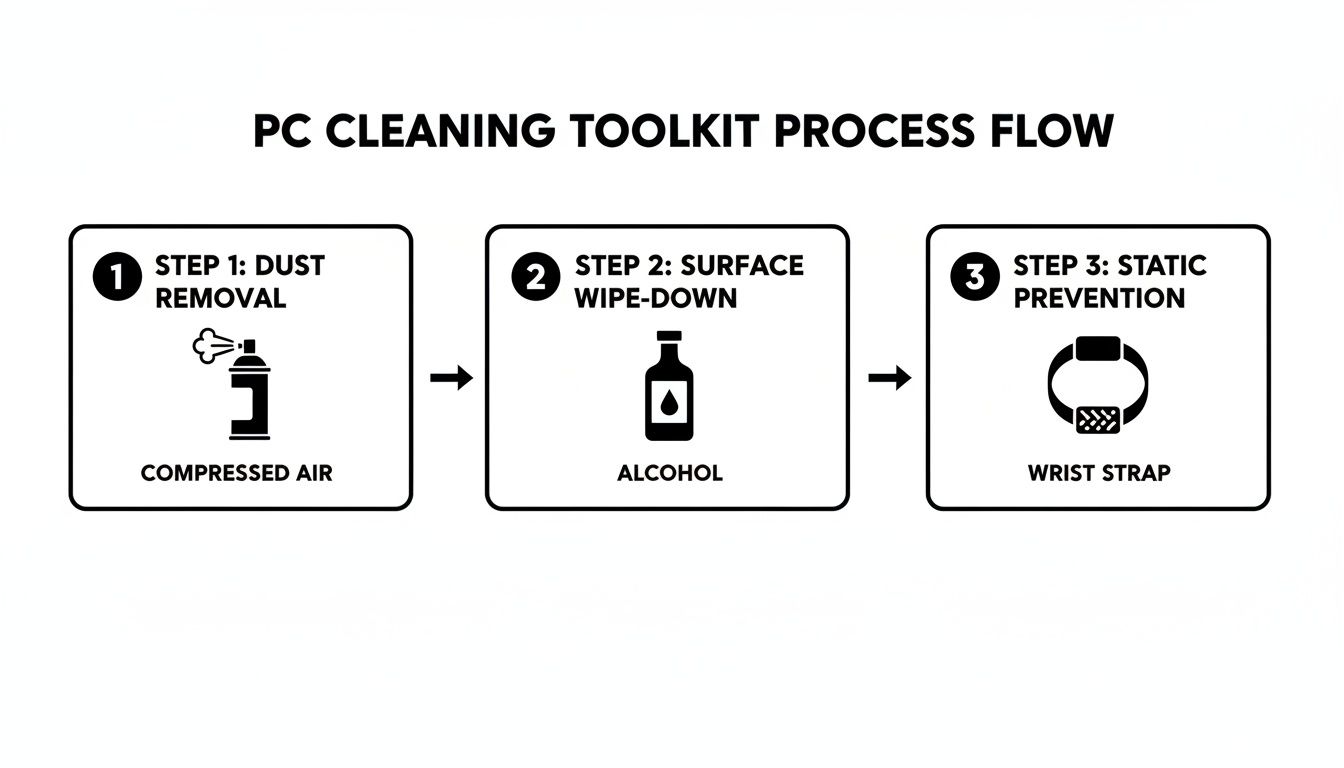
Putting Together Your PC Cleaning Toolkit
Getting the right tools for the job is what separates a quick, successful clean from an afternoon of frustration—or worse, a costly mistake. Before you even think about opening up your computer case, you need to assemble the right gear. This is about more than just grabbing a rag; it's about using specific items designed to be safe around delicate electronics.
Your number one tool will be canned compressed air. It’s brilliant for blasting dust out of heatsinks, fan blades, and all those little nooks and crannies without actually touching anything. The trick is to use it in short, sharp bursts. If you just hold the trigger down, you risk spraying liquid propellant, which can instantly damage your components.
Next up, you’ll want some high-percentage isopropyl alcohol (90% or higher) and a handful of lint-free cloths or cotton swabs. This combination is perfect for getting rid of that sticky, caked-on grime you sometimes find on fan blades or heatsinks. The high alcohol percentage means it evaporates almost instantly, leaving no residue behind. For grabbing loose dust in those tricky spots, specialised disposable dusting cloths can also be a huge help.
Keeping Your Components Safe
There's one piece of kit that is absolutely non-negotiable if you’re working inside your PC: an anti-static wrist strap. That tiny spark of static electricity you can generate just by walking across a carpet is more than enough to permanently kill your motherboard, RAM, or graphics card. The strap grounds you, safely funnelling any static charge away from your precious hardware.
Think of an anti-static wrist strap as your insurance policy. For just a few dollars, it protects hardware worth hundreds or even thousands. It's a tiny investment for total peace of mind.
To give you a clearer picture of what's involved, it's worth looking at how a basic home toolkit stacks up against the specialised equipment a professional would use.
DIY vs Professional Cleaning Tools
A standard kit from home will get you through regular maintenance, but a professional service brings in specialised gear to tackle a much deeper, more thorough clean.
| Tool | DIY Purpose | Professional Advantage |
|---|---|---|
| Canned Air | Good for dislodging surface dust. | An electric data-vac provides a powerful, continuous, and moisture-free stream of filtered air, preventing propellant spray. |
| Cotton Swabs | Useful for cleaning fan blades. | Anti-static brushes with soft bristles can safely scrub dust from circuit boards and tight spaces without risk. |
| Lint-Free Cloth | Wiping down larger surfaces. | Microfibre cloths are used for external surfaces, while specialised tools tackle internal grime build-up more effectively. |
While a basic set of tools is perfectly fine for routine upkeep, a pro uses equipment designed to safely remove every last speck of dust from even the most hidden parts of your machine.
A Practical Walkthrough for Cleaning Your Desktop PC
Right, let's get our hands dirty—or rather, dusty. Diving into your PC's internals might seem a bit intimidating, but I'll walk you through how to turn this crucial task into a simple, satisfying project. The real secret to a safe and successful clean is all in the preparation.
First things first, shut down your computer completely. I don't mean sleep mode; go through the proper 'Shut Down' process and wait for all the lights and fans to stop. Next, find the little switch on your power supply unit (PSU) at the back of the tower and flick it to the 'Off' position. For good measure, unplug the main power cord from the wall.
With the power sorted, it's time to disconnect everything else. Unplug your monitors, keyboard, mouse, speakers—the lot. Now, carry the tower to a spot where you won't mind a bit of a dust storm. A garage, a balcony, or even just an open area with good ventilation is perfect. Trust me, you don't want all that gunk floating around your office.
Opening the Case and Identifying Key Areas
Now for the fun part. Most modern PC cases are designed for easy access, usually with a side panel held on by a couple of thumbscrews at the back. Just give them a twist, and the panel should slide right off.
Once you're inside, you’ll quickly see where the dust loves to hang out. You're hunting for any component with a fan, as these are the main air-movers and, by extension, the biggest dust collectors.
Your main targets will be:
- The CPU Cooler: That’s the big heatsink and fan combo sitting right on top of your motherboard. It's a magnet for dust.
- The Graphics Card (GPU): This is usually the beefiest card plugged into your motherboard, and it’ll have its own fans, typically on the underside.
- Case Fans: You'll find these at the front, back, and sometimes the top of the case, pulling cool air in and pushing hot air out.
- Dust Filters: A lifesaver in modern cases. These are removable mesh screens, often found at the front or bottom, designed to catch the worst of the dust before it even gets inside.
This gives you a good idea of the process: we'll be blasting away dust, wiping down surfaces, and making sure we do it all safely.
The Correct Cleaning Technique
Grab your can of compressed air. Before you point it anywhere near your expensive components, give it a quick test spray away from the PC. This clears out any liquid propellant that might have settled in the nozzle.
Now, here’s a pro tip: when you’re cleaning the fans, never let them spin freely.
Use one finger to gently hold the fan blades still while you spray. If you let the compressed air spin them like a pinwheel, you can easily damage the fan's bearings or—even worse—generate a small electrical current that could zap your motherboard.
Use short, controlled bursts of air to blow dust off the fan blades and out from between the fins of the heatsinks. You'll probably see a satisfying cloud of dust erupt—this is exactly why we're doing this in a well-ventilated spot! Give the CPU cooler and the GPU extra attention, as a clogged-up heatsink is one of the most common culprits behind overheating.
This isn't just something we do for home computers; it's standard practice in professional environments. Think about data centres in a place like Perth, where some server rooms can have up to 10,000 dust particles per cubic foot. Here at CTF, we take those high-stakes principles and scale them down for everyday users, recommending you pop the case open for a clean every 3-6 months. In Australia's climate, this kind of regular maintenance is non-negotiable, as a thick blanket of dust can easily raise component temperatures by as much as 20°C. You can read more about how critical cleanliness is for data centres on mintcleaning.com.au.
After you've tackled the main components, pull out those dust filters. Most of them slide or click out easily. Give them a good rinse under a tap, let them dry completely, and then pop them back in. Finally, blast any dust that's settled on the bottom of the case before sliding the side panel back on and hooking everything up again. Job done.
Tackling Dust in Laptops and Gaming Consoles
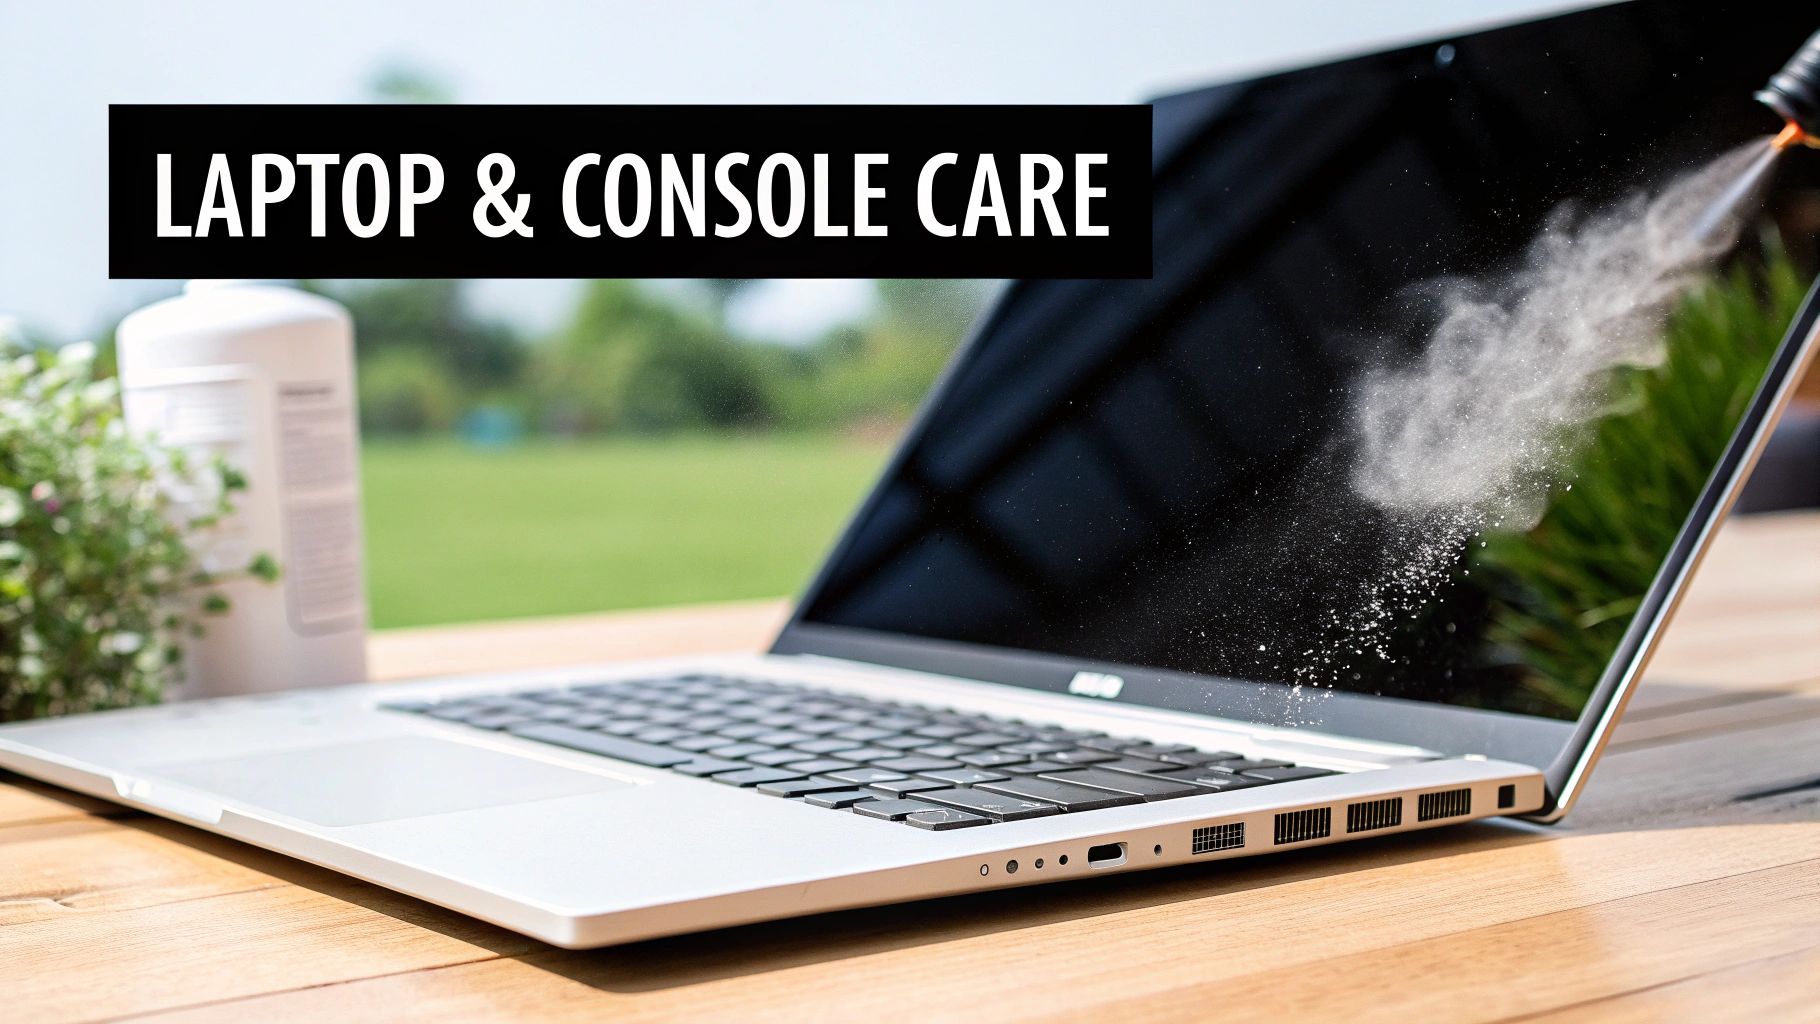
While desktops are fairly easy to get inside, laptops and gaming consoles like the PlayStation and Xbox are a different story altogether. Their tight, complex designs are fantastic at trapping dust, eventually turning your sleek machine into a miniature oven. Popping open a desktop tower is one thing, but a full teardown on a laptop is a risky job for a beginner—it's way too easy to break a delicate plastic clip or strip a tiny screw.
Because of this, we're going to focus on safe, external cleaning you can do yourself without a specialised toolkit. The good news is this is often all you need to sort out most common overheating issues.
Clearing Out Vents and Ports
Your main goal here is to clear the airways. Laptops and consoles suck in cool air and push out hot air through a series of small vents. Over time, these vents get clogged with a thick, felt-like mat of dust that completely chokes the airflow. Your best mate for this job is a can of compressed air.
First things first: completely shut down the device and unplug it from the wall. Take it somewhere well-ventilated—outside is perfect if you can. Now, have a good look and find all the ventilation ports. You'll usually find them on the sides, back, or bottom of the device.
Here's how to do it right:
- Always keep the can upright. Tipping it can spray out liquid propellant, which you definitely don't want.
- Stick to short, controlled bursts of air. A long, continuous blast isn't any more effective and just wastes air.
- Point the straw into the exhaust vents. This forces the dust back out the way it's supposed to go, clearing the path through the intake vents.
Blasting air directly into the intake vents can sometimes just jam the dust deeper inside, so always concentrate on the exhaust ports first. Don't be surprised if you see a big puff of grey dust fly out—that’s a fantastic sign you're clearing the blockage. This one simple trick can make a massive difference to your device's cooling.
Safely Cleaning Keyboards and Screens
A grimy screen and sticky keyboard can make any device feel old and unpleasant to use. To clean a laptop keyboard, use the same short bursts of compressed air at an angle to blow out crumbs and dust from under the keys. For the gunk on the keys themselves, a microfibre cloth lightly dampened with isopropyl alcohol works wonders. Just never spray any liquid directly onto the keyboard itself.
For the screen, a clean, dry microfibre cloth is usually all you need. If you're dealing with stubborn fingerprints, lightly spray a screen-safe cleaning solution onto the cloth—not the screen—and wipe gently in a circular motion.
If your gaming console is still overheating after a solid external clean, it probably points to a bigger problem. Dust can get wedged deep inside on the main heatsink, and that's a fix that requires a full teardown to sort out properly.
Here at our workshop in Perth, we see it all the time: laptops from students and gaming consoles from local enthusiasts running dangerously hot. While an external clean is a great first step, sometimes the internal buildup is just too much to handle from the outside. If your PlayStation sounds like it's about to take off, it might be time for a professional touch. Our team has the right tools and years of experience with these delicate jobs. You can find out more about how we fix game consoles and get them running cool and quiet again.
This careful approach means you can boost your device's performance without risking damage to your valuable electronics.
Simple Habits to Keep Your Computer Cleaner for Longer
Giving your computer a good, thorough clean feels great, but the real secret is stopping so much dust from getting in there in the first place. A few simple habits can make a huge difference, meaning you won't have to pull your PC apart nearly as often. These aren't complicated technical tricks, just smart, practical adjustments to your computer's surroundings.
The most impactful change you can make? Get your PC tower off the floor. Seriously. Floors, especially carpeted ones, are magnets for dust, pet hair, and all sorts of other gunk. When your PC sits on the ground, its intake fans act like a vacuum cleaner, sucking all that debris straight inside.
Just lifting it a few centimetres onto a small stand, or even a sturdy block of wood, can drastically cut down on dust intake.
Optimise Your Computer’s Location and Airflow
Where you put your computer is just as important as how high it sits. Try to avoid shoving your PC tower into a tight, enclosed cabinet or pushing it flush against a wall. Your components need room to breathe and push hot air out.
As a rule of thumb, I always recommend leaving at least 10-15 centimetres of open space around the back and sides of the tower. This gives the exhaust fans a clear path to expel heat, preventing it from just circulating back into the system. Better airflow doesn't just mean a cooler PC; it also means less stagnant air for dust to settle in.
Here’s another quick win: tidy up your cables. That tangled mess of wires behind your desk is a perfect dust trap and can seriously block airflow. Spend a few minutes bundling them with some cable ties or a sleeve. It looks neater and helps your machine breathe easier.
Think of your PC's environment as its first line of defence against dust. A clean, open space with good airflow is less hospitable to the kind of buildup that chokes your fans and overheats your components.
Choose Your Hardware Wisely
If you’re in the market for a new PC or planning an upgrade, pay close attention to the case you choose. A fantastic feature in many modern PC cases is the inclusion of removable dust filters. These fine mesh screens sit over the main air intakes—typically at the front, top, and sometimes the bottom of the case. Their entire job is to catch the bulk of the dust before it ever gets near your precious internals.
When you're shopping, look for a case where these filters are easy to get to. The best ones just slide out or are held on by magnets. This makes cleaning them a breeze; you can just pop them out, give them a quick rinse under the tap every few weeks, and you’re done.
Trust me, this five-minute job is infinitely easier than a full-blown internal deep clean and is one of the most effective ways to keep your computer running cool and looking brand new on the inside.
When to Skip the DIY and Call a Professional
Doing your own regular clean-up is fantastic for keeping your machine in good nick, but sometimes you’ve got to know when to call it quits and bring in an expert. Recognising when to put down the can of compressed air can be the difference between a quick fix and a costly mistake.
The most obvious sign? When you’ve done a thorough clean and the problems are still there. If your computer continues to run hot or the fans sound like they’re preparing for takeoff, it's a safe bet the dust is hiding somewhere you can't get to. It could be packed deep inside the power supply unit (PSU) or wedged underneath the motherboard itself.
Red Flags That Signal a Professional Is Needed
Weird noises are another massive red flag. A fan that’s rattling, grinding, or making a clicking sound isn't just dusty—it's likely a sign the bearings are on their way out. Blasting it with air won't solve a mechanical failure; in fact, you could make things worse.
Honestly, sometimes it just comes down to confidence. If you’ve spent a small fortune on your rig and the thought of prying it open gives you anxiety, there's no shame in leaving it to a pro. A professional service, like we offer at CTF, uses proper anti-static equipment and has seen it all before, so we can do a complete teardown without risking your hardware.
Overheating is a serious issue that shouldn't be ignored. A professional clean isn't just about dust; it's about diagnosing the root cause of heat-related problems to prevent long-term component damage.
This is particularly true if you live in a high-pollution urban area. A 2022 survey found that 75% of desktops in these environments build up enough dust quarterly to cause a 30% drop in performance. Our own data from 2024 backs this up, showing that 40% of our 1,200 annual computer repairs were directly caused by overheating from dust buildup. You can read more on the impact of airborne particles in these cleaning industry statistics for Australia.
So, if you’re facing stubborn heat issues or hearing worrying noises, making the call for expert help is the smart move. It’s a similar story for gaming consoles, where a proper clean requires a full disassembly. You can see more about how we handle that in our guide to gaming console repair near you. At the end of the day, a professional service gets the job done safely and thoroughly, giving you complete peace of mind.
Common Questions About Cleaning Your PC
Even with a detailed guide in hand, it’s completely normal to have a few questions rattling around. Let’s go through some of the queries we get all the time from customers to help you tackle this job with confidence.
How Often Should I Clean My Computer?
For most people, giving your PC a good internal clean every 6 to 12 months is a solid starting point.
But that’s not a hard-and-fast rule. Think about where your computer lives. If your desktop tower is sitting on a carpet, or you share your space with a furry friend who loves to shed, you’ll probably want to pop the case open and check for dust every 3 to 6 months. Your PC will usually give you a heads-up when it's struggling—if the fans are suddenly roaring to life or your temperatures are creeping up, it’s definitely time for a clean.
Can I Use My Household Vacuum?
I’m going to be blunt here: absolutely not. Your household vacuum is basically a static electricity generator on wheels.
That little spark you sometimes feel is more than enough to zap and permanently destroy delicate components like your RAM, motherboard, or GPU. It’s a huge gamble for very little payoff.
Stick to the right tools for the job. Canned compressed air or an anti-static data vacuum are the only truly safe ways to clear out dust from inside your computer.
While this guide is all about the dust inside, keeping the outside clean matters too. If you’re dealing with a grubby monitor, you can find some great advice on how to effectively clean your computer screen to get it looking new again.
Is It Safe to Remove Components?
If you’re comfortable tinkering with PC hardware, then yes, taking out parts like the graphics card and RAM sticks will let you get into every nook and cranny for a much more thorough clean.
The key is to do it safely. Always wear an anti-static wrist strap, and when you handle components, hold them by the edges of the circuit board. Never touch the gold contacts. If that sounds a bit daunting, don't risk it—cleaning carefully around the components is a much safer option.
Sometimes, performance issues are more than just dust. A professional can diagnose underlying problems and even help with things like data recovery after a component fails. You can learn more about our process for reliable data recovery in Mirrabooka and how we treat sensitive hardware.
At CTF Mobile Phones & Computer Repairs, we live and breathe this stuff. If you're not up for a DIY clean or you're running into issues that a bit of dusting can't fix, visit our website to see how our expert technicians can get your machine running like new.