Before you even think about picking up a screwdriver, it's worth remembering that most HP laptop fixes start with the basics. Simple things, like running a hardware diagnostic or just making sure the power is completely disconnected, can often solve the problem or at least point you in the right direction. From my experience, a successful repair is about preparation and safety, not just technical wizardry.
Starting Your HP Laptop Repair Journey Safely
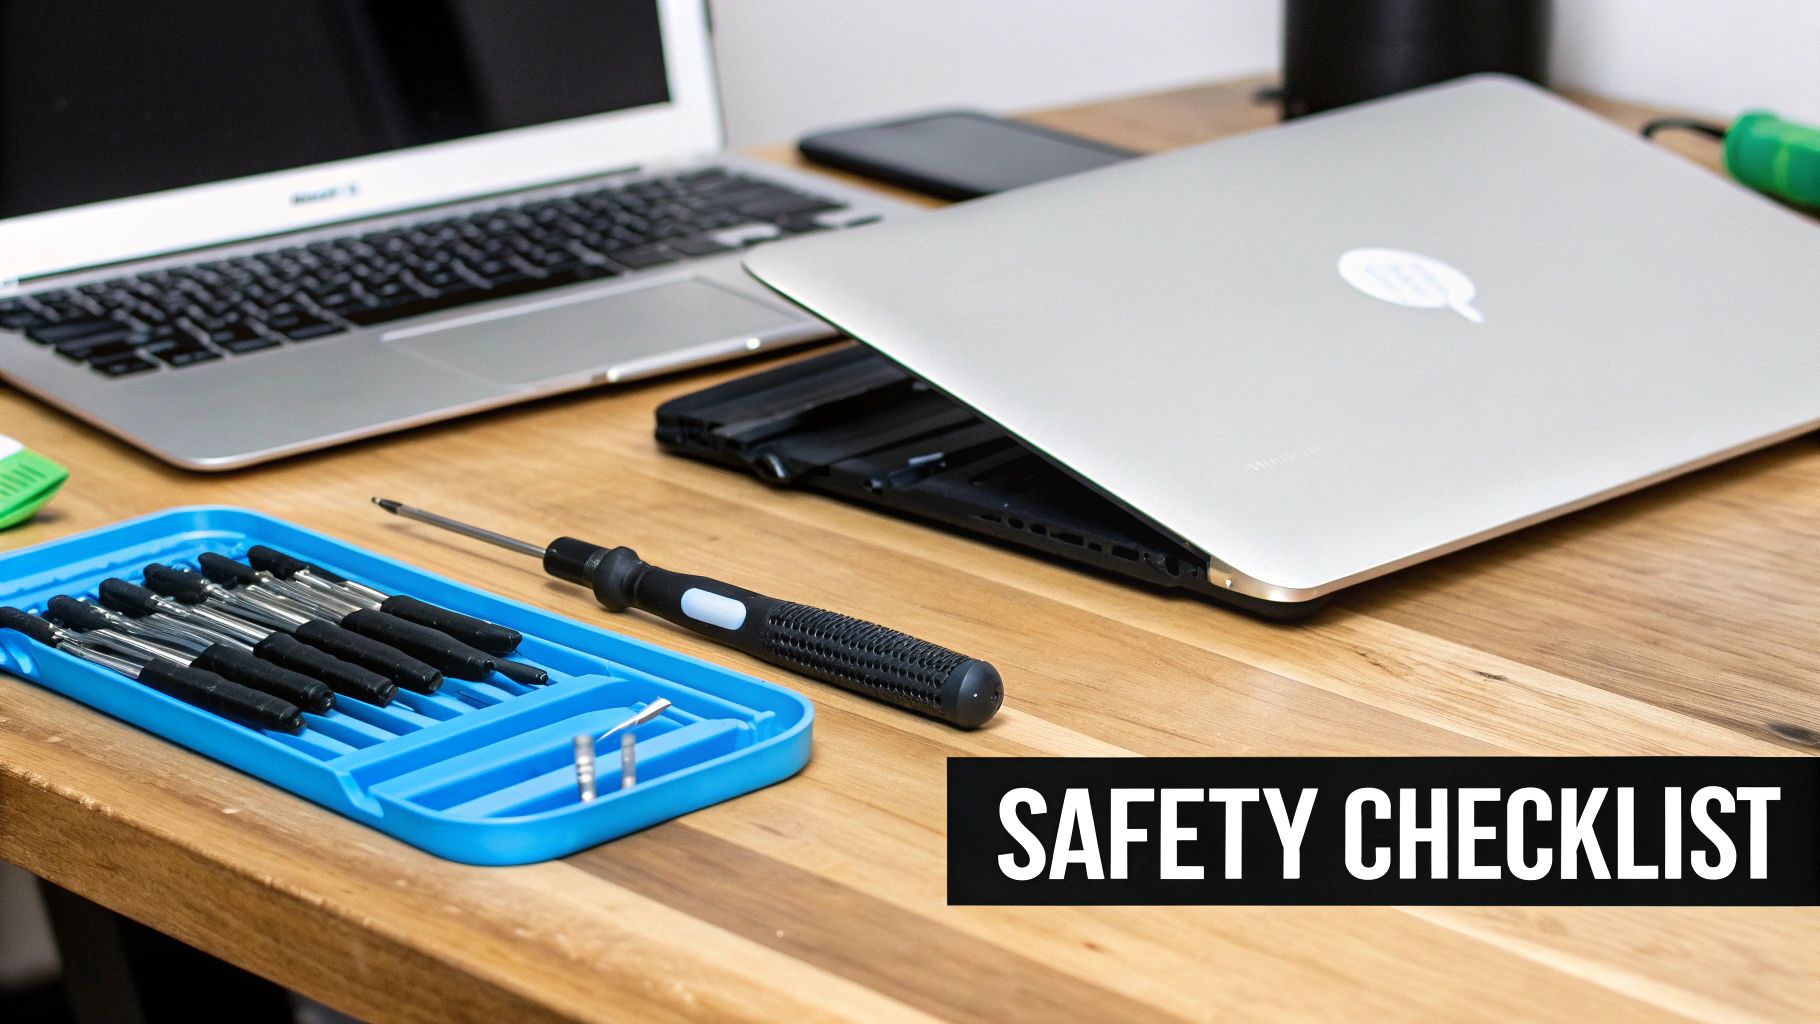
Before you dive in, taking a moment to set up your workspace and grab the right tools can be the difference between a five-minute fix and a five-hundred-dollar mistake. It’s all about creating a methodical process to protect both yourself and your laptop’s sensitive internals.
One of the most common missteps I see is people jumping in without properly identifying their device. Every HP laptop has a specific model or product number, usually on a sticker on the bottom. That number is your golden ticket—it gets you the right tutorials, the correct replacement parts, and disassembly guides that actually match your machine. Trust me, trying to follow a guide for a different model is a recipe for disaster.
Essential Tools and Safety Precautions
You don’t need a full-blown workshop, but a few items are non-negotiable for most hardware repairs. Having them ready from the start stops you from reaching for something that could cause damage, like using a butter knife to pry open a plastic case (I've seen it happen!).
Here’s your basic DIY toolkit:
- Precision Screwdriver Set: Laptops are full of tiny screws, often Phillips and Torx heads. A decent set is an absolute must.
- Plastic Prying Tools (Spudgers): These are critical for safely popping open the plastic clips on the laptop's chassis without leaving gouges or breaking them.
- Anti-Static Wrist Strap: This simple little thing grounds you, preventing an electrostatic discharge (ESD) from frying sensitive components like the motherboard or RAM.
Safety isn't optional; it's a hard requirement. A single static shock, which you might not even feel, can permanently destroy your laptop's electronics. Always disconnect the battery and power adapter, then ground yourself before touching anything inside.
With your tools laid out, the next priority is your data. If your laptop can still turn on, do a full backup before you attempt any physical repairs. If it won't boot, things get trickier. If you think the hard drive has failed, tinkering with it could make data loss permanent. In that case, looking into reliable data recovery in Mirrabooka before you start could be the most important step you take.
Quick Diagnostic Checklist for Common HP Laptop Issues
Before you grab your tools, running through a quick mental checklist can often narrow down the problem without needing to open the case. This table is a good starting point for that initial triage.
| Symptom | First Action | Likely Culprit |
|---|---|---|
| Laptop won't turn on (no lights) | Check the charger with another device; try a different power outlet. | Faulty charger, dead battery, or motherboard power issue. |
| Screen is black but power lights are on | Connect to an external monitor via HDMI. | Failed screen/backlight, loose internal display cable, or GPU fault. |
| Overheating and loud fan noise | Check for blocked air vents; listen to ensure the fan is spinning. | Dust buildup, failing fan, or dried-out thermal paste. |
| Extremely slow performance | Run HP's built-in diagnostics; check Task Manager for high CPU/disk usage. | Failing hard drive/SSD, malware, or insufficient RAM. |
This quick check helps distinguish between a simple fix and something that might require a deeper dive.
Distinguishing Software from Hardware Issues
Not every problem needs a screwdriver. A lot of performance hiccups, boot errors, or just plain weird behaviour can be caused by software glitches, malware, or a corrupted operating system. A great first step is to use HP's own built-in diagnostic tools.
To get there, first, shut down your laptop completely. Turn it back on and immediately start tapping the Esc key until a startup menu appears. From there, you can usually press F2 to launch the HP PC Hardware Diagnostics. Running a full system test here can tell you if your hard drive, RAM, or another component is failing, giving you a clear path forward.
Getting to the Bottom of Common HP Laptop Faults
Before you even think about picking up a screwdriver, you need to put on your detective hat. The first, and most important, step in fixing any HP laptop is figuring out exactly what's gone wrong. A good diagnosis will save you a world of pain, not to mention time and money. It's easy to jump to conclusions, but a methodical approach is your best bet because many symptoms can point to a few different culprits.
Let's tackle the one that causes the most panic: the laptop that's completely dead. You hit the power button and get nothing back. No lights, no whirring fan, just… silence. It’s natural to assume the worst, like a fried motherboard, but honestly, that’s rarely the case. Always start with the simplest thing—the power supply. Look at the charger. Is its little light on? Is it firmly plugged into the wall and the laptop? It sounds basic, but you'd be surprised how often a busted power adapter is the problem. It's a cheap and easy fix.
If the charger checks out, your next suspect is the battery. For older models with a removable battery, pop it out, plug the laptop directly into the wall, and try turning it on again. If it boots up, congratulations, you just need a new battery. For newer HPs with an internal battery, it's a bit more involved, but the logic is the same. You're simply trying to rule out the power source before assuming something more serious has failed.
Slowdowns, Strange Noises, and What They Mean
What about a laptop that works, but has slowed to a painful crawl? This is an incredibly common frustration. While it’s tempting to blame ageing hardware, the real villain is often software bloat or a nasty bit of malware. A quick way to check is by opening the Task Manager (just press Ctrl + Shift + Esc). Take a look at what’s hogging your CPU, RAM, and disk resources. If you spot unfamiliar programs using up a lot of power, it’s time for a deep virus and malware scan.
Of course, slow performance can definitely be a hardware problem, especially if your HP is still running on an old-school mechanical hard drive (HDD). Listen carefully. Can you hear a faint but regular clicking or grinding noise? That's the infamous "click of death"—a crystal-clear sign that your hard drive is about to fail.
That clicking sound is an emergency siren for your data. Power the laptop down immediately. At this point, your priority isn't fixing the laptop; it's saving your photos, documents, and files from disappearing forever.
Dealing with potential data loss can be daunting. It's a good idea to consult a guide to data recovery to see what your options are before things get any worse. The best long-term solution here is to replace the failing drive with a Solid-State Drive (SSD). Not only does it fix the problem, but it will make your old laptop feel brand new again.
Dealing with Overheating and Screen Problems
Is your HP hot enough to cook on? Does the fan sound like a jet engine taking off? Overheating is a silent killer for laptops, slowly cooking the sensitive components inside. The number one cause? Dust. Simple as that. Over the years, your laptop’s cooling fan sucks in dust, lint, and pet hair, which clogs up the heatsink and traps all that hot air.
The first diagnostic step is a simple visual check. Grab a torch and shine it into the exhaust vents on the side or back of the laptop. If you see a solid grey carpet of fluff, you've found your problem. It could also be a failing fan—if you hear grinding noises or the fan isn't spinning at all, it'll need replacing.
Screen glitches are another common headache. Here’s a quick way to troubleshoot what’s going on:
- A Flickering Screen: This could be a few things: an out-of-date graphics driver, a display cable that's worked its way loose inside, or a failing backlight in the screen itself. Always try updating the graphics drivers first; it's the easiest fix.
- A Black Screen (But the Laptop is On): You can hear the fan and see the power lights, but the display is completely black. The trick here is to plug your laptop into an external monitor or your TV. If you get a picture on the second screen, you know the computer's brain is working fine. The fault lies with the laptop's own screen or the cable connecting it.
- The Blue Screen of Death (BSOD): This infamous error is your laptop's way of telling you something has gone seriously wrong with either the hardware or a critical driver. Don't just restart and ignore it. Make a note of the error code on the screen (something like "CRITICAL_PROCESS_DIED"). That code is the clue you'll need to search online for the root cause.
It's also worth knowing you have options for repair. The Australian computer repair industry is a massive market, generating an estimated $3.1 billion in revenue for 2024–25. With 4,042 businesses in the game, you can choose between official service centres or local, independent experts like us at CTF here in Perth for repairs that are out of warranty. You can dig into these industry trends in this Australian market research report.
Getting Your Hands Dirty: Essential DIY Laptop Repairs
So, you’ve pinpointed the problem. Now for the fun part. It’s time to roll up your sleeves and get to the fix. You’d be surprised how many common HP laptop issues are perfectly manageable at home, as long as you have a bit of patience and a clear guide.
This section is all about the repairs that give you the most bang for your buck. We're talking about tangible improvements, from breathing new life into a sluggish system to finally silencing that screaming fan. Forget the dense, jargon-filled technical manuals; this is a straightforward guide built from years of hands-on experience.
Reviving Your Laptop with a Battery Replacement
Is your HP laptop basically a desktop now, permanently chained to its charger? A tired battery that can’t hold a charge is one of the most common hardware failures we see. Thankfully, swapping it out is often a simple fix.
Older HP models with an external, clip-in battery make this job incredibly easy. Just power down, unplug everything, flip it over, and slide the release latches. The old battery pops right out, and the new one clicks securely into place. Easy.
Newer, slimmer HP laptops have an internal battery. This means you'll need to open the bottom case, which is usually held on by a handful of small Phillips or Torx screws. Once you're inside, you’ll see the battery connected to the motherboard with a small cable. Always disconnect this cable first. Then, simply unscrew the old battery, put the new one in its place, and work backwards.
A word of advice from the workshop: When you're opening the case, use a plastic prying tool (often called a spudger) to gently separate the clips after the screws are out. A metal screwdriver will almost certainly leave ugly scratches or even break the plastic housing.
Upgrading Your RAM for a Major Speed Boost
Does your laptop grind to a halt the moment you open a few browser tabs and a program or two? That's a classic sign of not having enough Random Access Memory (RAM). A RAM upgrade is one of the quickest and most cost-effective ways to get a serious performance lift. For a deeper dive, there are many quick fixes for a slow computer that can also help.
Most HP laptops have one or two RAM slots hidden behind a small panel on the bottom, though some newer models require removing the whole back cover. After grounding yourself to prevent static damage, find the RAM modules. They’re held in place by two little metal clips. Just gently push these clips outwards, and the RAM stick will pop up at an angle, ready for you to pull it out.
Installing the new stick is just as simple. Slide it into the slot at that same 30-degree angle, then press it down firmly until both clips snap satisfyingly into place. That click is your confirmation that it's seated correctly.
The Ultimate Upgrade: Swapping Your HDD for an SSD
If your laptop is still running on an old-school mechanical hard drive (HDD), upgrading to a Solid-State Drive (SSD) is the single biggest performance boost you can give it. The difference is staggering. Your boot-up time will drop from minutes to seconds, and programs will feel incredibly responsive.
The physical swap is pretty similar to changing an internal battery. Open the case, find the drive, disconnect it, and pop the new SSD in. The really important part, though, is what you do with your data. You’ve got two main choices:
- Clone Your Drive: This is my usual recommendation. You use cloning software to make a perfect, bit-for-bit copy of your old drive onto the new SSD before you install it. This way, everything—your files, your programs, your Windows installation—is exactly where you left it.
- Start Fresh: Alternatively, you can install the blank SSD and then do a completely fresh installation of Windows. This is a great way to get rid of years of digital clutter, but it means you have to back up all your important files to an external drive first.
This flowchart can help you track down the source of your laptop's problem before you start taking things apart.
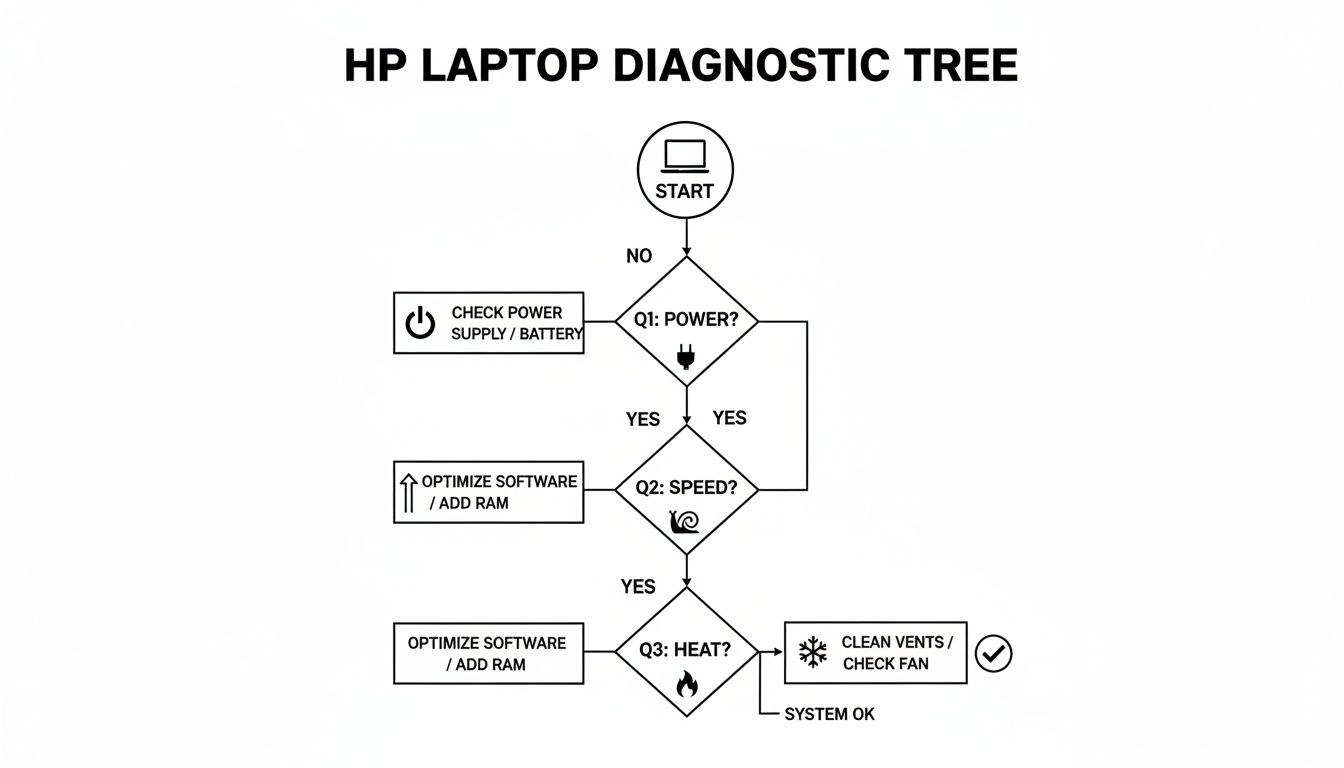
As you can see, a proper diagnosis is the first and most critical step before you pick up a single tool.
Tackling Overheating with a Deep Clean
Is your HP’s fan always roaring like a jet engine? Does the bottom of the laptop get uncomfortably hot to the touch? The culprit is almost always a thick layer of dust clogging the cooling system. Overheating doesn't just slow your machine down; it can cause permanent damage to the components inside.
The fix is a good, old-fashioned internal clean. You’ll need to open up the laptop, find the cooling fan assembly, and carefully unscrew it. I guarantee you’ll find a nasty blanket of dust, hair, and lint completely blocking the heatsink fins. A can of compressed air and a small, soft brush are your best friends here. For an even more detailed walkthrough, our guide on how to clean your computer from dust has you covered.
While you're in there, it’s the perfect time to replace the thermal paste. This is the gunk that sits between your processor (CPU) and the heatsink, helping transfer heat away. Over the years, it dries out and stops working effectively. Just wipe the old, crusty paste away with some isopropyl alcohol and apply a fresh, pea-sized dot. This small step makes a huge difference to your laptop's cooling and overall health.
Tackling the Trickier Repairs Like a Pro
Diving into repairs beyond just swapping out a battery or RAM can feel a bit daunting. I get it. But with a bit of patience and the right know-how, you can absolutely handle some of the more complex jobs that would normally send you straight to a pricey repair shop.
We're going to walk through two of the most common "scary" repairs I see: replacing a shattered screen and rescuing data from a laptop that won't even turn on. They demand more precision than your average upgrade, but the feeling of accomplishment—not to mention the money you'll save—is huge.
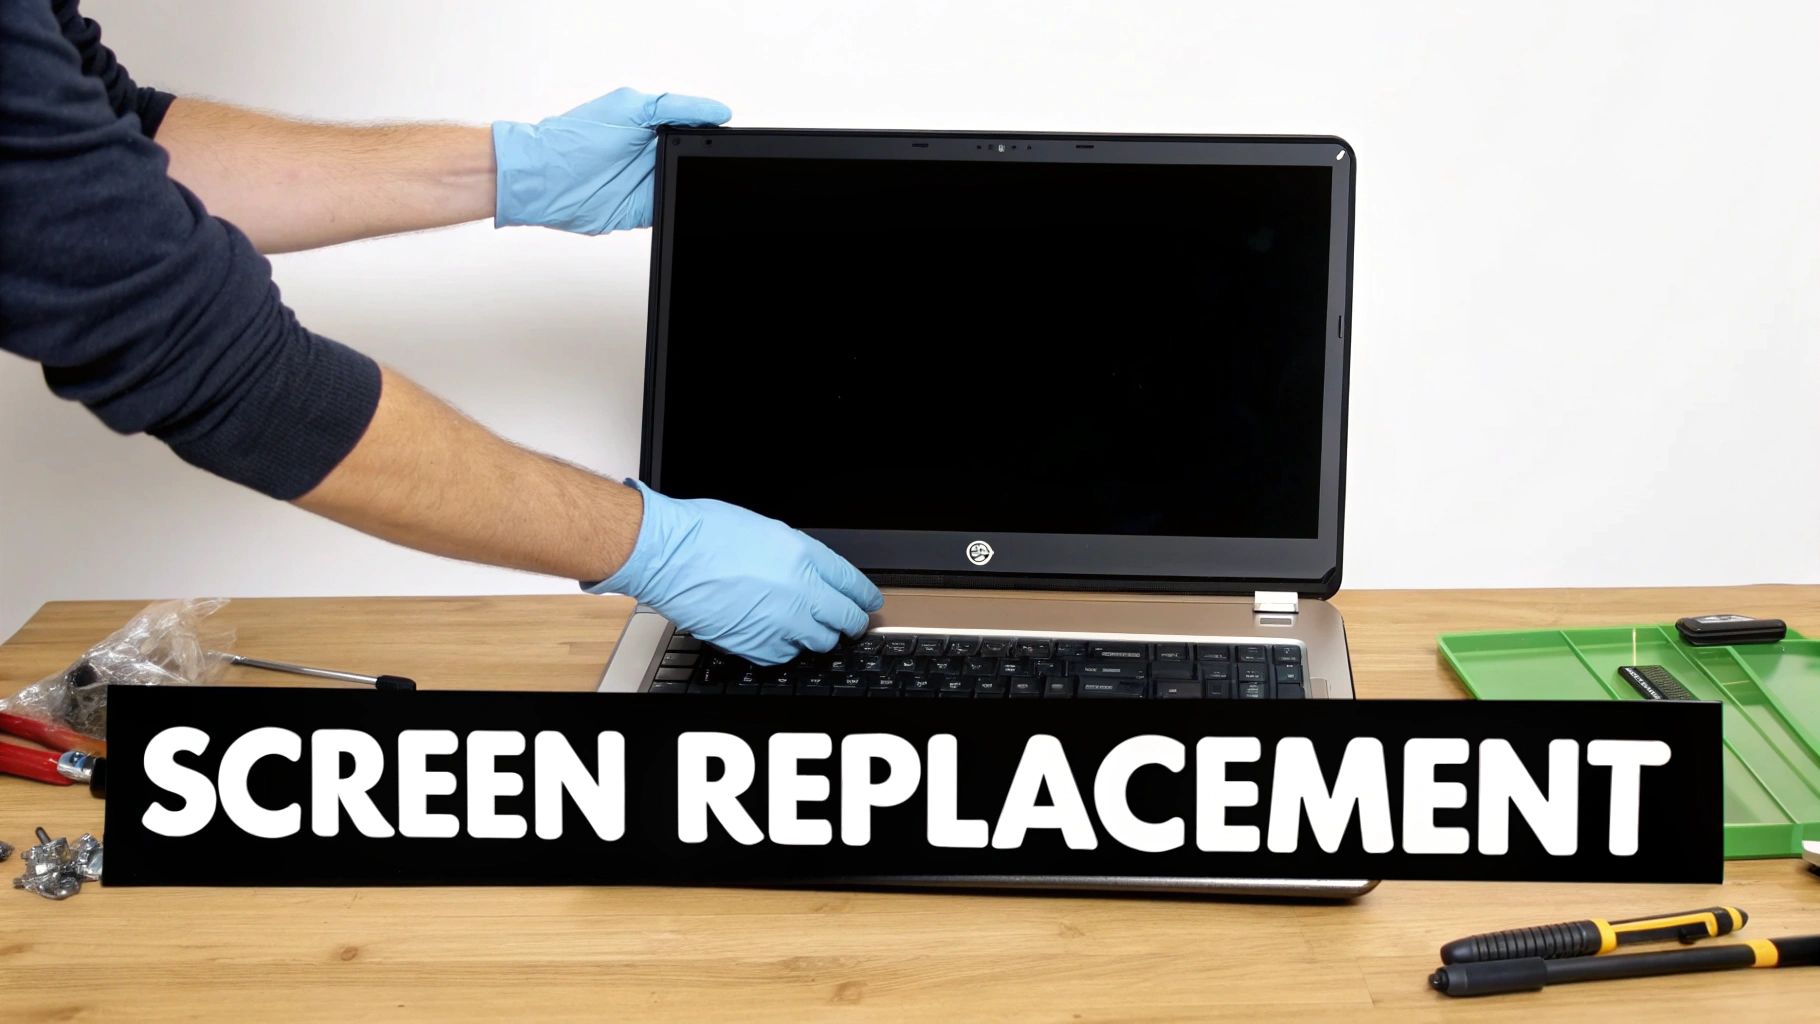
A Clear Guide to HP Laptop Screen Replacement
That spiderweb of cracks across your screen is a gut-wrenching sight, but it doesn't mean your laptop is toast. Replacing the LCD panel is a careful, deliberate process, but it's definitely achievable for a DIY-er. The trick is to be methodical and gentle every step of the way.
First things first: you need the exact replacement screen. This is non-negotiable. Screens are incredibly specific, so grab your HP laptop’s full model number to start the search. To be absolutely sure, you’ll often need to find the part number printed on a sticker on the back of the broken panel itself. This guarantees the size, resolution, and connector type are a perfect match.
Got the new screen? Great, now the real work starts. Disconnect all power, including removing the battery if you can. The screen is framed by a plastic trim piece called the bezel, which is usually just snapped into place. You'll need a plastic prying tool to gently work your way around the edge, releasing the clips without breaking them. Slow and steady wins the race here.
Once the bezel is off, you'll see the LCD panel itself, secured by several tiny screws. Unscrew them and carefully lean the panel down towards the keyboard.
A word of warning: be incredibly careful with the video cable. It's a flat, fragile ribbon connected to the back of the panel. The connector is tiny and often held down with tape. Gently peel back the tape, then flip up the tiny locking bar on the connector itself to release the cable. Don't just pull on it!
Hooking up the new panel is just the reverse. Secure the video cable, screw the new screen into its frame, and gently snap the bezel back on. Power it on to check your work before you start celebrating, but a successful screen swap can easily save you a few hundred dollars.
Getting Your Precious Data Off a Dead Laptop
So, your HP laptop is completely dead, but all your important files are stuck on the hard drive. What now? As long as the storage drive itself hasn't failed, you have an excellent chance of getting every last file back.
The whole process boils down to taking the hard drive or Solid-State Drive (SSD) out of the dead laptop and connecting it to a working computer. Your secret weapon for this is an external drive enclosure. It's a small case you pop the drive into, turning it into a portable USB drive.
Your first move is to extract the drive. The method varies between HP models, but it usually means opening the bottom case of the laptop. Inside, you'll spot either a rectangular 2.5-inch drive (on older laptops) or a small M.2 SSD that looks like a stick of RAM (on newer ones). Carefully disconnect it from the motherboard.
Next, you'll fit that drive into the correct external enclosure. You have to match the type—an older SATA drive needs a SATA enclosure, while a modern NVMe M.2 drive needs an NVMe enclosure.
Once it's securely in the enclosure, just plug it into another computer's USB port. It should pop up like any other external hard drive, giving you full access to drag and drop all your photos, documents, and other crucial files to safety. It's a real lifesaver when you're in a jam and a fundamental skill in the world of fixing an HP laptop.
Knowing When to Call in a Perth Repair Expert
There’s a great feeling that comes from fixing something yourself. While a lot of common HP laptop problems are surprisingly easy to sort out at home, the real skill is knowing when it’s time to put the tools down and call a professional. Pushing your luck can turn a simple fix into an expensive, permanent headache.
This is all about spotting those red flags. Think of it as an honest guide to help you decide when the DIY route has run its course and it’s time to find an expert here in Perth to get your HP laptop sorted.
The Definite DIY Stop Signs
Some symptoms should be an immediate deal-breaker for any home repair. These are the kinds of issues where, without specialised gear and years of experience, the risk of causing more damage is just too high. If you see any of these, it's a clear sign to call for backup.
- Any Sign of Liquid Damage: This is the big one. If you’ve spilled a coffee or water on your laptop, the absolute worst thing you can do is try to turn it on. The liquid can short-circuit the motherboard, frying it instantly. A pro needs to completely disassemble the machine for a deep ultrasonic clean—a process that’s well beyond a standard DIY job.
- Persistent Power Issues: You've tried a new charger and even a brand-new battery, but your HP still won't power on or hold a charge. This usually points to a much deeper problem on the motherboard itself, like a failed power circuit.
- Physical Port Damage: A wobbly charging port, a busted USB port, or a dodgy headphone jack might look like a simple fix. But the repair almost always involves micro-soldering, a delicate skill that requires a microscope and steady hands to do correctly.
Trying to fix a motherboard-level issue without proper training is like performing surgery with a butter knife. The chances of causing irreversible damage are incredibly high, often turning a repairable laptop into a paperweight.
Authorised Service vs Local Perth Experts
Once you decide to get professional help, you’ve got two main options here in Perth. You can go through an official HP-authorised service centre or choose a trusted, independent local shop like us at CTF Mobile Phones & Computer Repairs. Both have their pros and cons, and the best choice really depends on your situation.
For Aussie consumers, HP-authorised repairers are the default path for any warranty claims. If your laptop is still covered, you’ll likely need to go through them to keep that warranty intact. But for anything out-of-warranty, a local expert can often give you a faster and more affordable fix. You can get a feel for the official channels by reading through HP's own support discussions.
Making the Right Choice for Your Repair
So, what are the practical differences? Here's a quick comparison to help you choose.
| Factor | Authorised HP Service Centre | Local Perth Repair Shop (like CTF) |
|---|---|---|
| Warranty | The only choice for in-warranty hardware failures. | Perfect for out-of-warranty repairs; our work is backed by our own guarantee. |
| Turnaround Time | Can take weeks, as devices are often shipped to a central facility. | Often same-day or next-day service for common problems. |
| Cost | Prices are often standardised and can be higher, especially out-of-warranty. | Generally better value, with clear, upfront quotes. |
| Scope of Repair | Tends to replace whole components (e.g., the entire motherboard). | Can do component-level repairs (like fixing one port), which is much cheaper. |
| Personal Service | You'll likely deal with a corporate call centre. | You get to speak directly with the technician fixing your device. |
Ultimately, it’s your call. For a brand-new HP with a clear hardware fault that's still under warranty, the authorised route is a no-brainer. But for an older machine with a cracked screen, a dead battery, or a software nightmare, a local Perth expert from Karrinyup to Marangaroo will give you a quicker, more personal, and often much more affordable service. This is especially true for common but fiddly jobs; understanding the typical laptop screen repair cost shows just how much value a local specialist can offer.
Your Top HP Laptop Repair Questions Answered
When your HP laptop starts acting up, you're bound to have questions. Is it worth fixing? How much will a new screen set me back? Is my personal data at risk? It’s completely normal to want clear answers before you decide what to do next.
I've been in this business for a long time, and I've heard just about every question there is. To help you out, I've put together answers to some of the most common queries we get at the workshop, using straightforward language without the confusing tech-speak.
What's the Typical Cost to Fix an HP Laptop?
This is usually the first thing people ask, and the most honest answer is: it really depends on what’s wrong. A software tune-up is a world away from replacing a cracked touchscreen, and the price will reflect that.
To give you a ballpark idea of what you might be looking at for common jobs in Australia, here are some typical price ranges:
- New Battery: This is a pretty standard fix. You're usually looking at somewhere between $150 and $250, which covers the new battery and the labour to fit it.
- Screen Replacement: The cost here can swing dramatically depending on your HP model. A standard screen is one thing, but a high-resolution touchscreen is another. Expect a bill anywhere from $250 to over $500 for the part and installation.
- SSD Upgrade: Swapping out an old, slow hard drive for a modern 500GB SSD is one of the best upgrades you can make. Including the drive and cloning your data across, this typically lands in the $200 to $350 range.
My biggest piece of advice? Always get a firm quote before agreeing to any work. A good technician will diagnose the fault first and give you a final price, so there are no bill shocks later on.
Is My Personal Data Safe During the Repair?
It's a huge concern, and for good reason. For most hardware repairs—like swapping a battery or fitting a new keyboard—your data is perfectly safe. The technician is just working on the physical components and never needs to access your files or operating system.
The situation changes for software problems, virus removals, or if the laptop needs a full factory reset. In those cases, your data could be at risk.
Pro Tip: If you can still use your laptop, back up everything important before you hand it over. Copy your photos, documents, and other precious files to an external hard drive or a cloud service like Google Drive. If the laptop won't turn on at all, a professional can usually retrieve the data first as a separate job.
How Can I Find the Correct Parts for My HP Model?
Using the wrong part in a repair can cause more headaches than it solves. To get it right, you need to find your laptop’s specific model number or product number. Just flip it over—you’ll almost always find it on a sticker on the bottom case.
With that number in hand, you can search online for compatible components. Be specific. Instead of "HP battery," search for something like "HP Pavilion 15-cs3000 battery". For really critical parts like a screen, the best bet is to find the exact part number on the broken component itself to guarantee a perfect fit. Sticking with genuine or high-quality OEM parts will always give you a better, more reliable fix.
Should I Repair My Old HP or Just Buy a New One?
Ah, the classic "repair vs. replace" dilemma. I always suggest the 50% rule as a starting point. If the repair is going to cost more than half the price of a similar new laptop, it's probably time to start shopping for a replacement.
The age of your machine is another big factor. If your HP has seen more than five years of service, fixing one thing might just be the start of other components failing. But for a two or three-year-old laptop with a clear-cut issue like a dead battery or a broken key, a repair is almost always the smarter, more economical choice.
If you're dealing with a tricky repair or just need some honest advice, the team at CTF Mobile Phones & Computer Repairs is here to help. We provide clear, upfront quotes and reliable service for all HP laptop issues right here in Perth. https://www.ctf.com.au